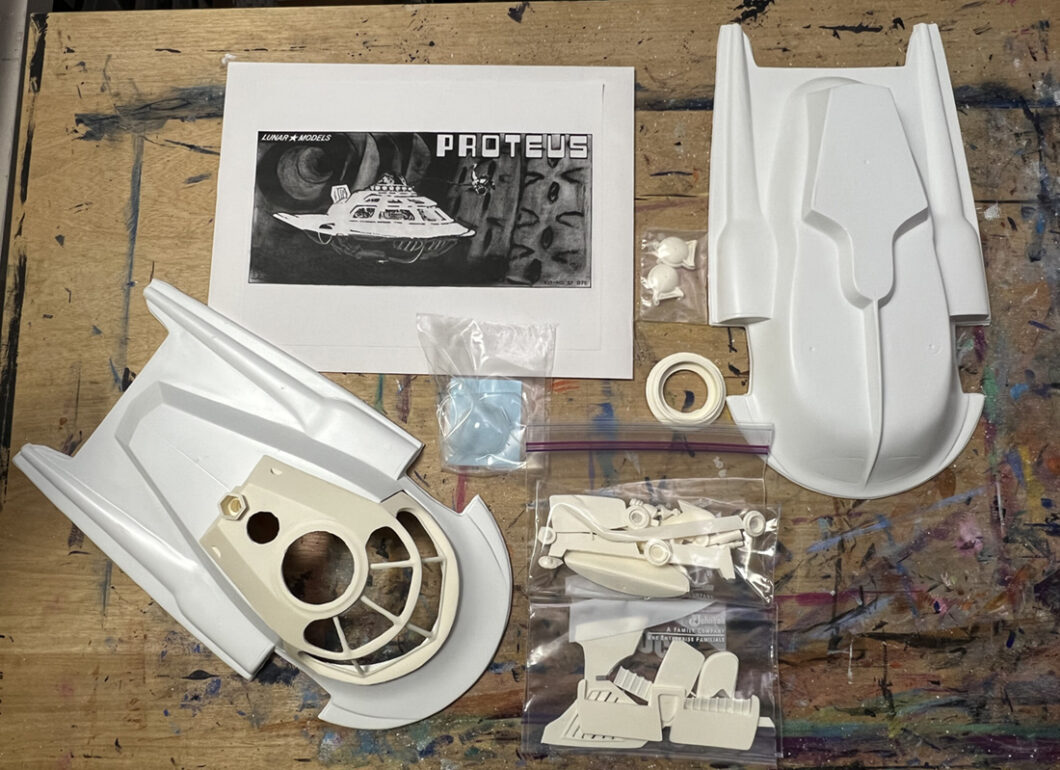
I have accumulated far more spaceship model kits than I have time to build in my lifetime. At least given my current pace of zero-to-one each year. Even if that improves, and I hope to get back to a few of my model projects, I have more than I can build. So I am now adding them to my store, you can find them in my Models and Kits Category.
Many of these are resin garage kits, and require a bit of experience to build and paint. They’re not impossible for beginners either, but be aware that they’re not quite as simple as your standard polystyrene model that you’re familiar with.
A somewhat typical garage kit with resin parts, and vacuum-formed shells
I’ve kept the prices on these fairly low, compared to what I bought them for years ago. But if you see something you like, feel free to snatch it up because once they’re gone they will be hard to find. Most of these were limited-run items and remain rare to this day.
I will be adding more as I go, so check back often!
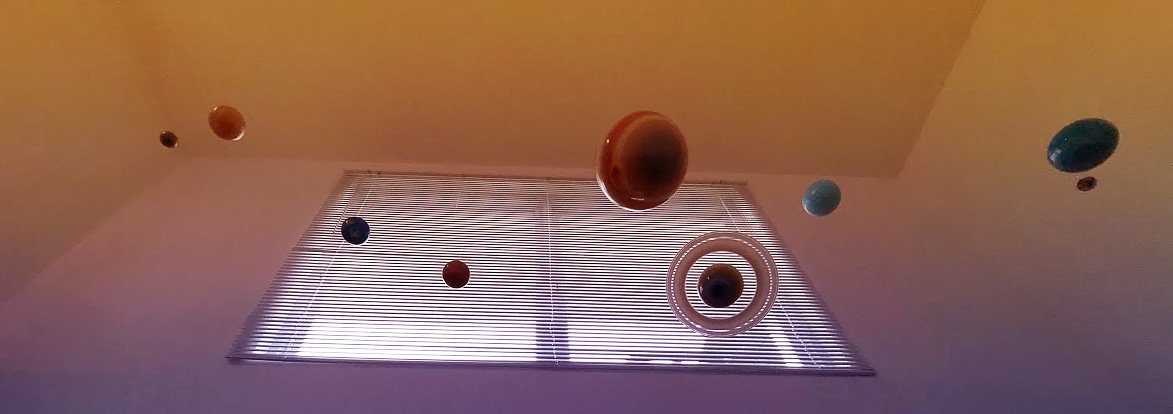
I received these wonderful photos from my client who ordered the scale model planets from me last Fall. They are installed and are awaiting a light fixture to represent the Sun. It’s great to see these in their new home!
Planets in the Foyer
Each of the planets included a small hook so they could be hung from a ceiling display. I’m happy to see that they made the journey to Australia in good shape.
Planets with Temporary LightingView from Below (planets distorted by camera lens)
If you would like a set of planet models, they are still available in my shop! They can be ordered individually or as a set.
I am thrilled to announce my new line of scale model planets, starting with Saturn!
Each Saturn is 11″ in diameter, and the planet’s body is 4.5″. They are made from clear acrylic, and each is hand-painted.
Pre-Order Now!
Both the standard sized Saturn and the smaller ornament are now up for pre-order in my store. These are all made by hand, and can take up to two weeks for delivery in the Continental US.
COMING SOON
The rest of the Solar System planets (including Pluto, regardless of its classification on the day you are reading this), are going to be available soon as well.
Recently, I was approached by someone who saw my painted planets from a few years back. They wanted a new set of planets, in a larger scale, for an installation at their home. I am happy to announce that this project is now underway.
My previous planet set – each 2 1/2″ across
Previously I offered Jupiter, Mars, Earth and its Moon. Each was approximately 2 1/2″ across, and far more round than the actual planets they were depicting.
I’ve always wanted to upscale the planets that I made before, and render them in a more accurate fashion. This is a perfect opportunity to do so, and to perhaps offer these updated planets to others. Especially Saturn, which is by nature a difficult planet to depict in 3D due to its beautiful rings. I’ve had my own ideas on how to make a scale model of Saturn, but they required tools that I did not have easy access to at the time. And frankly with the bakery business that we were running, I didn’t really have the capacity to make any progress on them. But I did manage to knock together a concept model using smaller wood hemispheres and a shape I cut on our Cricut Maker.
Original Prototype – 3.5″ across – wood and chipboard
I’m pretty fond of this size Saturn, but the details would be quite hard to see. And the thickness of the rings is a bit distracting. This design was a test of the rings that are suspended from a single ledge behind the planet (not shown in the photo). It’s effective when viewed from multiple angles.
As luck would have it, a good friend and colleague of mine started collecting some clever machinery that would help make this project a reality. And this week, after some back and forth about the details, we have our first Saturn prototype ready to go:
Full Size Saturn Prototype
The main body of Saturn will be two acrylic hemispheres, 4 1/2″ across. The rings were laser etched and cut by my friend Joe Graziano. We will be working together on these and I am thrilled with the results so far. Overall Saturn will be just over 10″ across with the rings.
Outer Planets (L to R) Jupiter 6″, Saturn 4.5″, Uranus & Neptune 4″6″ Hemispheres for Jupiter – clear acrylic
The largest single planet will of course be Jupiter, at 6″ diameter. Uranus and Neptune will each be 4″. As much as I’d like to scale these with 100% accuracy, I am at the mercy of available hemispheres. At least until I can manufacture my own at a later date. Each of the hemispheres will need to be reduced in height to match the proper profile of the planets.
The inner planets will be mostly at scale with each other, but for the sake of the display, they will each be larger than they should be compared to the outer planets. As of this writing, I am considering bumping up their scale a bit as they may be a bit small when viewed in person.
For my client, these planets will be suspended from the ceiling with a dedicated light fixture. I will be working on stand-alone sets as well, either wall-mounted or tabletop. Either way, I am excited to share this with all of you and I will be updating as things progress.
My second Emerald City Comicon, and a wonderful weekend for my family and my art. This year I had models on display with the Galaxy Hobby SF Model Club, a chance to share my favorite spaceship model kits and space art. My wife and daughters came along, and all had a fantastic time. It was a pleasure having their company at an event that would typically have been mine alone to enjoy.
This year I also brought along my art supplies, to paint a space battle in front of the crowd. It seemed a fitting subject given the weekend, and one I’ve been wanting to tackle. I had most of the painting finished on Saturday, leaving details to finish on Sunday.
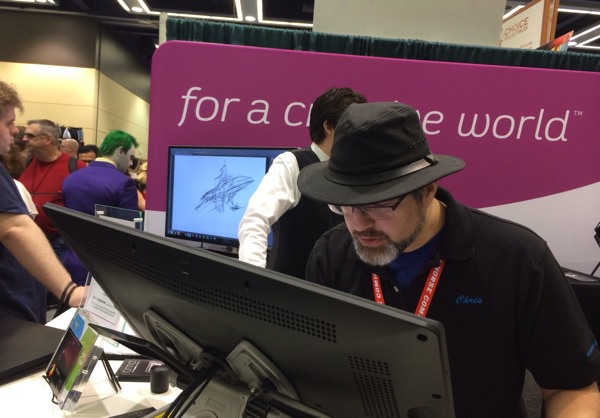
The folks at the Wacom Booth, makers of digital art tablets, invited me to be the guest artist for an hour on Sunday. I’ve wanted to try out a Cintiq for some time, and the chance to perform in front of a crowd was exciting. A number of attendees stopped to watch as I airbrushed my way into another space scene. After a few minutes I felt right at home with the tablet which was running my favorite graphics application, Photoshop.
Next year I will be having my own art table, with my friend and co-artist Justin Edwards from The Drunken Easle.
This week I was featured on the Amazing Stories website in a series that profiles Space Artists, members of the IAAA (International Association of Astronomical Artists). I’m honored and privileged to have been selected for this article alongside artists that I’ve looked up to over the years. If you get a chance, check it out:
Last weekend Emerald City ComiCon hosted their first scale model show, Model Mayhem 2013, here in Seattle. My thanks go out to the folks who run Emerald City ComiCon, and to my fellow model builders from the Galaxy Hobby Science Fiction Model Club for making this wonderful event happen.
The show almost didn’t happen, as the original organizer was unable to carry out the preparations. At the last minute I picked up the task as we already had space dedicated to the show. Initially this was to be a contest for area modelers, but given the remaining time we elected to present our work as a display-only. This format has proven quite successful for the Seattle IPMS Club (International Plastic Modeler’s Society), and allowed us to bring in a large number of our kits.
Lots of visitors
Based on our own off-the-cuff counts, and this is a conservative estimate, we think we had at least 5,000 people come through our room this year. That’s quite a large number for the scale model community, and it was likely far more than this.
We were rather impressed with the number of people who found our little room – far more than I can remember seeing in some of our previous shows. It was the largest Emerald City ComiCon to date, and unlike many of our model-themed shows this ComiCon crowd brought us a lot of people who may not be aware of our hobby. And among them there were those who fondly remember building models when they were young.
Show me the models!
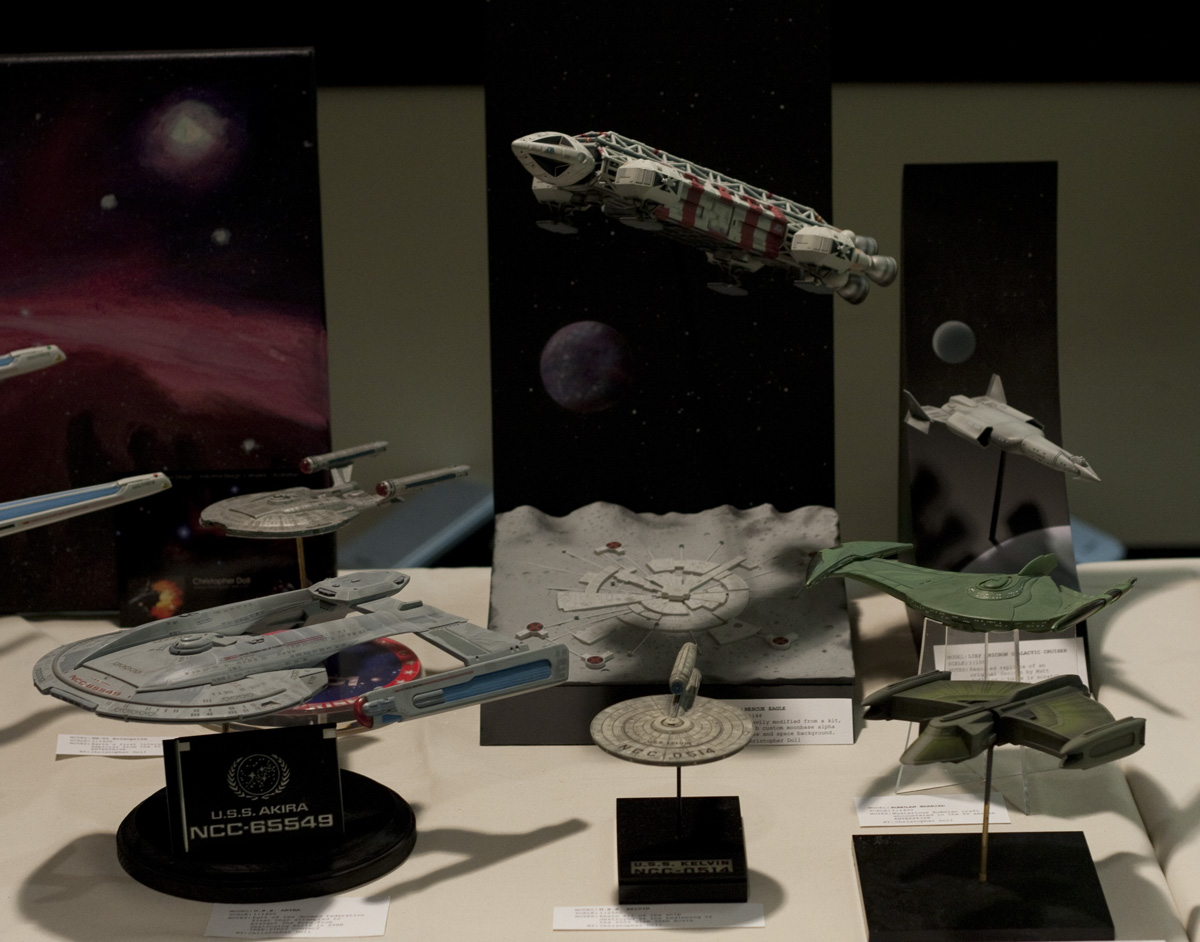
Our display featured a great cross-section of the models we build – spacecraft, vehicles, figures, busts, and even a carnivorous plant. A perfect way to demonstrate a wide range of subjects. John, Preston, and Paul also brought kits to work on during the show, which proved to be a popular demonstration for the crowd.
I mostly build spacecraft from science fiction movies and shows, and I brought every finished kit I had that didn’t need extensive repair. This is one of the unique aspects of a model display show like this, you get to see a lot more of everyone’s models. With a contest, participants usually just focus on their latest projects.
The most common comments I had on my models were:
“Did you sculpt these yourself?” – More a question about the spectacular figures on display, and by far the most asked question of the day. Most of the figure kits were garage kits – sculpted and cast by ambitious artisans, often far more elegant than a mass-market figure. They require clean-up and painting, sometimes a more robust stand that better features the work. And our club has some top-notch, award-winning figure modelers. Very impressive indeed.
“I built a model of the Enterprise as a kid, but I thought it was larger” – The only classic Enterprise models I had on hand were smaller (and much more accurate) kits produced ten years ago by Polar Lights, not the original AMT Enterprise which actually is larger.
“Are these for sale?” A question that caught many of us off-guard a bit. The answer is “Yes, but the price may be higher than most people are willing to pay”
“SPACE:1999! I remember that show!” My Rescue Eagle and Moonbase Alpha model drew a lot more comments than I’d anticipated. Still one of my favorite science fiction TV shows from the 1970’s, it was fun to see how many people also had fond memories. Far more people mentioned it than I’d anticipated.
“AUDREY II!” – My little Audrey II was a crowd-pleaser. And such a simple kit really
Next Year – Model Mayhem 2014!
We’re looking forward to expanding the show next year to include a full-on model contest with prizes, a make-and-take for the kids (very popular in our other shows), and more hands-on demonstrations.
For those of you who visited Model Mayhem 2013, I’d like to thank you on behalf of the Galaxy Hobby Model Club, IPMS Seattle, and of course the folks who run Emerald City ComiCon. We had a great time showing off our hobby and hope that our excitement was shared.
If you are interested in learning more about the Galaxy Hobby Science Fiction Model Club, you’re welcome to attend our regular meetings which are open to the public. We meet on the second Thursday of every month at Galaxy Hobby Shop in Lynnwood (check the link for location and details).
Did you visit Model Mayhem 2013?
If you dropped by to see Model Mayhem 2013, thank you! Tell us what you liked and didn’t like!
“The Bunker” was my favorite suggestion as a name for my home studio, thanks to my pal “Crazy Joe” Nedjberger. It won out over some equally good suggestions like “The Dollhouse”, “Dollshop”, “BlackBirdCD’s Cave”, and so on.
The room itself is the fourth bedroom of our split-level house in Bothell, Washington, and the largest bedroom in the house. It was partitioned by one of the previous owners in the originally unfinished downstairs. For years it’s been the home office, craft area, and model-building space all crammed into one. Having such a dedicated room is one of the luxuries our modest house offers, but as is the nature of such a space it was rarely comfortable to walk into, much less work-friendly than it needed to be for my new career as a Freelance UX Designer and artist. Let’s face it, the hobby room is the last to be sorted out and organized unless it’s used on a regular basis.
Gone were the piles of half-started, in-progress spaceship models, paperwork and tangles of cables from long-forgotten computer hardware. That’s all out in the adjoining family room now, or in the refuse pile. That which is to be retained has been brought back in carefully, put in its appropriate place, as I re-configured the desks to be more efficient for my work.
Digital on one side:
And my workbench for painting and model building on the other:
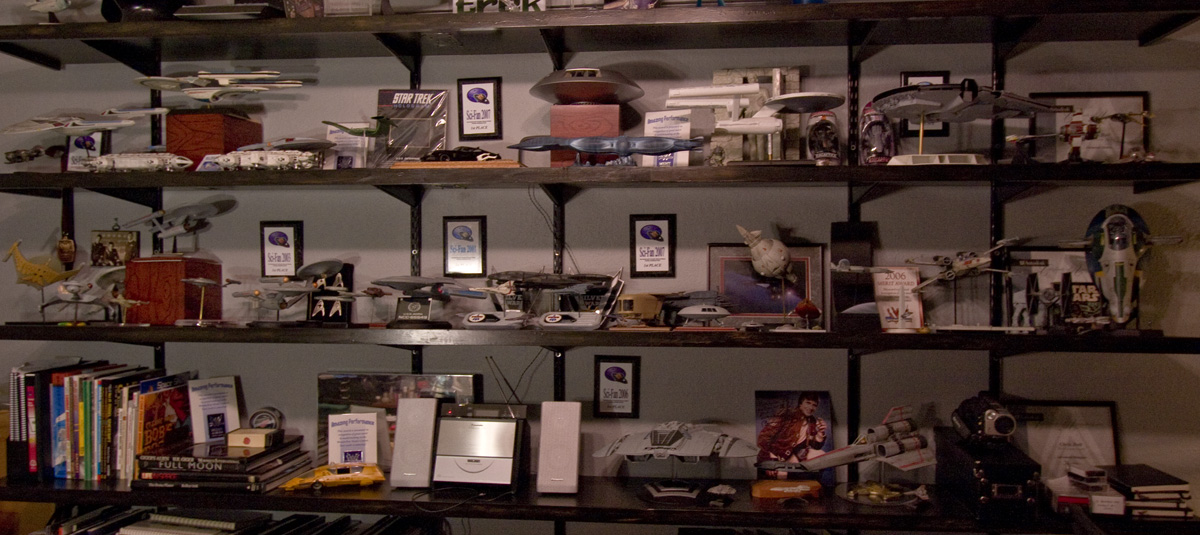
The feature image of this post shows the shelves that I use to display finished models, awards, and books that I turn to regularly for the work that goes on here. It still needs a little love, but that’s for a later date. The photos only show 2/3 of the overall space, the rest is dedicated to my wife’s craft station, and a large closet. Four people can be seated at the central island where the easel is sitting. It’s a good sized room.
Originally planned as a weekend project, the cleanup has extended into nearly ten days of careful re-organization using the existing furnishings. It will never look this clean again, but I’ve already noticed how the change has improved my own efficiency, and my own demeanor when I’m in the space.
If there’s any lesson to be gained from this exercise, it’s gotta be one of the most basic – “clean your room”.
This article was based on material I presented at Wonderfest 2003 in the “Advanced Scratchbuilding Course”, and was previously hosted on one of my older websites. The article has been slightly updated, but remains intact.
What is Scratchbuilding?
Scratchbuilding isn’t a specific art or activity, but more of an approach. It is an approach that encompasses skills that can be learned from many other areas. This is my personal approach to creating a model like Moya. I would strongly encourage you to evaluate the approach and skills you read here with others you encounter along the way, as every project is different and may require alternate methods. Consider this a good starting point.
Most modelers build from kits, which have several advantages. The parts are pre-made, engineered to fit, and you have an explicit assembly order carefully illustrated by printed instructions. The shortcomings can include accuracy, as necessary short-cuts taken by manufacturers can sometimes lead to soft detail or sizing issues. The instant you begin complaining about the accuracy or quality of a kit, you’re ready for scratchbuilding! In my case, no commercial model kit was available for Farscape’s Moya, and there haven’t been any made since (yet). I was fond of the show, and enjoyed the design of this living spaceship. I had no choice but to consider sculpting one myself.
Kit bashing is often a first step for scratch-builders. Taking parts from existing kits to make new ones is rewarding, but you’re still relegated to using someone else’s parts � also your scale is pre-determined by the parts. Clearly there would be no easy option for me to kit-bash Moya.
A common myth is that you have to be a master modeler to scratch-build. That is not true at all � everyone has the base skills needed to scratch-build. All that is required is a desire and a plan. If you keep the complexity within reach of your skills, maybe push them just a bit here and there, and you can do it too.
You have no instructions!
There are no parts to work with, you make them all yourself
Accuracy and quality are up to you, your skill level, and your comfort level
You aren’t forced to use found parts that are out of scale. Kit bashing forces you to use parts designed by someone else
How do I get started?
So how does one get started? First you need to select a subject – seriously. Making basic decisions is the core to any scratchbuilding project and this is the first. More importantly you need to ask, and answer, as many questions as you can about your model. Will it be hollow, what scale is it, how big will it be, are there any moving parts, how many parts etc.
If you’re re-creating an existing design then you need to secure as many source images as you can. Look for clear shots that define the form and, if possible, find them in orthogonal views (top, front, left, right, etc.), because you will be drafting them later. The best views are straight-on shots – use dynamic views more for color and surface references.
Now you need to break out your pens and draft model scale views of your model. By model scale, I mean drawings that are sized to your final model. Many questions will be answered by these drawings. They are your instructions and will become reference markers later on.
Choose a subject
Ask, and answer questions
What scale is it?
How big will it be?
Will it be hollow?
What will it are made from?
How many parts? You need to decide based on your project
Collect source images, if possible
Draft plans � draw your own instructions
Orthogonal views – top, side, front, bottom
Make Templates from your drafting
My Project – Farscape’s Moya
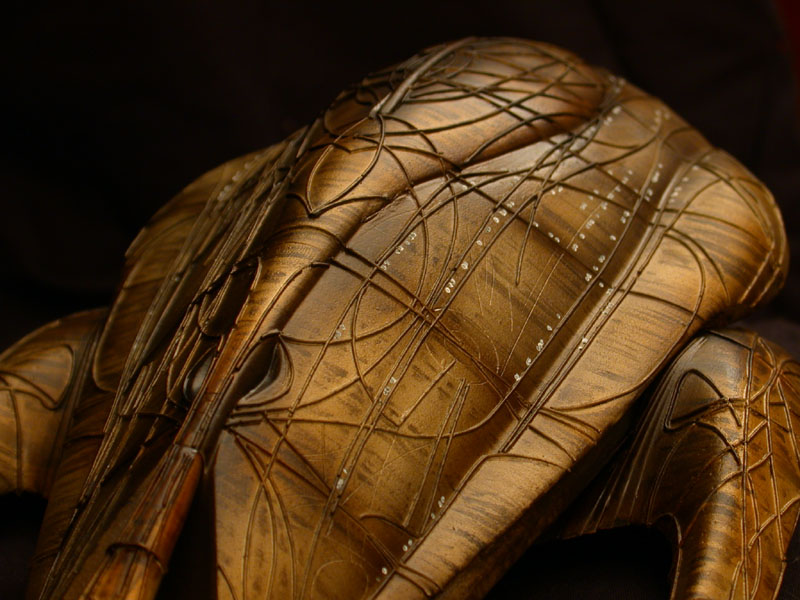
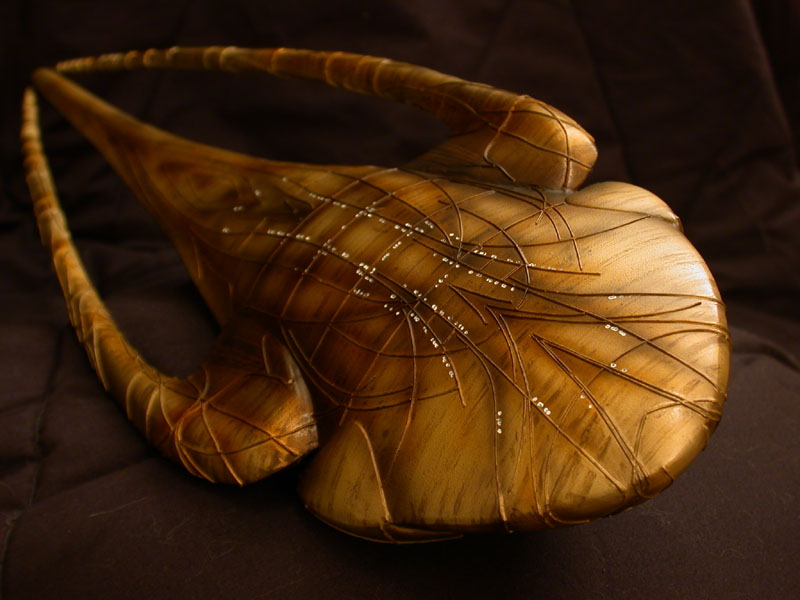
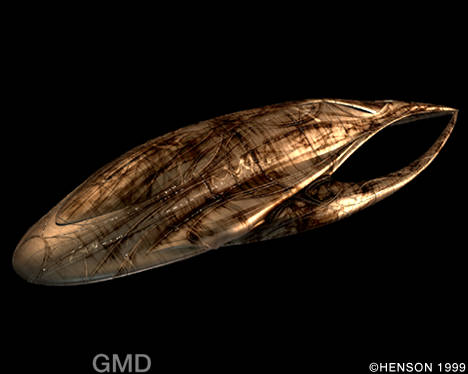
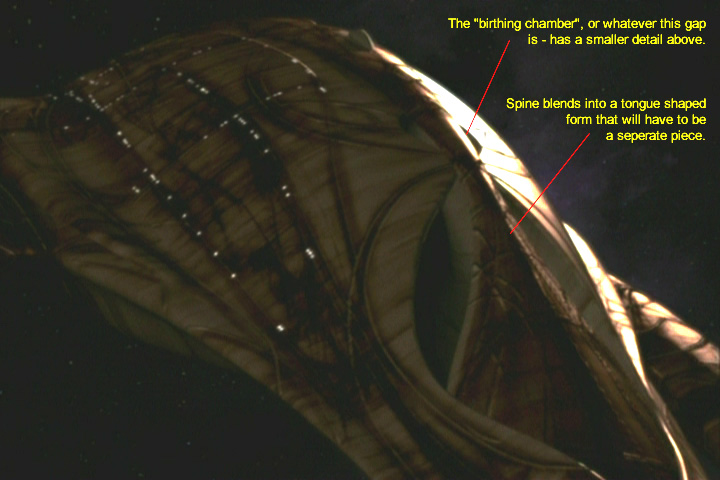
Today’s example will be my scratchbuilding project � Moya, the living spacecraft from the TV show Farscape. She is referred to as a Leviathan in the show, a living bio-mechanical spaceship. As you can see there isn’t a straight line on her. Worse, she’s covered in contour lines that would be a bear to emulate.
I knew there was never going to be a model kit of this ship, and nobody in the garage market appeared to want to sculpt one. It was after my first trip to Wonderfest that I decided I would take a stab at making my own Moya.
For the better part of a year I answered my own series of questions. I knew that this was going to be a difficult project, full of new techniques, so I wanted a larger size in the end � 16 inches. It needed to be hollow so that I could light it from the inside. This meant I would have to cast the parts.
We will see, in the following slides, how the master was created. The master or pattern, in modeling terms, is the primary form used for casting later on.
Gather References
Reference material was virtually non-existent. I found much of it online, took screen-captures with my home PC, and found some great shots in books and magazines. The special effects company wasn’t keen on sharing their images with me, unfortunately, although I did try.
Once you get a lot of material, print it out so you can reference it on your workbench later. The bigger the better, but often I would combine detail shots onto one page. I ended up having enough pictures to fill a small book.
Drafting
Once I felt I had enough decisions made, and enough reference material, I began drafting the ship in AutoCAD. This helped me generate the section lines needed for the buildup. If you don’t have access to CAD software, or do not know how to use such tools, grab some drafting supplies and draw it out the old fashioned way. It’s important to have reference drawings at the exact scale of your final model.
Once you have your plans, and your reference material, you’re pretty much ready to go.
You will be using all of your modeling skills, usually. In my case I had to learn skills along the way, but that’s okay. Plan extra time in your schedule (if you have one) so you can compensate for any time slippage.
Start with whatever tools you have, and add more as you need them. I’m not going to call out special tools, as they are typically tied to specific techniques. Learning new techniques is a part of the modeling hobby, so don’t be afraid to research and try as you go.
Lofting
I built Moya’s main body using a technique known as lofting. Lofting is a nautical term used to describe the construction of a boat hull using consecutive ribs laid along a keel. This is a fairly common practice for complex, organic shapes. I will walk through this process.
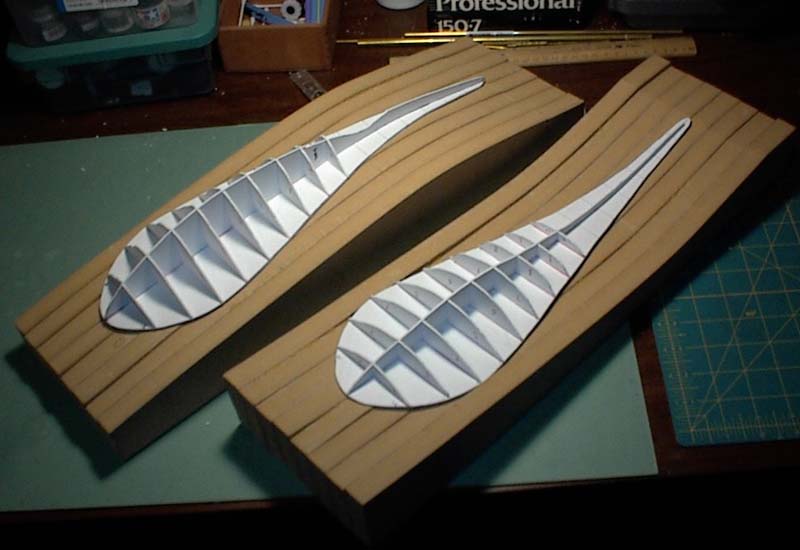
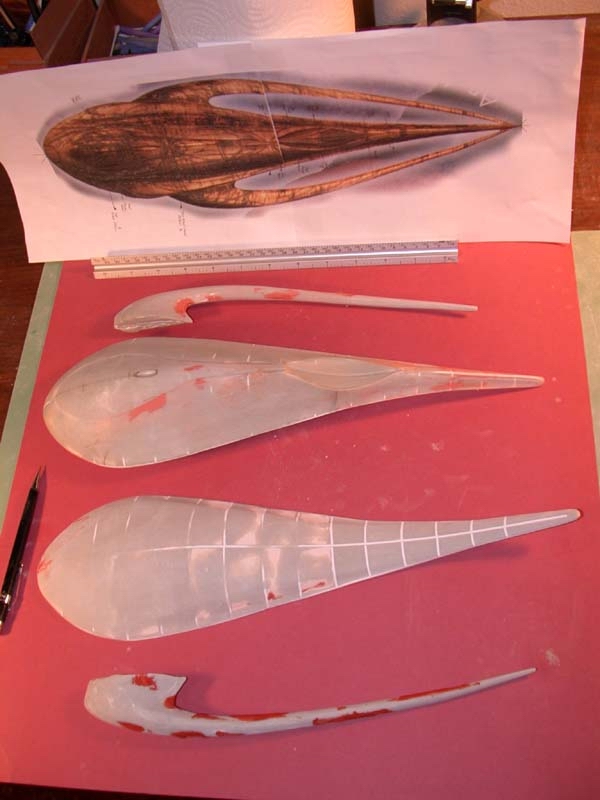
Since I had the side and top profiles, and a series of sections, transferred to styrene, I could begin assembling the body.
There was no flat surface I could work from so the first thing I needed to build was. . .
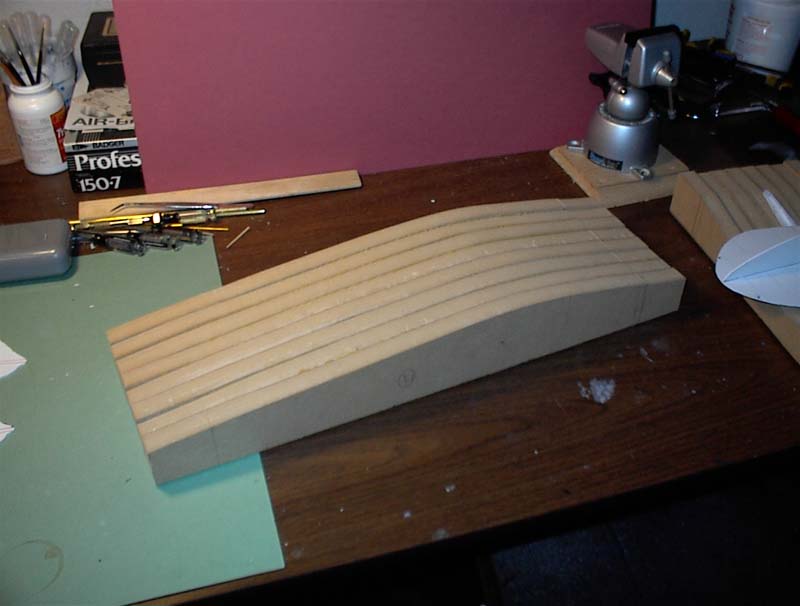
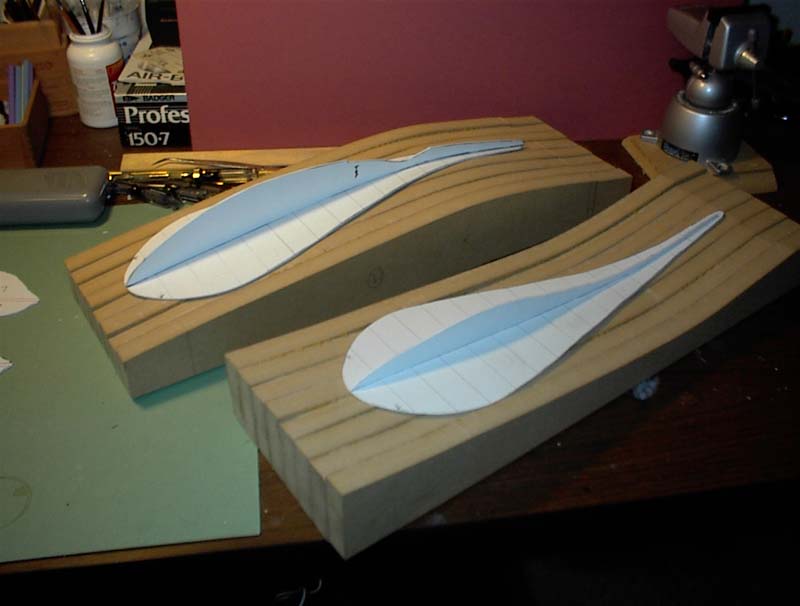
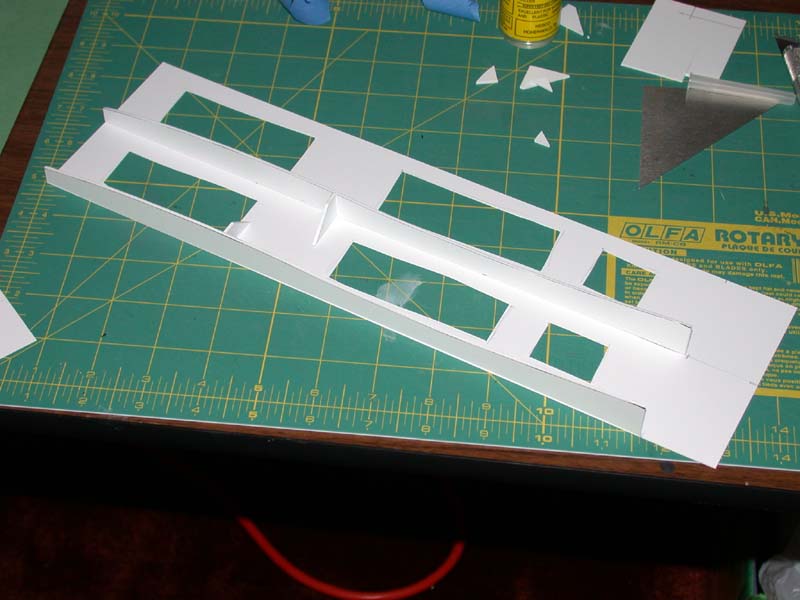
The base or keel. Technically this is referred to as the �datum� – a geometric form or line that is used as a reference for construction or definition. The top shape of this keel was derived from the part line along the side of Moya. I built one base for the top, and one for the bottom. When put together, the splines fit perfectly. It was on these bases that I mounted the profiles and sections.
It was critical that the spline on the base was dead-on accurate. Not only would it be a base to work from, but it would also define the part line of my final pieces!
Once I was happy with the base splines, I mounted the profile assembly to the surface. The side profiles were then glued to the base profiles using TENEX, a powerful liquid styrene cemet. Today, since TENEX isn’t readily available, I’d recommend Ambroid Pro-Weld or something similar.
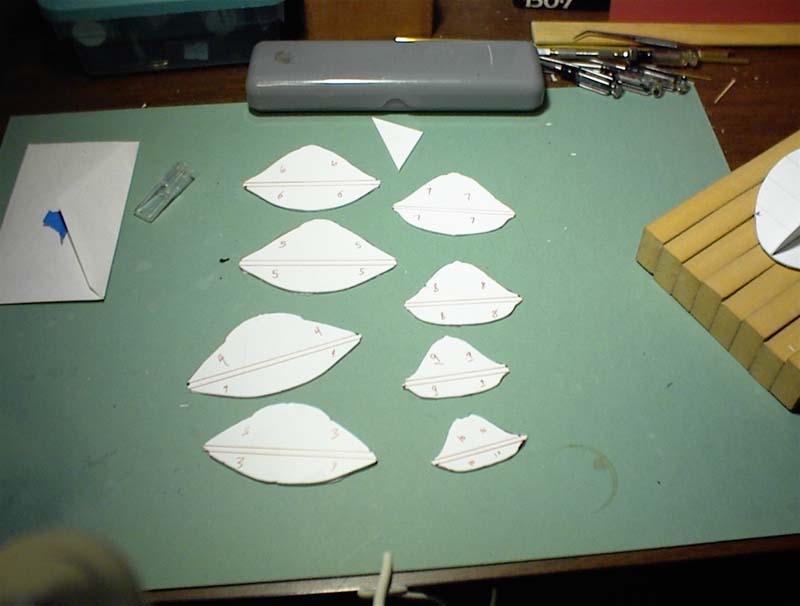
Sections were cut from my drawings and glued onto the profile assemblies. Each section had a 1� gap between them, and was set at 90� to the flat base.
Once these were placed, the forms were checked for symmetry. If the left and right sides do not match, now is the time to make adjustments. Every error at this point will be compounded later, so it’s good to make sure things match up the way you’d like them to.
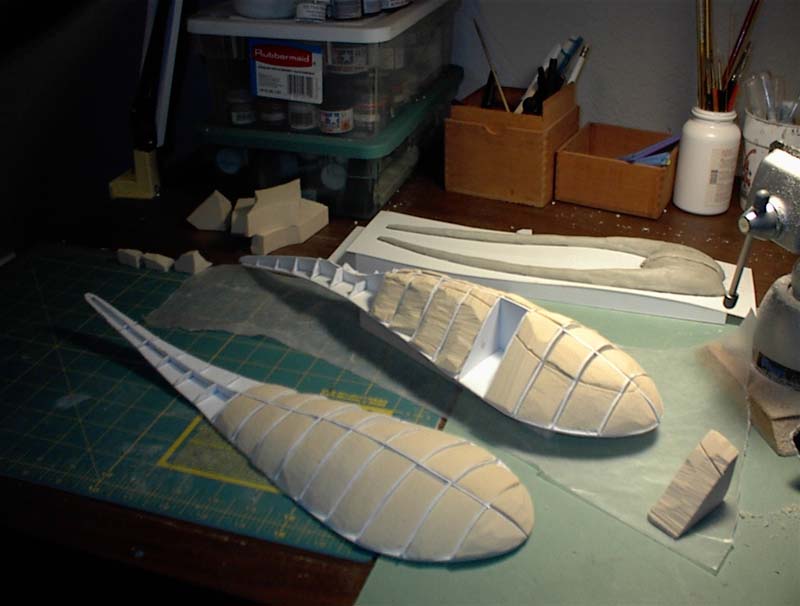
After all the sections were laid in, I began cutting section fillers of foam to go on the inside gaps. I could’ve simply loaded this with expanding foam, or even magic-sculpt, but I had the foam and it was very quick.
As you can see, once you begin filling the gaps, the shape really begins to be noticeable. I even began delineating detail lines.
Magic Sculpt was mixed up and used to cover the surface in thin sheets. I worked slowly, doing a few inches at a time. The Magic Sculpt was rolled thin using a wooden dowel.
I knew that later on I would have to scribe channels on the surface for the detail lines. Just gluing wire on the surface wouldn’t be sufficient � wire is round and a channel would help set the wire into the surface. This would help in molding and casting copies as well. Magic Sculpt has an excellent surface property that allows for easy scribing and manipulation.
Arm construction
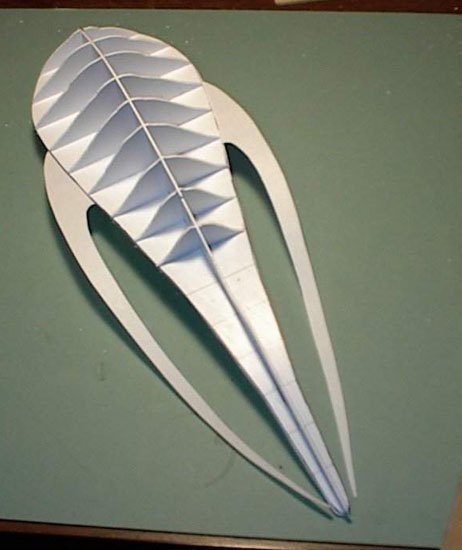
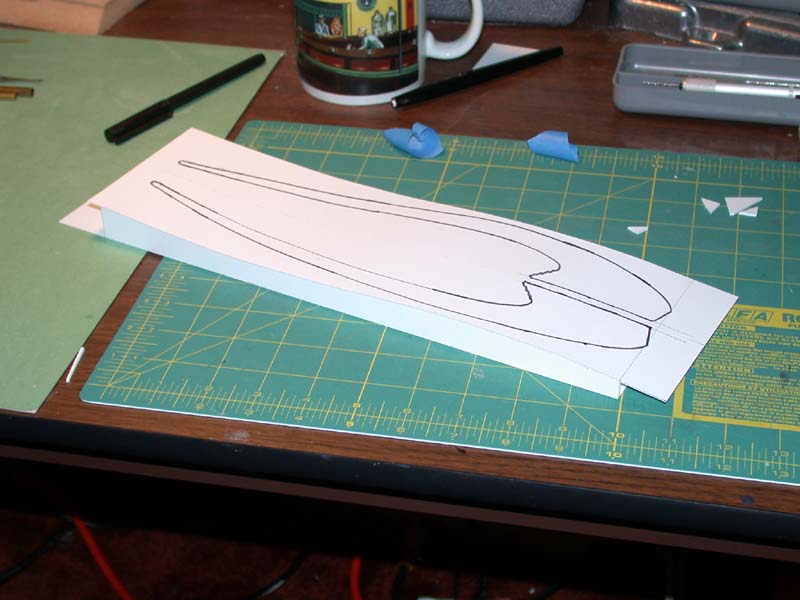
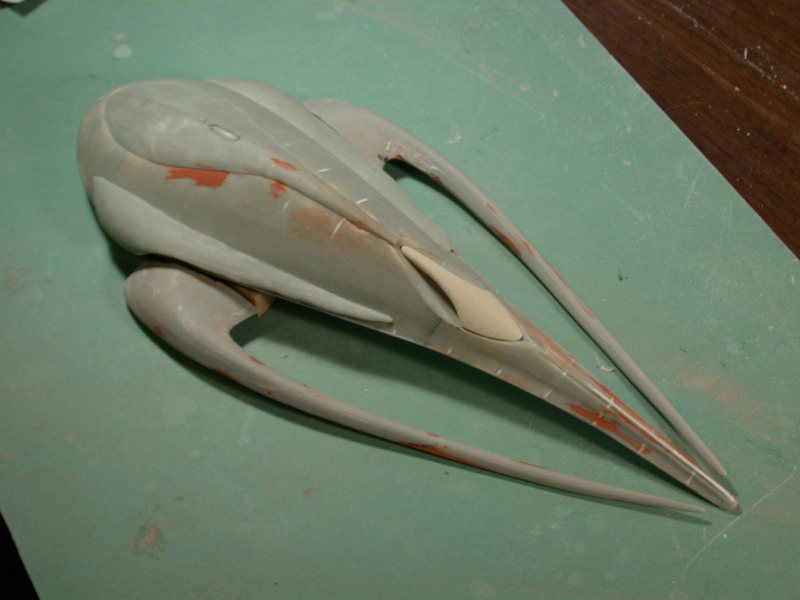
The arms were a different problem. While I still had a common part line through the middle, they were small enough to be built as a single piece. However they were actually more complex forms than the main body. They were inherently asymmetrical, but needed to be symmetrical with each other!
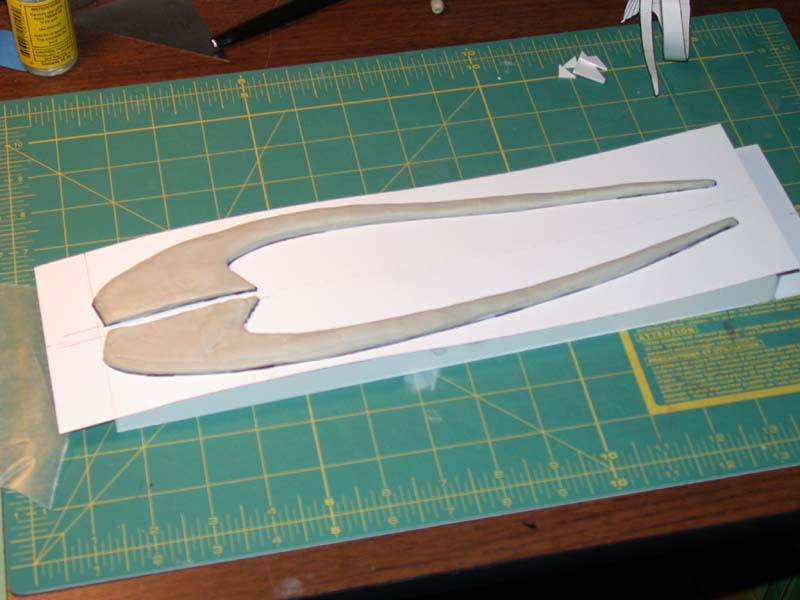
I decided to break the problem down by identifying the side view part line as a baseline to work from. I had the top views plotted, symmetrically, in my drafting, so I transferred those to a flat sheet of styrene. Once glued to the base, I now had a properly contoured surface to work with.
Magic sculpt was added along the lines. I didn’t care much about thickness, as I knew I would be sanding these down later. The arms are really thin.
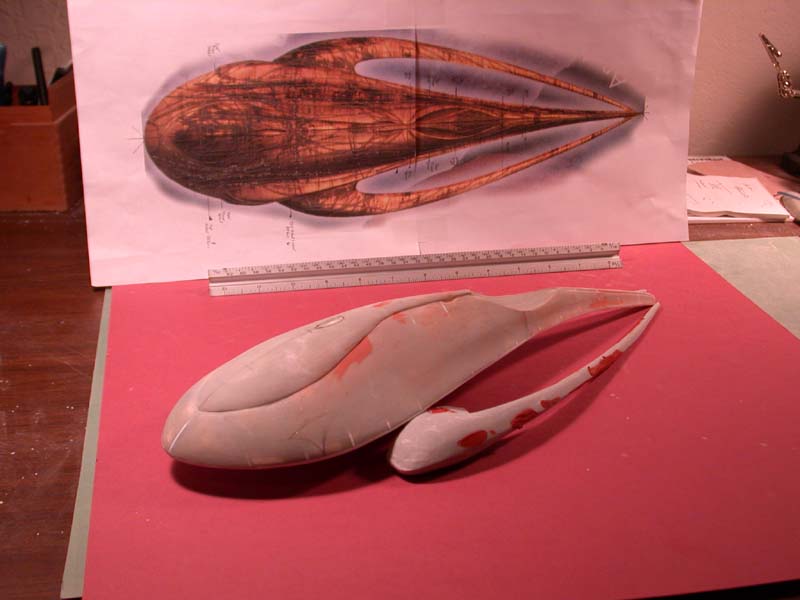
Once I had the arms completed, and the main body, I began working the forms by sanding. You can see that I got back down to the foam on the main bodies. Those areas were simply filled in with spot putty.
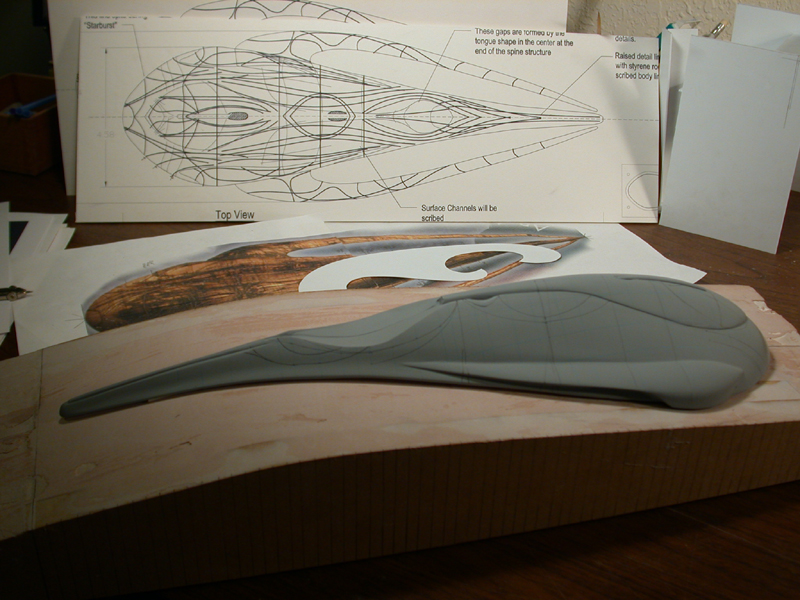
At each step I checked the forms using my templates. Symmetry was critical and I battled accuracy issues the best I could with the images and drafted plans.
As you can see on the right, I managed to secure a top view of Moya. I printed it out at my model scale and was able to check my work along the way, with a high degree of accuracy.
The detail piece in the rear was quickly carved out of foam, and covered in Magic Sculpt.
After all of the gaps and surface defects were filled, it was time to prepare the surface for detailing. Moya had a lot of raised lines (a lot!) that needed to be meticulously plotted. I shot primer over the surface and gave it a quick, light sanding with 400-600 grit sandpaper. I was now ready to proceed.
Detailing
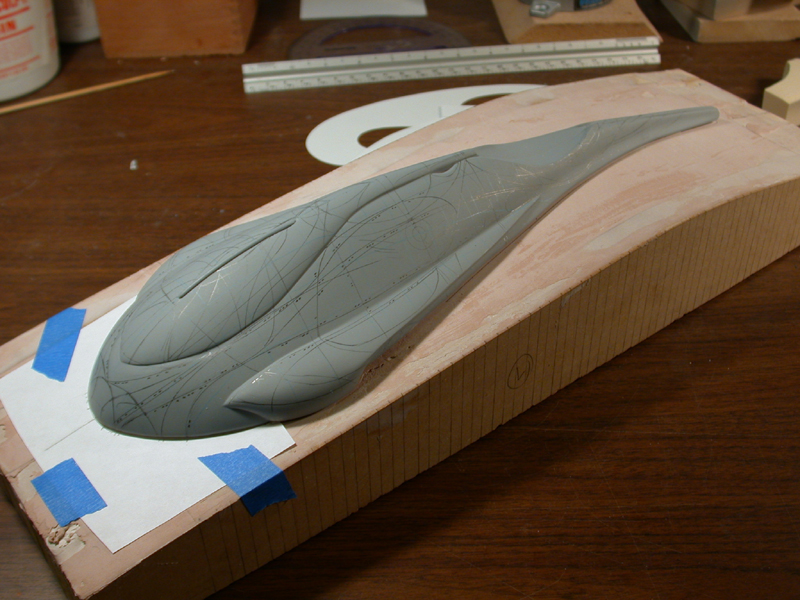
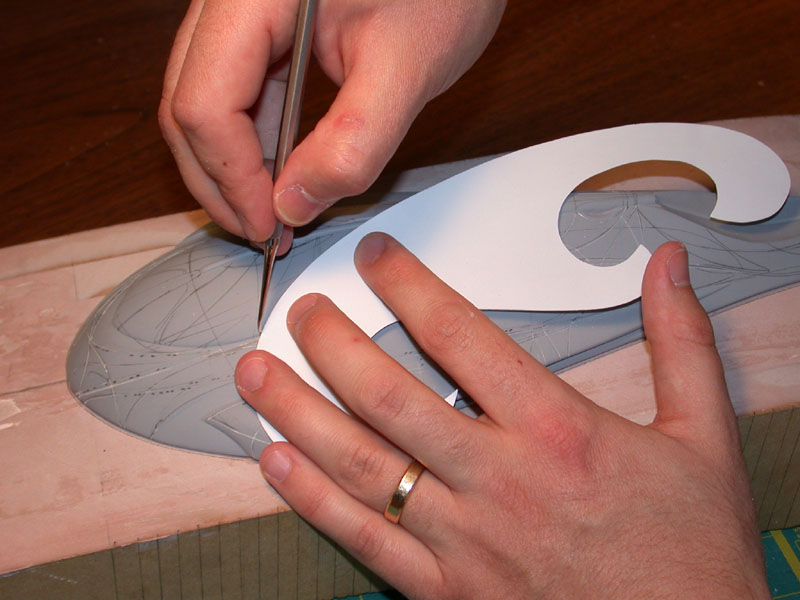
After about three weeks of work, I finally had the forms to where I wanted them � exactly. Now began the task of marking the surface lines. I felt like I was creating an Aboriginal tattoo. But with my references, printed to scale, and a curve template that I cut from styrene, I was able to plot the lines with a pencil.
Amazingly, side-by-side symmetry was very, very close.
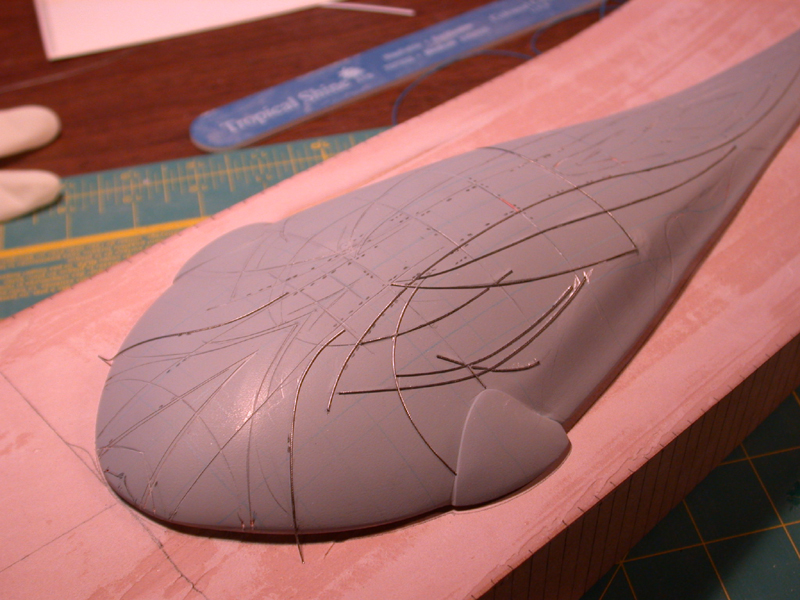
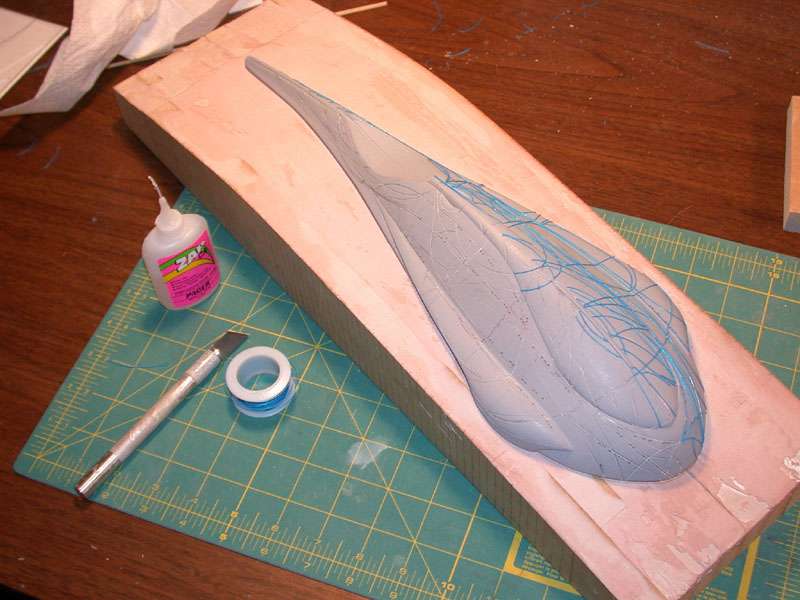
Once the lines were completed, I took a scribing tool and created channels all along the surface for the wire. These channels allowed the wire to settle into the form and gave the CA (liquid super glue) more surface area to bond with. Ends were cut appropriately.
The first wire I used was far too stiff, and was miserable to cut so I switched to the blue Radio Shack wrapping wire you see above.
Shooting your masters with primer really brings the forms together and allows you to see any flaws that may have built up along the way. For Moya, I used primer after I first got the forms built, and then after I got all the wire laid down. My favorite primer is Duplicolor Sandable primer, which can be found in most auto parts stores. I used gray primer for this project, but I typically use black primer for final models.
I was able to make final corrections to the lines and add a few other surface details. At this stage you could add all sorts of greeblies, but care should be taken to ensure that they’re in scale with your subject � don’t just slap items on!
Molding and Casting
I won’t go into molding and casting too heavily � there are other resources you should reference for more information. But it was a critical issue with this project.
This was a new area for me and I relied heavily on a good friend of mine who worked with the processes and materials regularly, and had created a kit of his own. Added to that the classes I attended at Wonderfest and people I knew online, I was able to tackle this technique with only a few setbacks.
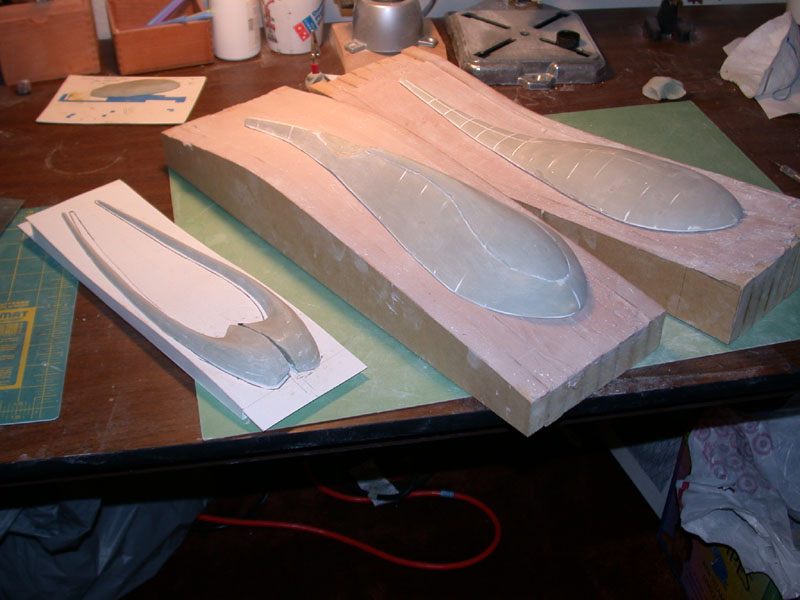
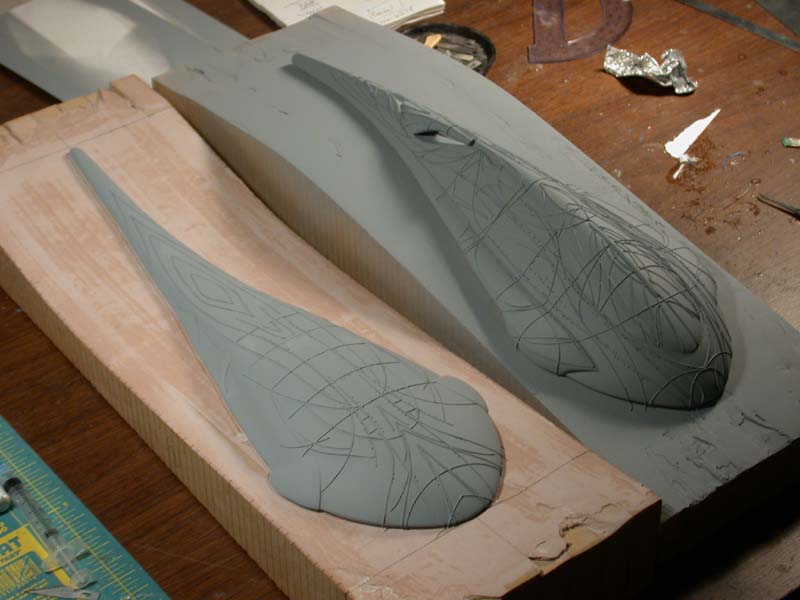
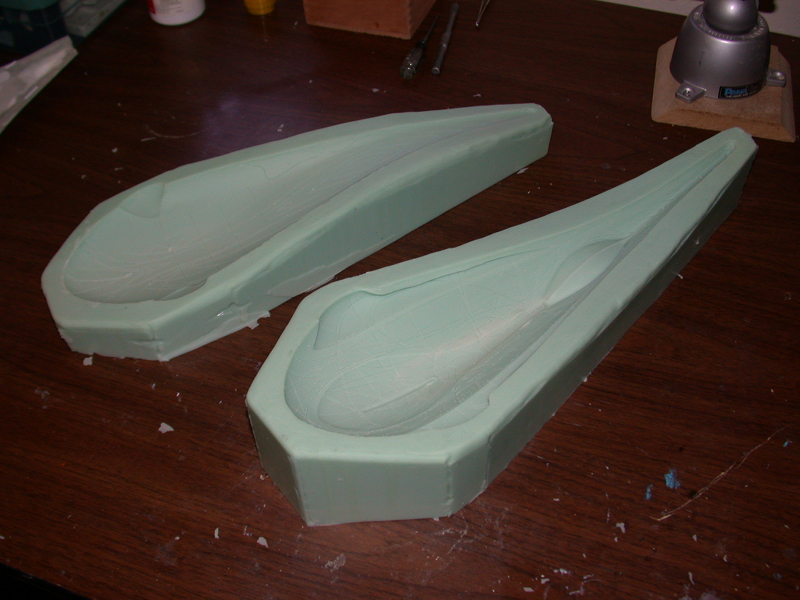
Above you can see the positive molds of my masters. The part lines were now a part of the mold.For part thickness, But I still had one more step to do. These molds only captured the surface detail of my original forms. Had I proceeded to pour the other side of the mold, my parts would have no thickness! The best way I found to define the part thickness was to cover the open mold, with all its detail, in a thin layer of some material, and THEN pour the back half of the mold. Basically, you’re making a sandwich of silicone RTV mold (with detail) on the bottom, a 1/8″ to 1/4″ thick layer of some material, then the top cap of the mold (also in silicone RTV).
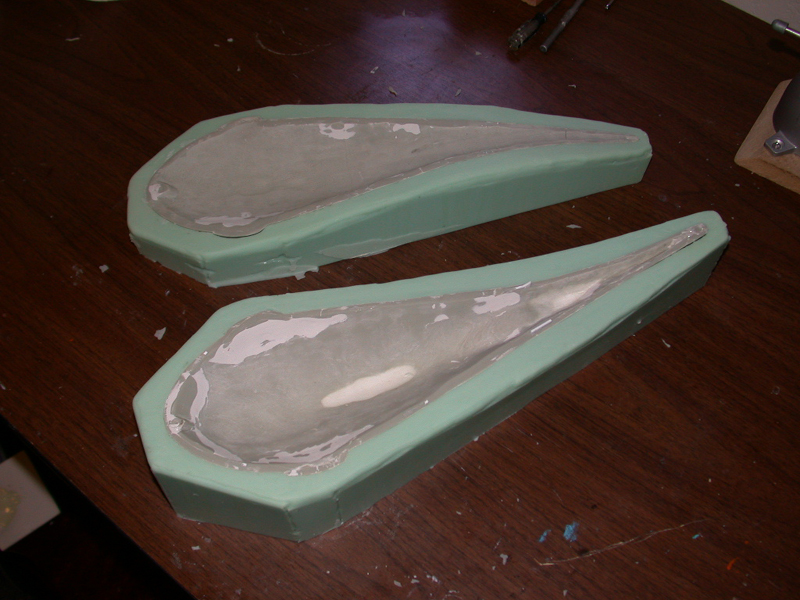
I filled the cavities with a thin layer of magic sculpt. I tried to keep them as thin as possible, and cut to the surface of the mold.
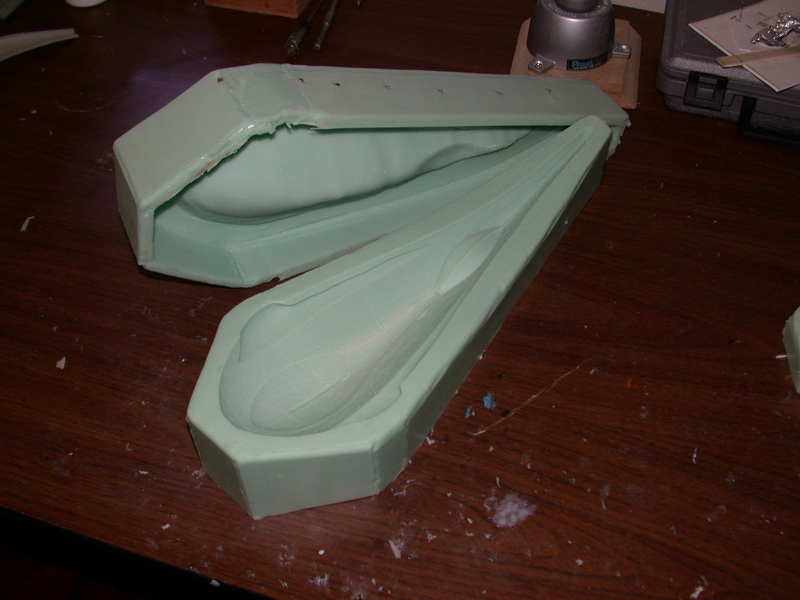
I then poured the top of the mold � with pour spouts and vents place appropriately. Brass rods were used inside the top to give it some support. With all the weight of the cap there was a chance it would sag.
This, by the way, is an unconventional mold process that used a lot of mold rubber. But the pouring the castings was extremely easy. Because the molds were so heavy, they held themselves together by gravity. I never had to clamp the molds to prevent the casting resin from running out. Once the parts were cast it became a simple matter of assembly and painting.
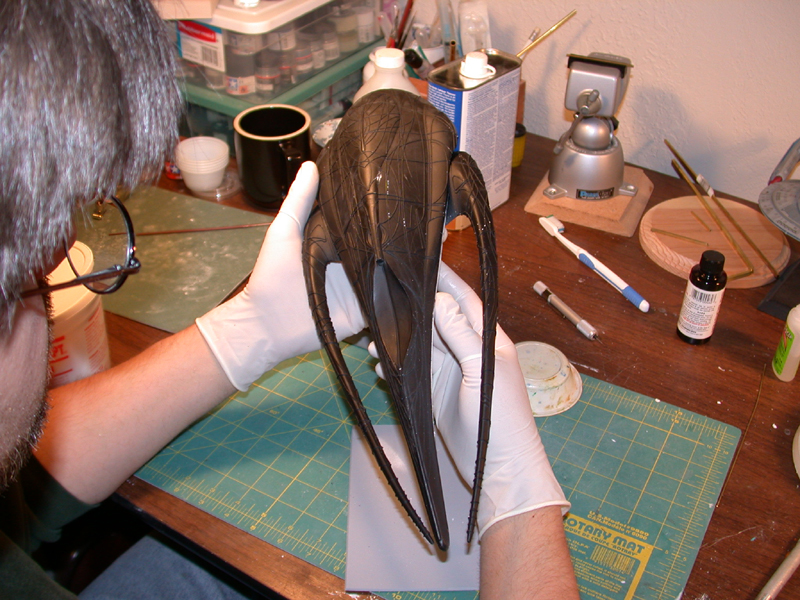
And here’s a shot of a casting that I’d cleaned up, assembled, and covered in my favorite black primer. Building the kit that I created was one of the most surreal experiences I can remember. Have fun!
Moya Today
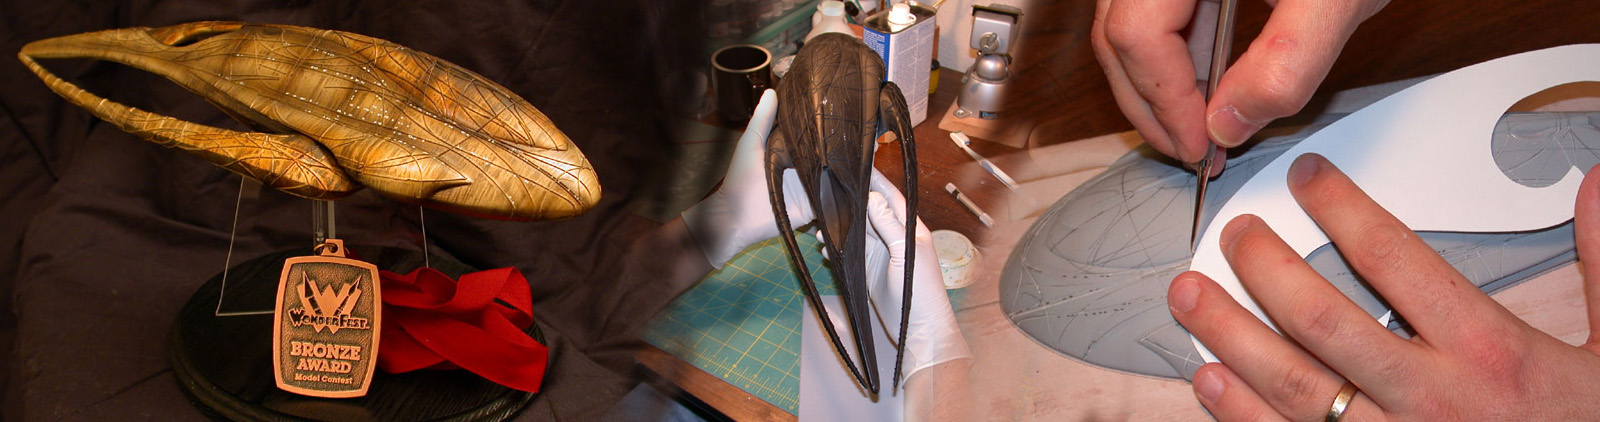
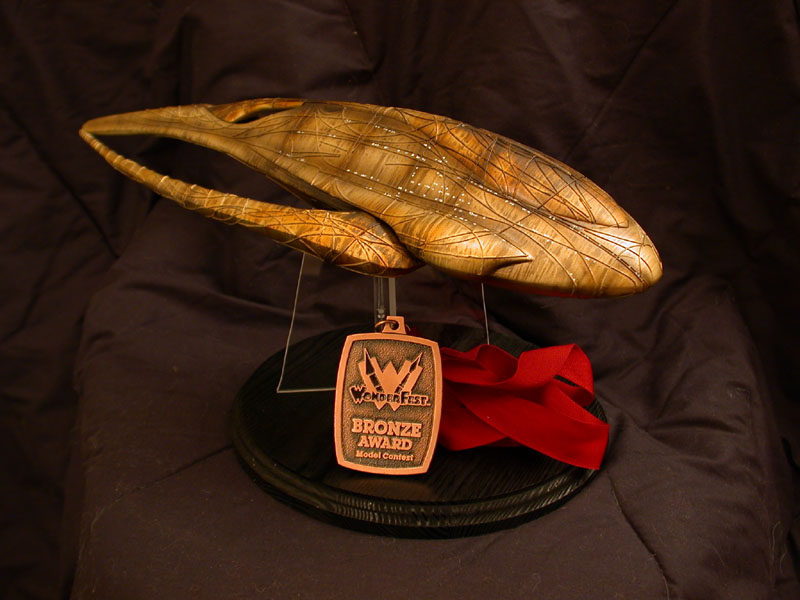
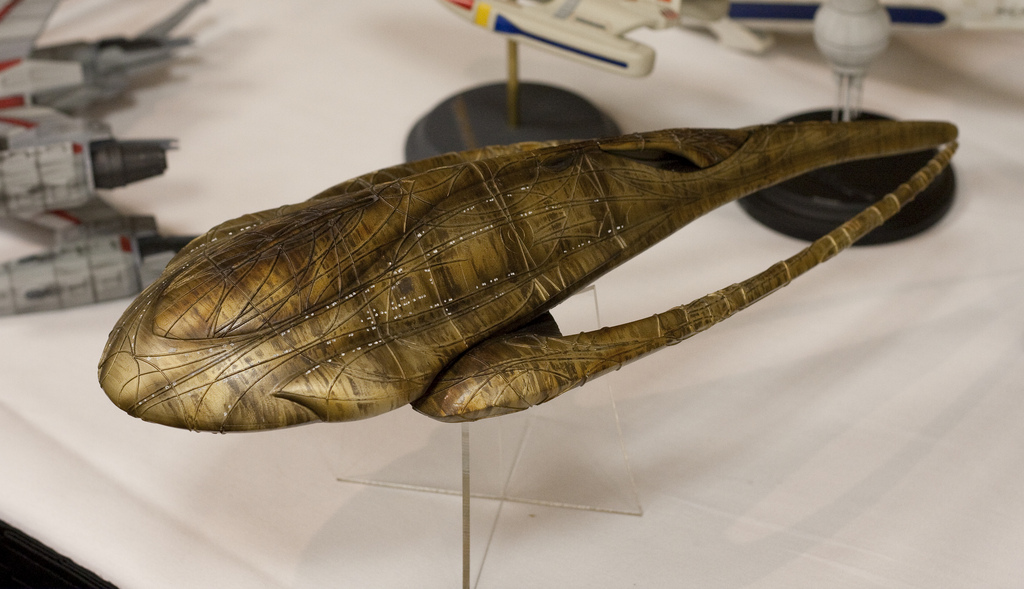
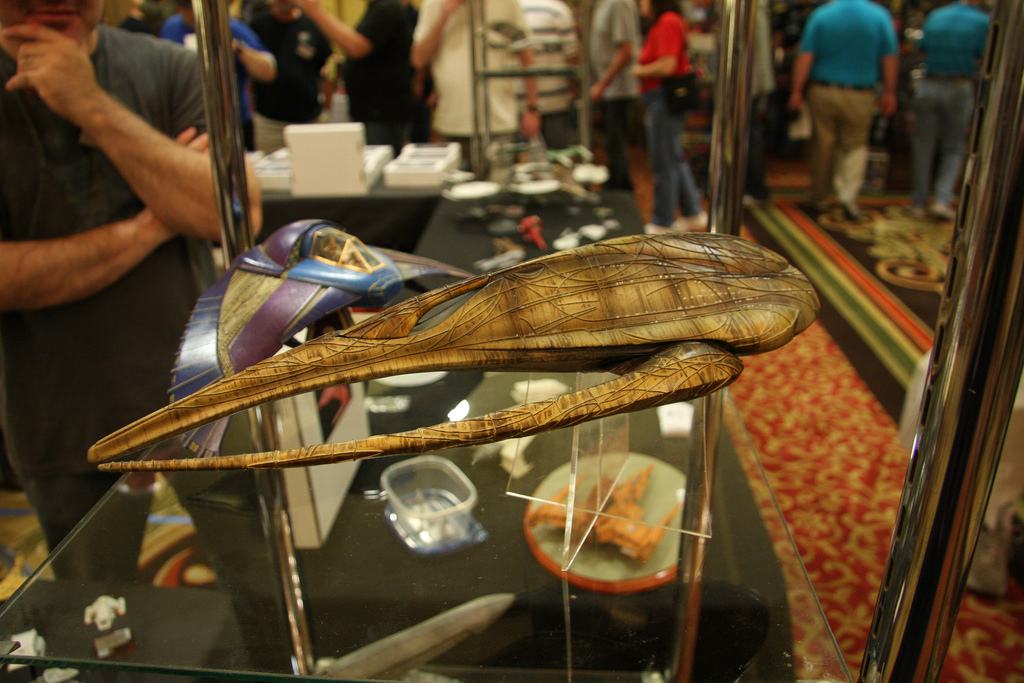
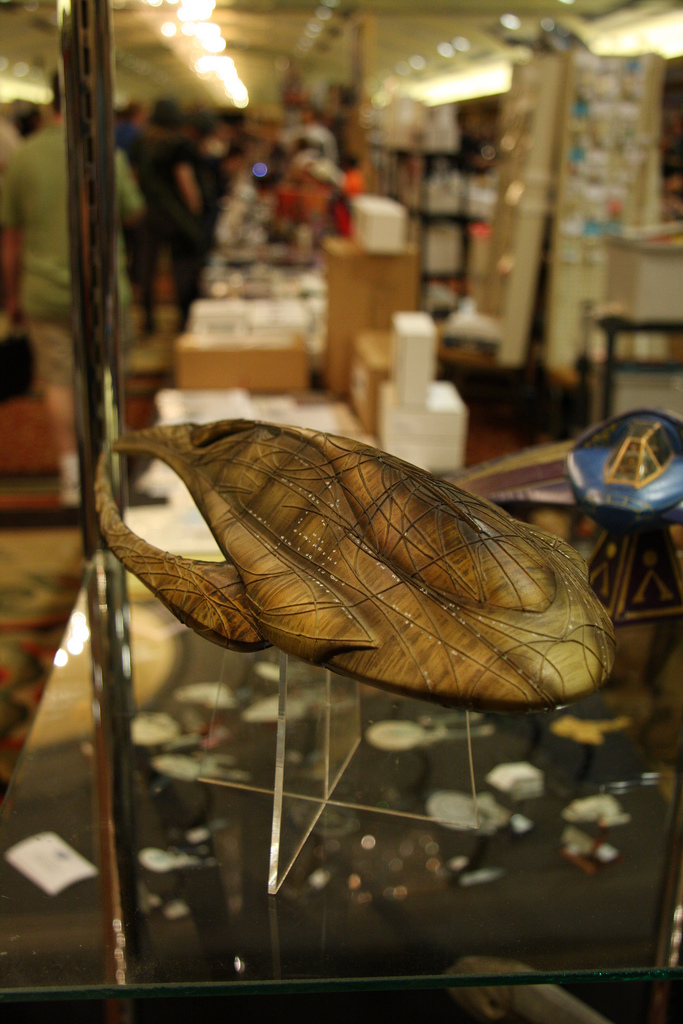
My finished Moya model won a Bronze award at Wonderfest 2002, which was more recognition than I’d anticipated. I ended up selling that one to a good friend of mine, and each year it’s brought back to Wonderfest as part of his display models. A second build-up was also sold, and today I do not have a build-up of my own. Although I’ve retained several good copies for future buildups.
For a brief time I sold copies of Moya as an aftermarket resin kit. There are still a few out there, so if you’re interested in getting one for yourself I’d recommend hitting up Federation Models.