
Tag: Jupiter

  • Planets Project Update – First Color

    Planets Project Update – First Color

    The scale model of the solar is coming together and here’s the first color on each of the planets. I’ve also test-painted the rings for Saturn, which is fun to see in 3D. More below, and please pardon the dust – these shots were taken in my art studio and there’s a lot going on.

    Planet Hemispheres, all with base colors

    Each of the planets has their base color tones as of this writing. Some of the planets are painted inside the clear acrylic hemisphere, which will give them a bit more depth. Jupiter, Saturn, Uranus, Neptune, and Venus will make use of this effect. Except for Uranus, clouds will be painted on the outside, but some light will scatter through the acrylic and bounce off of the inside layer.

    Process for painting the inside of the planets

    After the base color is applied, I went over them with white primer. This provides enough light blockage to prevent them from glowing too much. There was still too much of a glow, so I covered the white layer with a deep black. I don’t have a photo showing the effect, but it’s very similar to Uranus above (which is pretty much ready to be sealed as-is.

    Jupiter

    Jupiter North Pole

    The cloud bands were mapped out using an airbrush and several colors. Additional cloud details are needed, some to cover up that unfortunate splatter from my airbrush. Or, I just call that part a storm.

    Jupiter – South Pole

    The recent images from the NASA/JPL Juno mission have provided high resolution detail of Jupiter’s south polar region. I’ve started here by getting the colors more into a gray-purple realm. A good base for many whirling clouds.

    Saturn

    And finally my favorite of the bunch, Saturn. I’m thrilled with how the rings turned out, courtesy of my friend and colleague Joe “Faust” Graziano. Shown here are one of the prototype rings we cut to my original design.

    Base Color for Saturn and Rings

    While there’s still a lot to finish on each of these, it’s fun to see them come alive.

    Let me know what you think! And if you like this, please share at your leisure. Thank you!
  • My First Astrophotography with a Telescope

    My First Astrophotography with a Telescope

    Up until yesterday all of my star photos have been taken with my Canon 40D mounted on a tripod. I�ve read enough to know you can get fantastic images with just your DSLR, without a telescope. And in the process you learn a lot about exposure times, settings, and post-processing.

    Last week I stepped up to a Celestron C8, a Schmidt-Cassegrain telescope with an 8-inch mirror. My thanks to the Seattle Astronomical Society for offering equipment check-outs to members. Exciting as it is to try out a great telescope, my family was thrilled to check out the moon the first night we set it up. That�s Jessica, eight years old, who just finished frosting the birthday cake for my wife Stephanie.

    The Moon

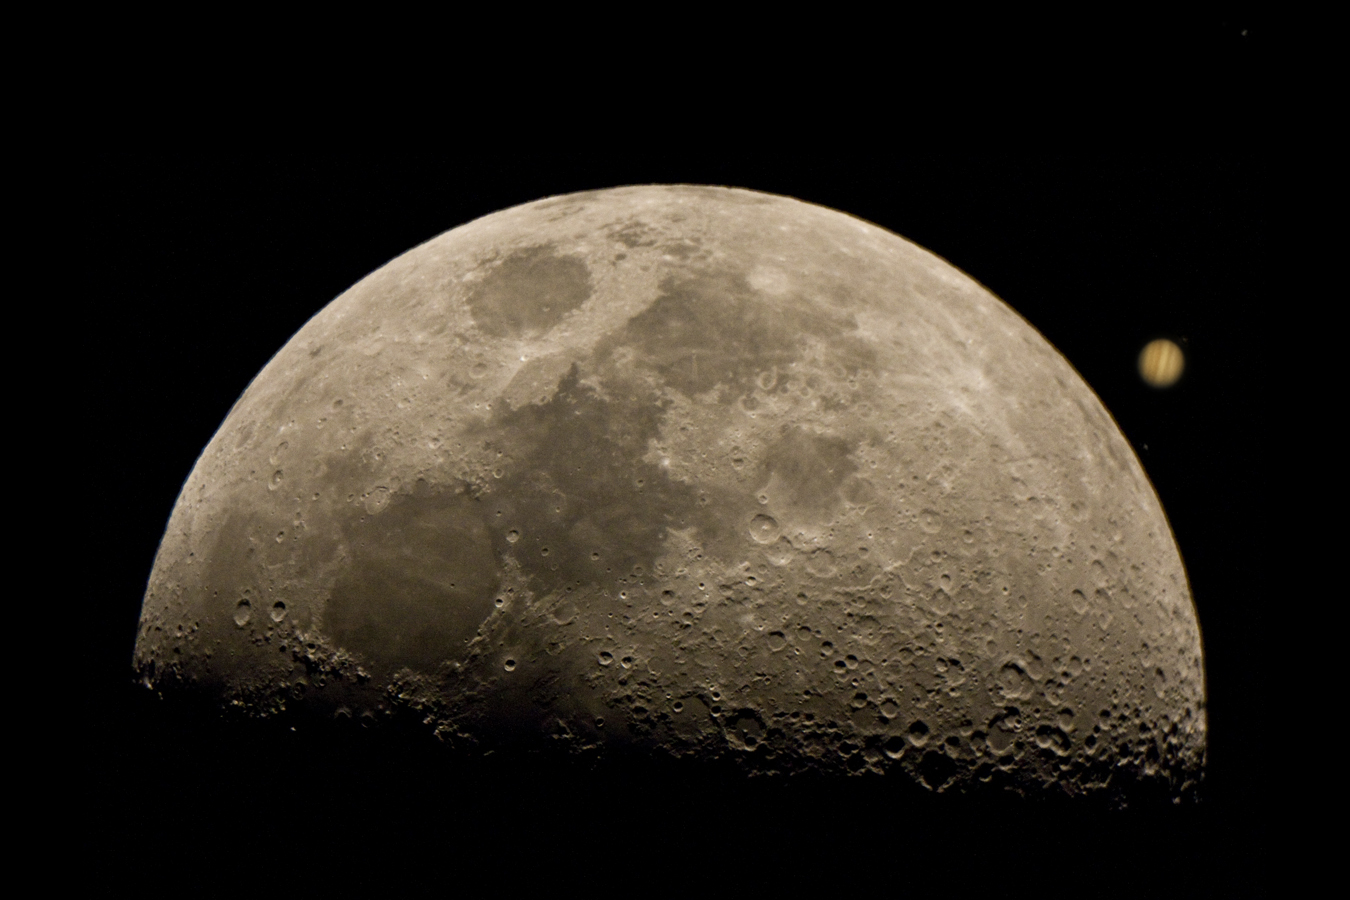
    September 22nd, 2012 was the International Observe the Moon Day, and here we were observing the moon. The moon was nearly a full quarter, with a great view of the crater shadows along the terminator. After taking turns being blown away by the moon at dusk, I took out my camera with the appropriate telescope adaptor. Lining up such a large, bright target wasn�t nearly as challenging as trying to capture stars without a telescope. But I took 60-plus photos anyway, bracketing settings, focus, and playing with the composition.

    Of all the photos, this view was my favorite and I present it to you with minimal post-processing in Photoshop. What you see below is almost exactly as it was shot. I did adjust the brightness and contrast only slightly, and framed it for composition:


    Jupiter

    I spent the rest of the evening fighting with hazy viewing conditions, enjoying the stars that I could see. Around 2:30am, already far later than I�d planned on staying up, this showed up over the trees:


    I grabbed my camera, and set about taking photos. By now I�d already moved the telescope to a clearer spot in my backyard which meant I had ruined my polar-alignment (the telescope was no longer aimed at the Earth�s point of rotation, meaning it would be difficult to track any object easily with the built-in motor). Undeterred, I went back to settings I�d learned while shooting stars without a telescope. Short exposure times, lots of them, stack and process the images later.
    I took over twice as many individual pictures of Jupiter than I�d taken of the Moon � over 120. I could get ten photos shot before having to re-center Jupiter in the viewfinder � the Earth�s rotation is far more obvious when looking through a telescope. From those, I was able to do a first pass at processing the picture you see above, with ten of the best shots.
    I�m quite happy with what I�ve accomplished so far, recognizing this is all part of a long learning curve. Next time it�s polar tracking and hopefully, with clear skies, some deep sky objects