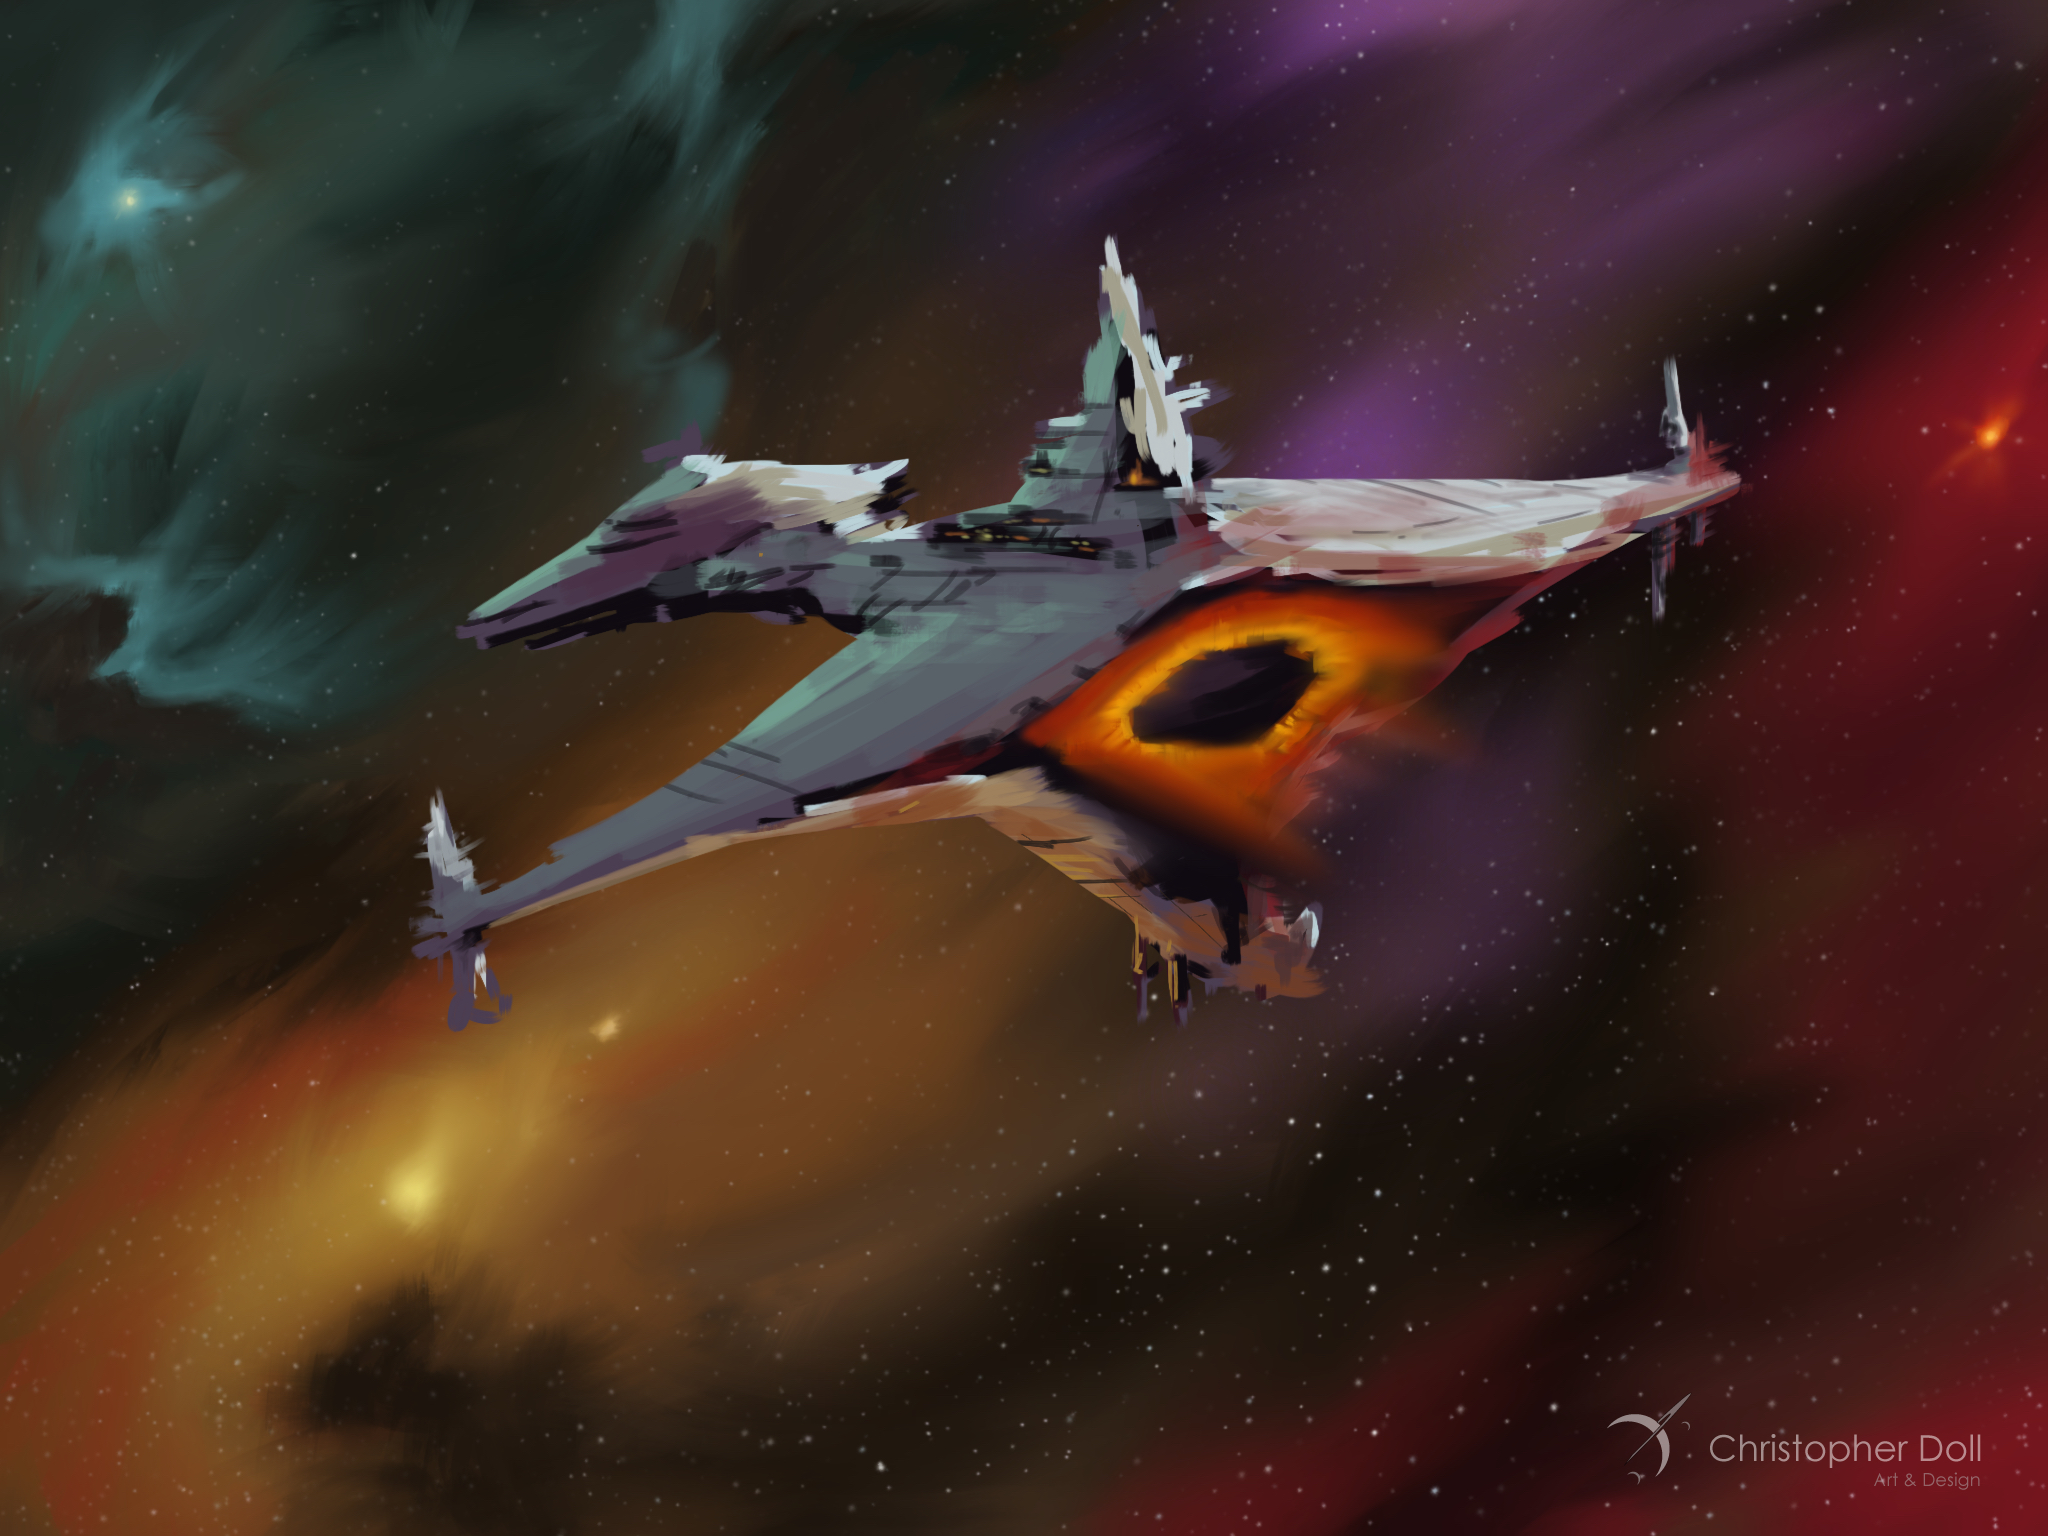
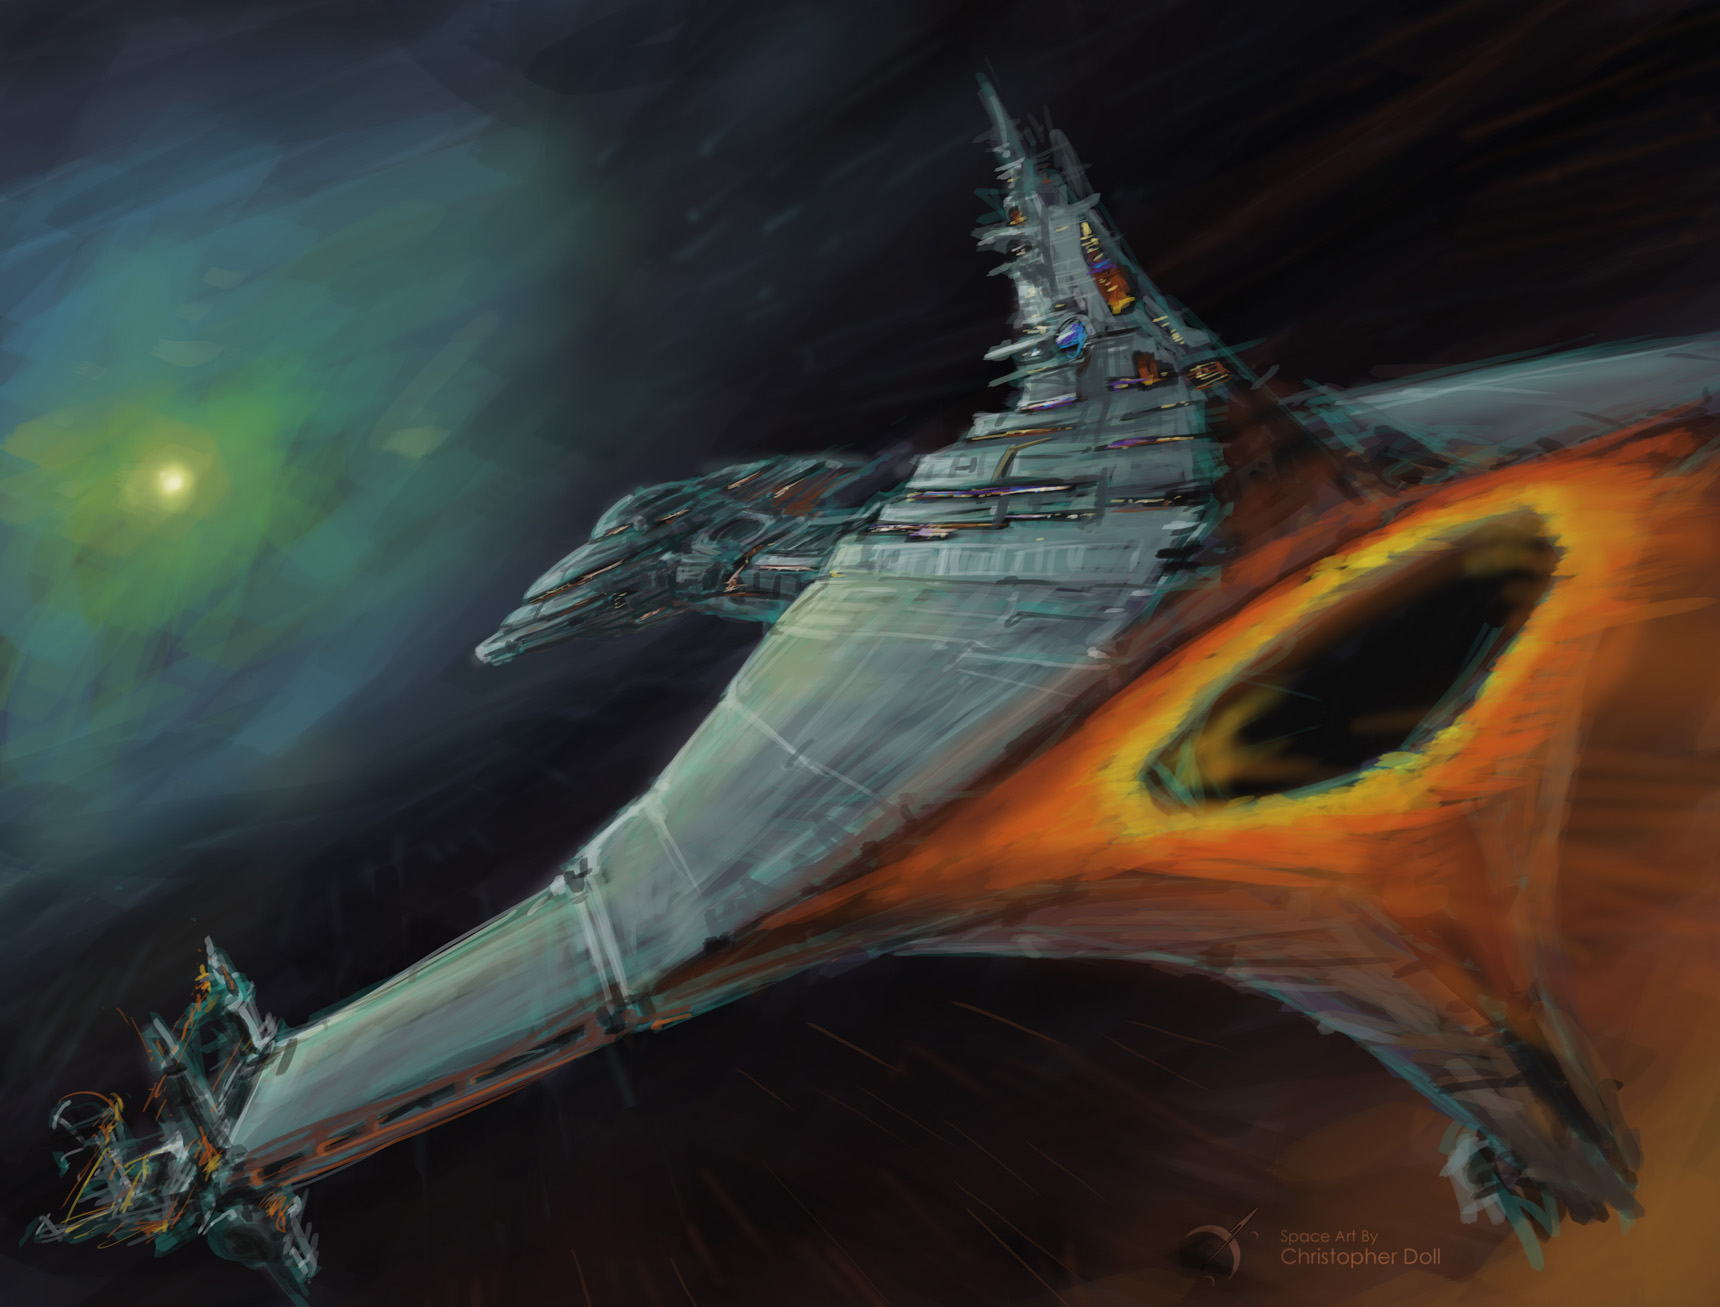
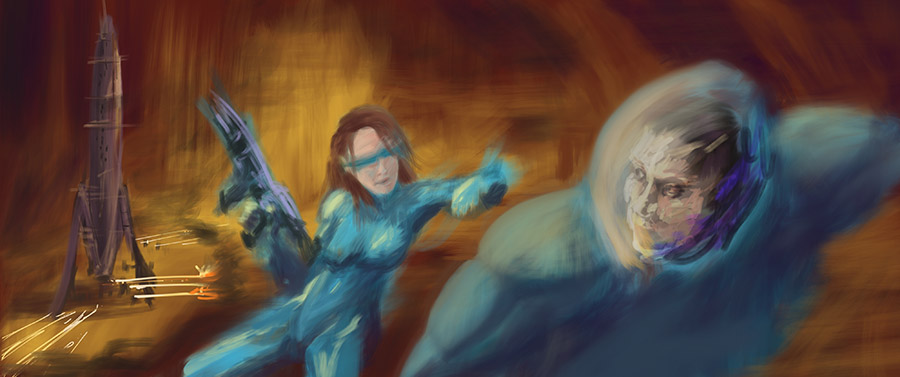
I can’t believe it’s been 3 years! This started as an experiment of “what can I do, with what I have?”. I am thrilled to see how the community has grown since this all started. Typically I do a larger painting on the anniversary livestreams, and this will be no different. Plus, one lucky viewer will win the painting of the evening!
The livestream has given me a chance to share my art with the world. These are quick paintings, and sometimes they’re not the best. But sometimes they’re pretty darn cool! I’ve turned some of the livestream paintings into more finished pieces, and others have inspired work in different directions. My primary goal was to force myself to do a painting a week, regardless of the outcome. This is a great exercise for any artist, and I have managed to use these paintings to try out new things – new materials, layouts, techniques, etc. In the end, the real underlying mission is to just have fun – and have fun with everyone who arrives to watch me fling paint on the canvas.
I am grateful to everyone who has supported me and the livestream since I started, and I look forward to continuing well past this 3 year mark. Thank you, and I hope to see you all there!
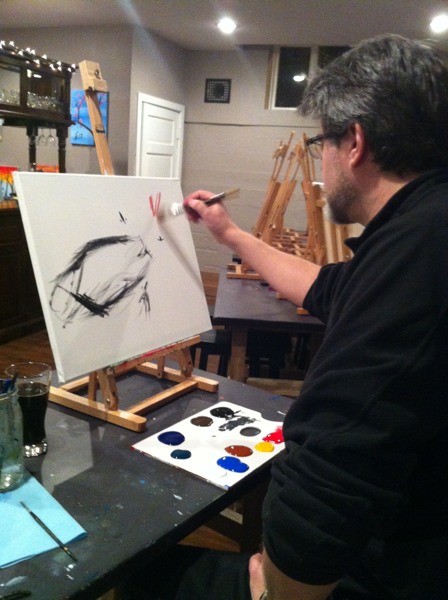
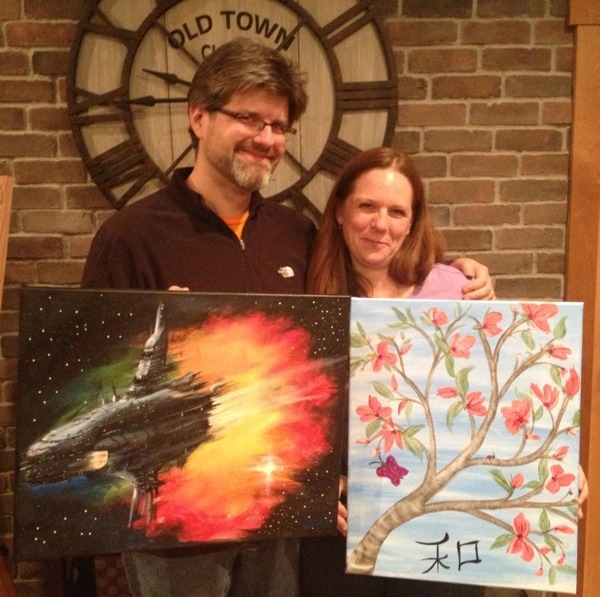
Back in December 2012, Stephanie used a Groupon Coupon for a new paint and sip shop nearby. We were the only couple to show up that evening, but the owners Justin and Janelle were happy to have us hang out and paint. They showed us a wall of paintings they were prepared to walk us through. Stephanie picked one while we both enjoyed a few libations. Being the science fiction and space enthusiast, I decided I’d take advantage of the paint and canvas in front of me and go rogue with my own painting.
Me at The Drunken Easel, putting down some lines
I had learned to paint during my time at Kendall College of Art & Design, back in Michigan. Even though I went through their Industrial Design program (and got the degree), we had many core Fine Art classes. Sixteen years had passed since the last time I picked up a paint brush, I wasn’t sure if I’d forgotten everything. But there was no pressure, and I had the confidence of a couple of good stouts so I just started moving the brush.
“It looks like this could be a nebula”
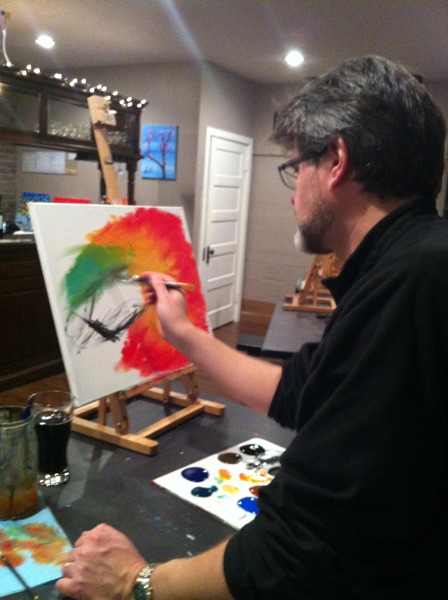
I felt comfortable with the paint and brush, and a blank canvas. A picture started forming as I painted, and I forced myself to just keep going. Don’t stop, don’t deliberate, just go with the flow. It was liberating. No art direction, no internal dialog. Just the canvas, paint, some good music, a chill atmosphere, and decent beer.
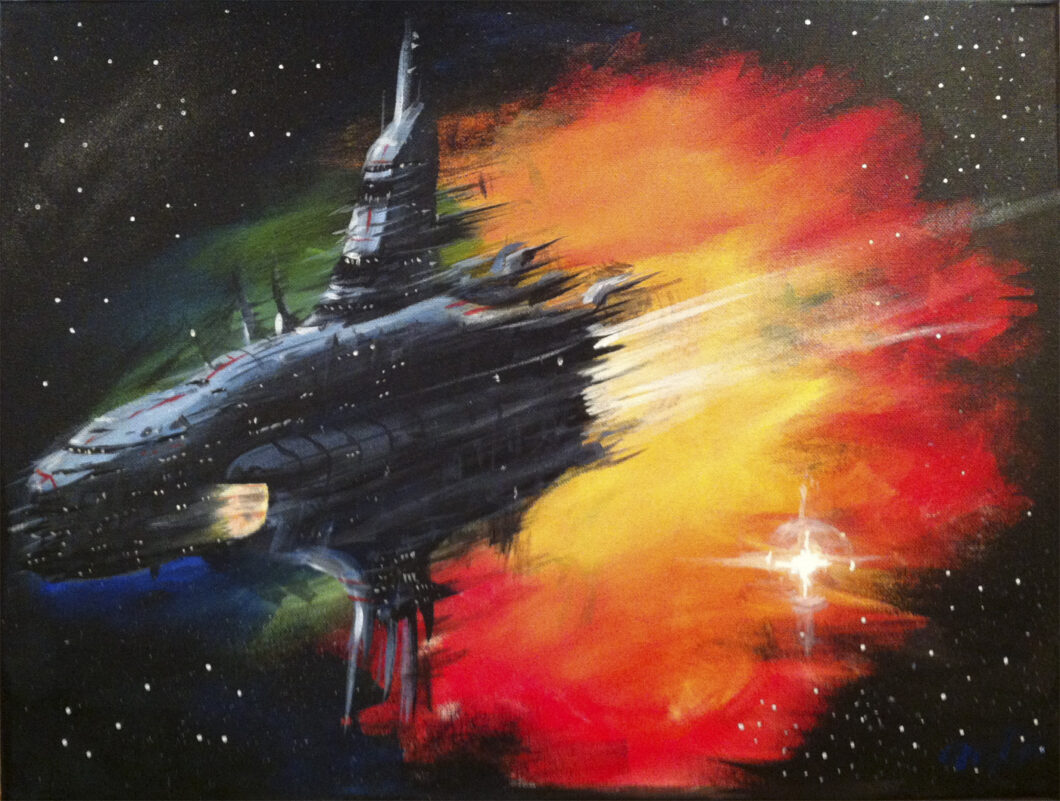
The spaceship started taking form with dark shapes. I blocked in the overall silhouette and added highlights, details, windows. I put on a few “hero stars” with a brush then spattered a bunch of smaller stars to finish it off. By the end of the evening, this was staring back at me:
Spaceship And Nebula #1
I surprised myself. Painting tapped into a part of my brain that was dormant for many years. I left feeling like I had ignored a base instinct my entire life. It was different than the 3D work I had done as a game designer, or even on my own as a digital artist. And as much as I enjoyed building and painting models of spaceships, this offered something more – an energy and context that was missing from my other hobbies.
I Went Back to Work on Monday
The next week I went back to my dismal job as a User Experience Designer. I loved being a User Experience Designer, don’t get me wrong. But I was working in the middle of a series of garbage corporations, many that you’d know by name, in an industry that still to this day remains stagnant and miserable for designers. I decided that if I were to remain sane and not die sitting in a cubicle or standing desk, I needed to sort out how to make a living as an artist on my own terms.
This was an insane idea. I’ve known many artists, and even in my circle of friends I knew people with Fine Art Degrees that shoved them aside to work in the more practical technology and business fields. My peers would laugh at me, and with good reason. I wouldn’t make nearly the money I was making in tech. Artists my age already had 20 years on me. I was just a guy who had a few beers and threw a spaceship on a canvas.
I was already beginning to realize my career was killing me. That isn’t hyperbole. I was beginning to hit the wall with several health issues related to stress and anxiety. And maybe I would’ve hit that wall anyway, but I knew after sixteen years I wasn’t built for the industry. Even with my comfortable salary I hadn’t accumulated enough money to just walk away and start painting. We’d lose the house within months, and I knew it.
One of my last work badges (company name modified to protect the jerks)
So, Get On With It
It took me a few weeks to build a plan, and I started slowly. I dusted off my Wacom tablet and began working with my digital tools. With a recently purchased iPad, I put a lot of miles on an early version of Procreate. And I began buying paint, brushes, and canvases to work on painting at home. The only way I could pull this off was if I put myself on the equivalent of a Master’s Degree program for Fine Art, while working as a UX Designer. This meant more than just painting nebulae and spaceships, I wanted to tackle it all – landscapes, abstracts, figurative art. I had to get good at many levels if I ever wanted to step up and call myself an Artist.
I still feel I’m an Imposter as an Artist, ten years later. But in that time a lot of good things happened. I left my career as a UX Designer and joined my wife Stephanie with her baking business Doll House Baked Goods. This helped us keep the house and I was still able to learn new painting techniques, new media, and I started landing commissions. I also learned how to make a mean batch of chocolate chip cookies, sourdough, pies, and other baked goods. More importantly, we got a crash course in running a small business and this was a tremendous advantage for my own art business.
For an imposter, I’ve had a few successes – I’ve painted the covers for many science fiction novels, including a series that won the Hugo Award for “Best Science Fiction Series” in 2019. My work has been on album covers, model kits, and is now in the homes of many collectors. This year I completed a HUGE commission for a Science Museum (more on that when I can reveal the project). And I’ve been running a weekly livestream on Twitch.TV where I paint a new science fiction or space painting every week, Bob Ross style. I remain hopeful that I can grow this business and career for the rest of my remaining days.
There are many artists who, like me, left their careers to become successful space and science fiction artists – and in less time than it’s taken me. But I wouldn’t trade my own experience as it’s been both frustrating and incredibly rewarding.
I am Grateful
I am thankful to Stephanie for arranging this event, and for being such an amazing supporter of my art for the last ten years. I had no idea going into this evening that it would switch my brain onto a completely different course. And my thanks also go out to Justin and Janelle for being so great to their lone patrons that evening, and letting me paint something that was quite literally “off the wall”. I am also grateful for the many followers that have found me on social media, and more recently through my livestream. You’ve all helped make this possible.
Our Paintings from the Drunken Easel
Post Script
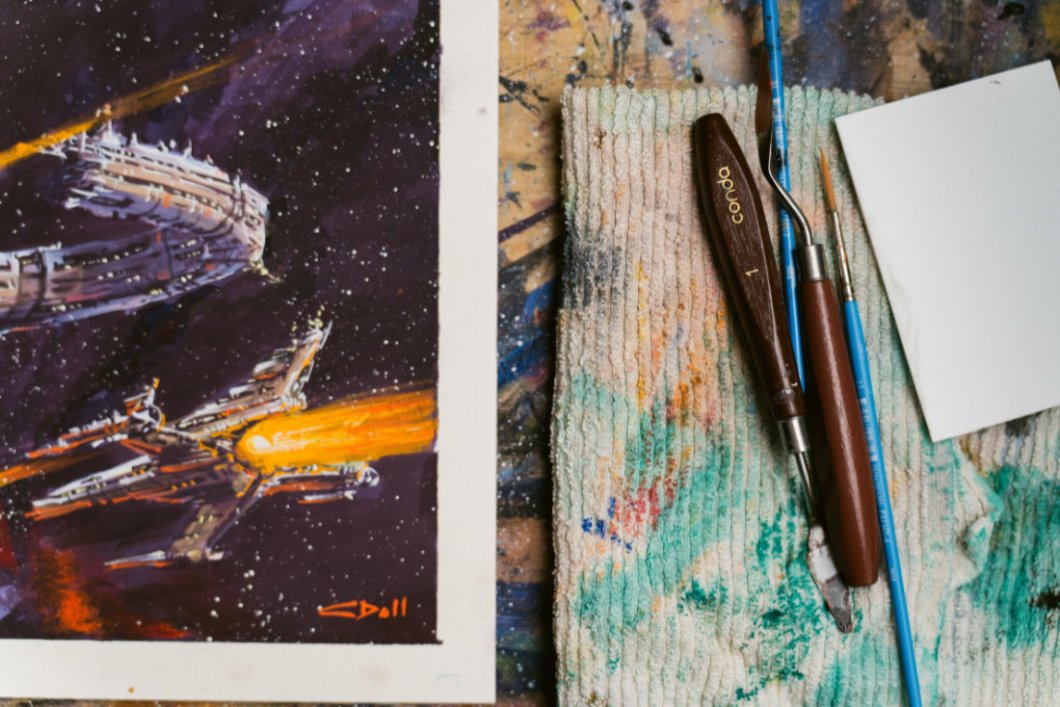
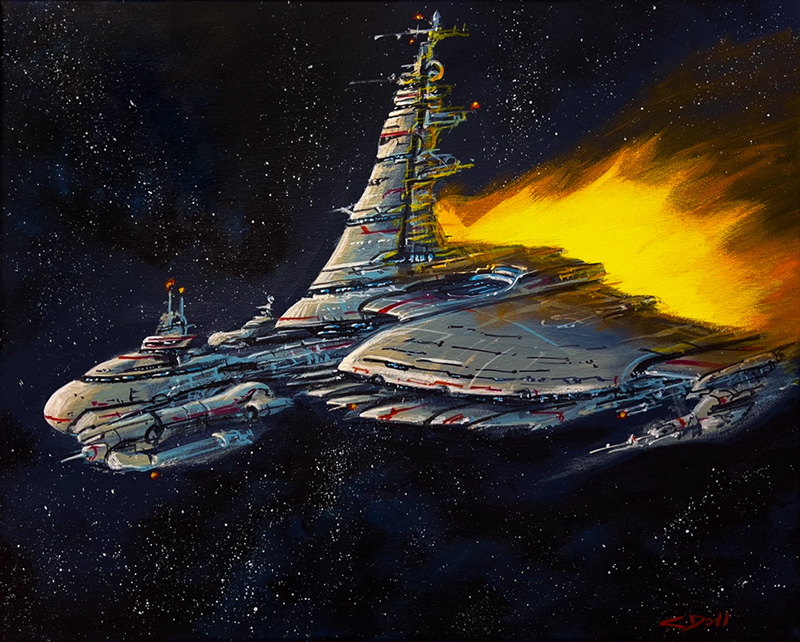
I’m approaching the third anniversary of my livestream on Twitch and two weeks ago I wanted to try painting my “spaceship and nebula” again, just like I did at The Drunken Easel ten years ago. This was a two-hour live painting, with no initial preparation. Just me, the paint, the camera, a fine audience of viewers (thank you to all of my subscribers, followers, and Patreon supporters). I still enjoy the visceral throwing of paint that happens with a spontaneous painting session:
Speed sketching with your tools is a great way to get your pen moving, and your drawing mind working. You can speed sketch in traditional media or digital, both are�a great way to warm up, or to shake things out in between projects. Speed sketches�force you to make decisions quickly and with less deliberation than a full-blown piece.
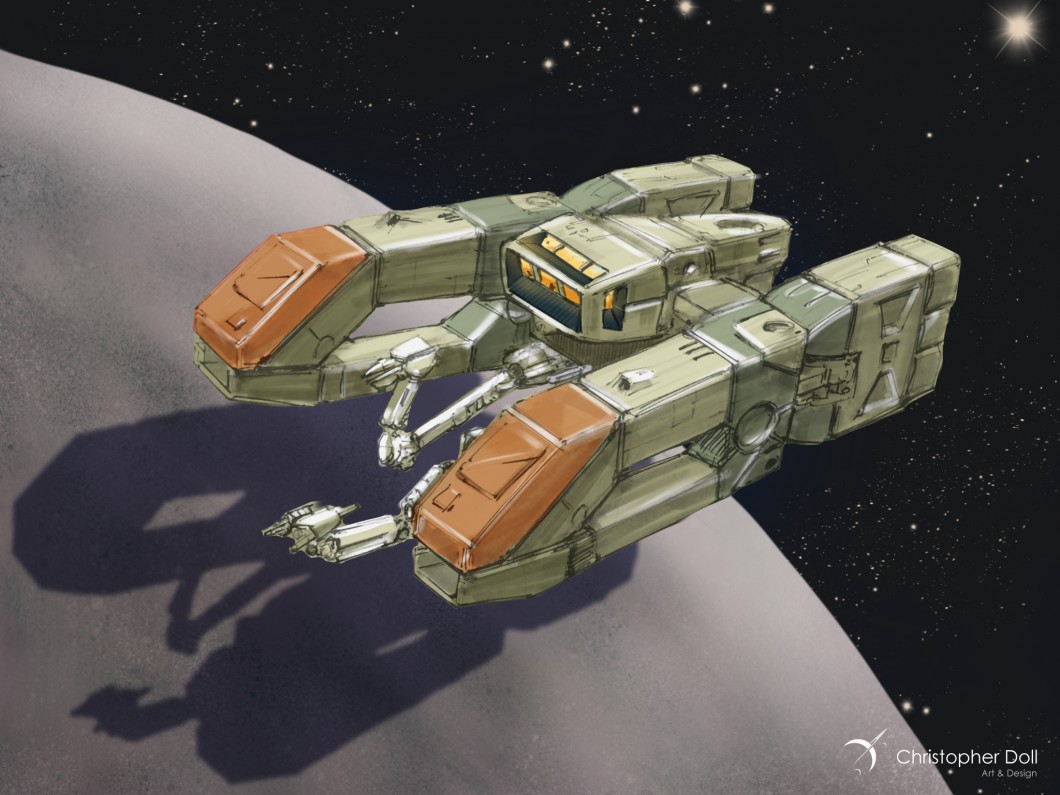
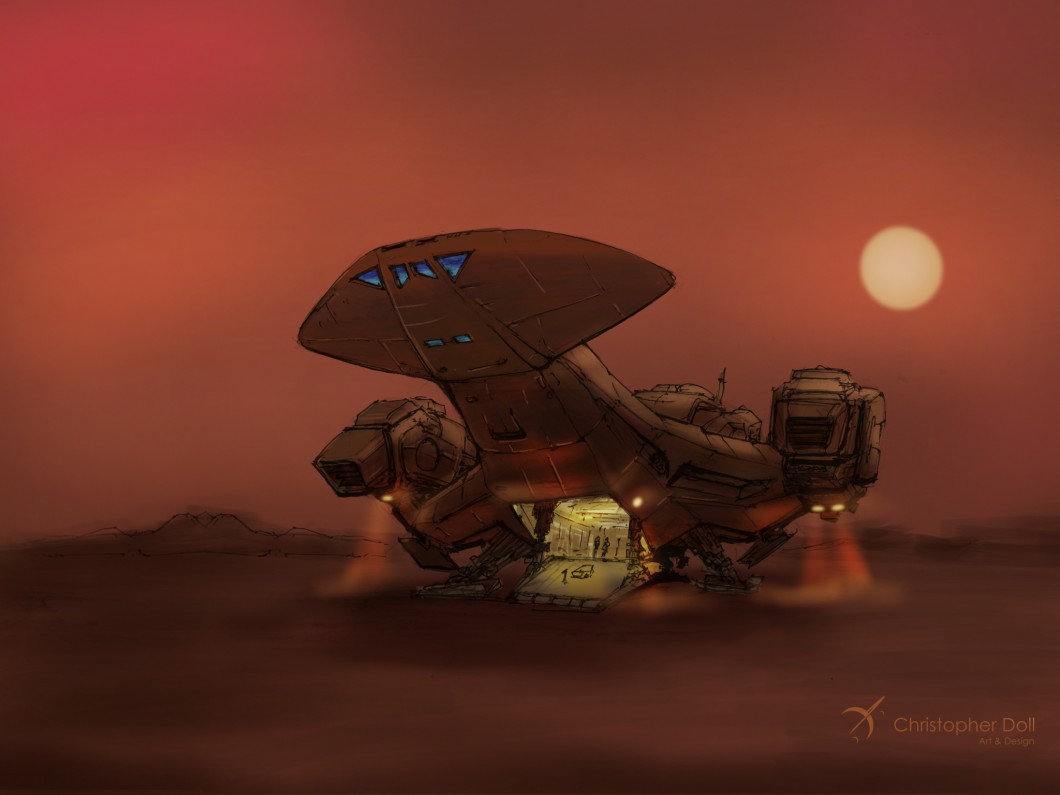
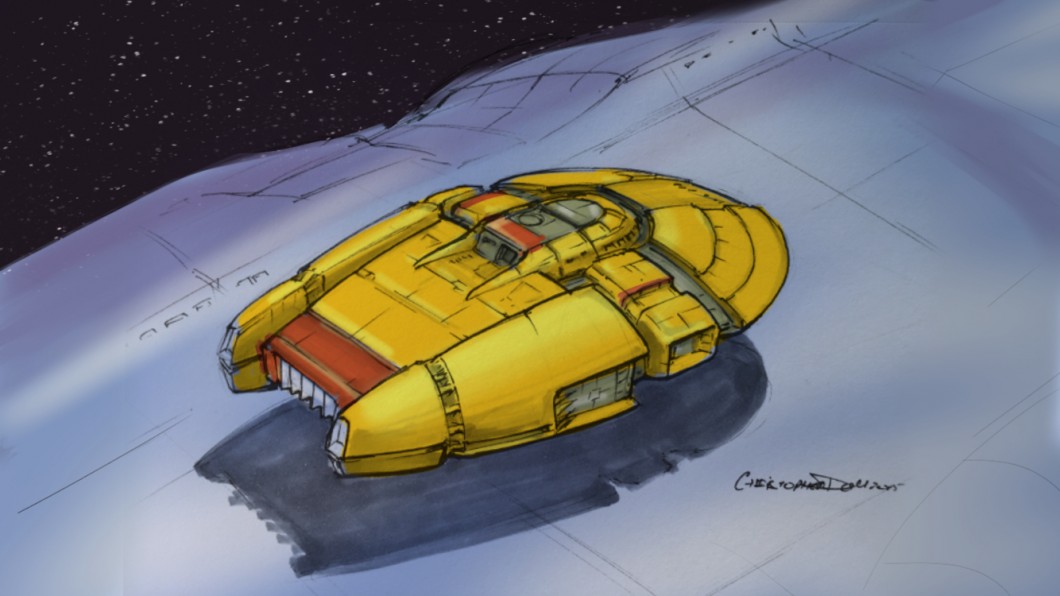
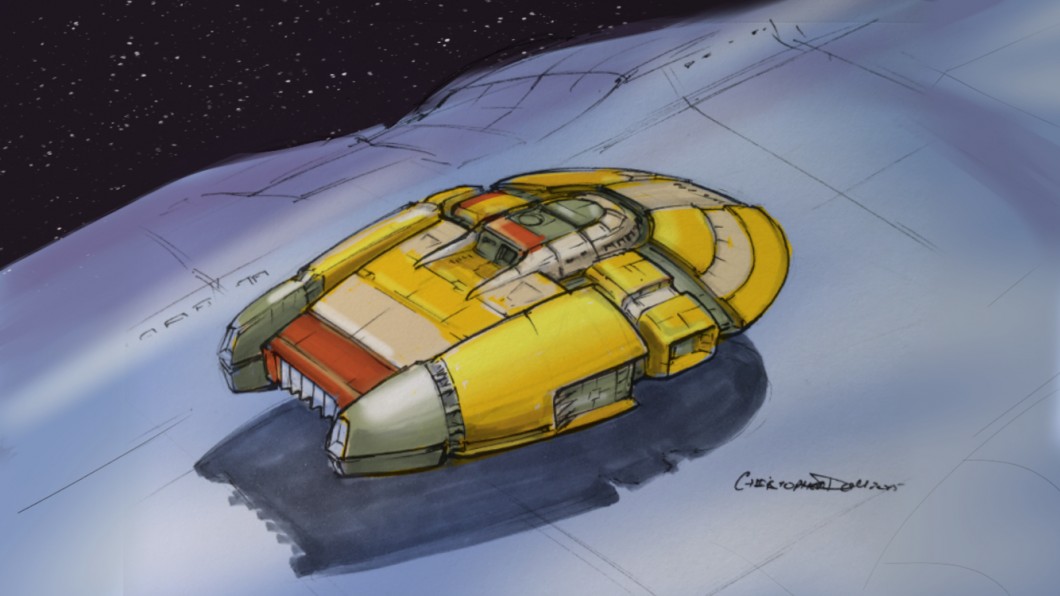
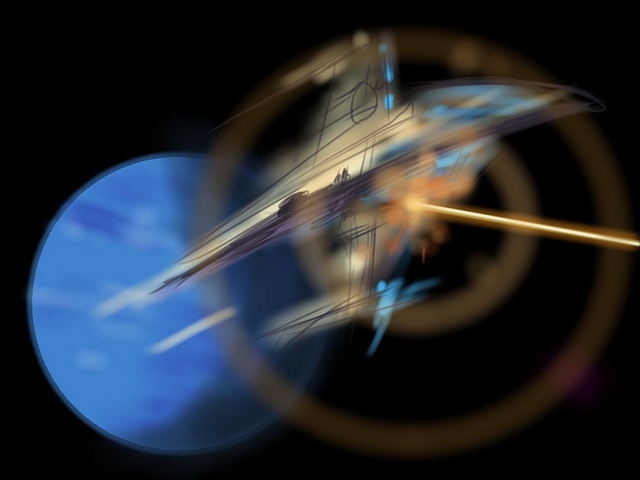
Three Versions of Ambush In Orbit
For those of you following my recent posts on Instagram, Twitter, and Facebook, you’ve noticed that I’ve been adding more of these speed sketches recently using Photoshop and my Wacom Intuos Pro tablet. I’ve learned some new brushes that I don’t normally use, like some of the built-in paint brush emulators in Photoshop. Some are okay for my needs, while others better than I’d anticipated. Their angle and flat brushes are great for laying in quick areas of color as I draw these scenes.
While some speed sketches have turned out better than I’d anticipated, and are themselves almost complete pieces, others haven’t turned out as well as I’d hoped. In this case, I started with the phrase “Ambush In Orbit” and began thinking of some John Berkey-like scenes in my mind.
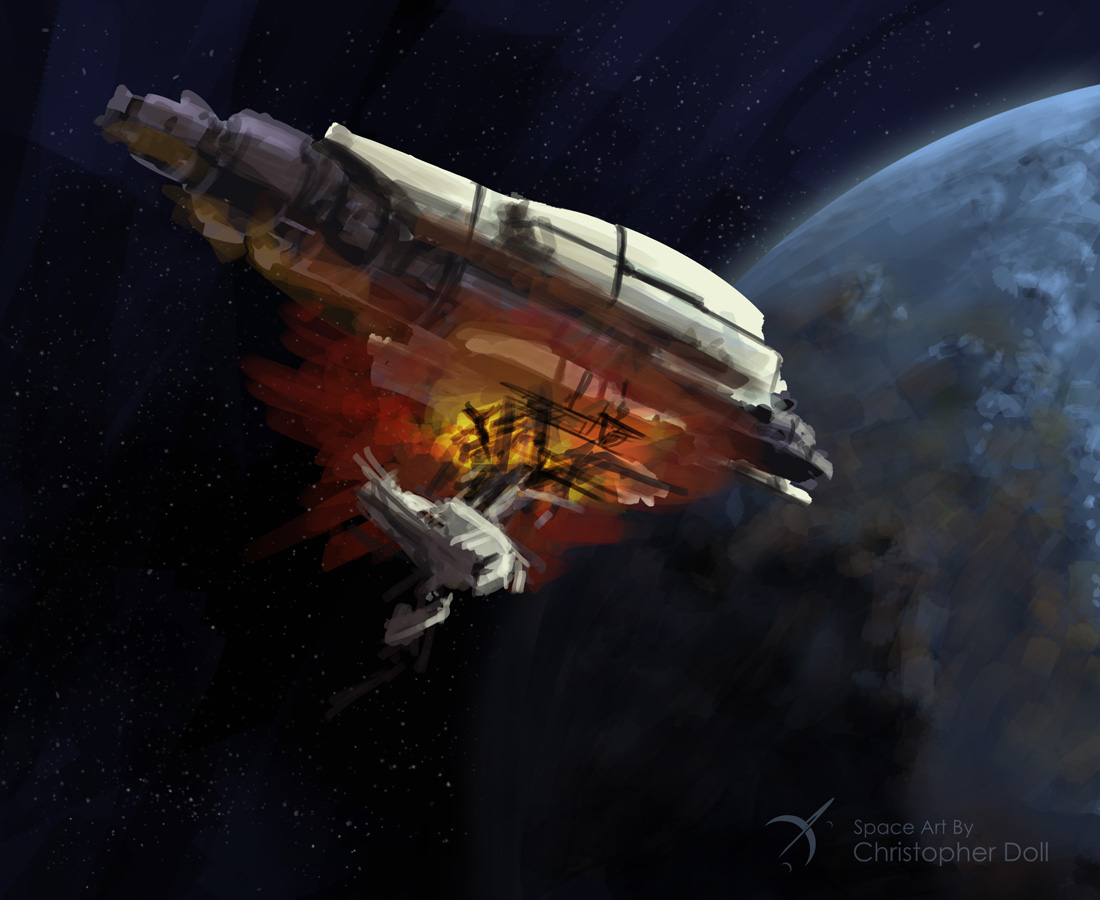
The planet and background were drawn first, and I spent almost an entire 45 minute session on these alone. I don’t always render the background first, but it helps set the tone of the main subjects. When it came time for the spacecraft, none of them matched what I originally had in my mind so I ended up with three different styles of spacecraft. I stopped near my standard 45 minutes on each of these, and while they are each a bit off from my planned vision,�I’m somewhat happy with them.
Ambush In Orbit 1
This first version fell away from�the colors I wanted, with the ship being warmer than I’d intended. If I were to take this on to a finished piece I’d adjust the hue across the layers of the ship.
Ambush In Orbit 2
The second spacecraft here just gave up on the whole notion of an orbital ambush, but those engines were just too fun to draw. And the Monty Python style helmet was cracking me up. I am still digging the indication of lit rooms, although it looks like a raging forest fire in there.
Ambush In Orbit 3
None of the shapes in my third attenpt were working out so I started blocking out detail cuts from the form and throwing in the energetic engine colors. The engine flame layers were set to Color Dodge and duplicated to enhance the effect. Now it looks like a piece of wreckage, in my eyes, and a more fun direction than where I started. Again this would be taken a lot further as far as detailing is concerned.
That’s a bit of a view on the process, and while sometimes they don’t come out the way you’d like, they’re still fun and good practice.
About Christopher DolL
Christopher Doll is an artist and designer from the greater Seattle area.� He specializes in astronomy, space travel, and science fiction themes. His work has been featured in a number of books, articles, and on the cover of several novels.
Five years into a long journey to a distant world, the crew of Stellar Explorer Copernicus detects a radio signal from a nearby star system. Weary from isolation and already far from home, the signal sparks a fiery debate about the nature of their mission, and how to proceed as emissaries of the human race.
The fourth vessel of the Stellar Explorer class, and first to leave our solar system, Copernicus contains over 5,000 capable men and women on a mission to establish an outpost on the first Earth-like world found in a nearby star system . On their journey, they are isolated in an artificial world with almost no contact home for years on end, and no guarantee of return. Their only hope and reward is to find a living, breathing planet where humans can live outdoors. Built by a consortium of corporate and government entities spanning the entire solar system, Copernicus represents nearly a century of mammoth investment and research. Equipped with a powerful Faster Than Light drive, the journey itself is expected to take more than seven years. Each crew member has volunteered decades of their lives on what could be a one-way mission.
To support her crew and mission, Copernicus contains all the necessary equipment and capabilities to build a self-sufficient community on a new world, far away from Earth. Joining them on their journey is a small army of humanoid robots controlled by The Forum, a collection of artificially intelligent entities that help govern their community and Copernicus itself. Maintaining a starship of this size proves far more difficult than imagined. They have faced perilous accidents which claimed the lives of people very close to them. Even with such a large crew, the loss of any one person takes its toll personally and professionally. They can manufacture and repair major components of the ship itself, but people are not easily replaced.
Then out of the silence, a massive radio spike is detected from another star in the local vicinity. It appears to be artificial in origin, and its source is within range of their vessel. Copernicus has the means to investigate the signal, and complete their mission, but by doing so would they would eliminate the possibility of returning home to Earth. The crew must decide whether they should risk their lives and the mission for the chance to meet a possible alien intelligence in a nearby system.
The decision creates havoc among the crew. Many would rather go on to their final destination and leave the signal alone. While most agree that the signal is important enough to risk a detour, especially if it means the possibility of discovering intelligent life nearby, there is great concern for their own well-being and safety. For all it�s impressive capabilities, Copernicus is an unarmed exploration vessel. Many on board insist that they should prepare to defend themselves on the chance that this new species could be malevolent. And for those who wish to meet this new species, as emissaries of the human race, the question arises about how to communicate with beings totally alien to our own experience.
Against all better judgement, I am writing a science fiction novel of my very own. I didn’t want to write a science fiction novel, but a.) an idea stuck with me and wouldn’t leave me alone, b.) I had adequate time to pursue this madness, and c.) it’s guaranteed to have killer cover art.
Landing Operations – Color Comp
I started the first draft last Fall, and I’m calling it Stellar Explorer. That’s merely a project code name for now, I’ve not yet decided on a final title. It’s developed a life of its own, and not merely a shot in the dark, so I’m sharing the details with any of you that are interested.
Where did the idea come from?
In 2015 I was drawing a lot of spaceships, which a number of you followed through my #spaceshipaday Twitter posts. My thanks go out to all of you who have supported my art. Along the way, one particular drawing stuck with me.
Digital – Procreate on an iPad
It was a fun drawing that I made on my iPad with the Procreate App. My original intention was to draw a cool background with stars and nebula clouds, but halfway through I felt it was lacking something. It needed a subject, so I added a generic spaceship that was lit with color from the three different star groups, cyan, yellow, and red. The spaceship itself was the fastest part of the whole drawing, and surprised me how it developed so easily. Sketchy in form, with obvious perspective errors, the details flowed fast and fit into place. You know that feeling you get when a plan comes together? That’s what this felt like.
Since I was still on a self-guided mission to improve my artwork, I continued drawing spaceships and fantastic scenes. But this ship stuck with me, and like any other obsession I began to think about that scene. Where was this ship going? Who would build such a ship, and why? What does the rest of it look like? And more importantly, who would live on it?
Digital – Photoshop
Over the next few months, this spaceship kept showing up in my drawings. Those of you following my art posts might have wondered “why is he drawing the same ship over and over again?”. Obsession, of course. This image wouldn’t leave my mind. The other was more practical – I was honing specific drawing skills and in the interest of time it was easier to use a design that I already explored (as opposed to creating a whole new ship). It shows clear lineage to many of the science fiction shows and stories that have inspired me over the years: from Star Trek, Space: 1999, and Star Wars to novels by Larry Niven, Kim Stanley Robinson, James S.A. Corey, and artists like John Berkey, Robert McColl, Vincent DiFate.
After much deliberation and research into contemporary concepts of interstellar travel, it was quite apparent that a spaceship like this is not feasible at all. At least not within the boundaries of existing science and engineering knowledge. It’s enormous, if the size of the windows are any indication. Thousands of people would be able to live inside of it. It would have to reach tremendous speeds to get near those beautiful nebulae within the lifespan of an average human being. And it’s configured like a cruise ship, meaning it would have to have artificial gravity (there are no rotating centrifuges to mimic gravity). But if you extrapolate on a few key technology advancements, technical hand-waving common in the science fiction realm, it starts to look reasonable. At least reasonable enough to warrant further speculation.
What’s it about?
I’ve called the project and this spaceship Stellar Explorer. Derivative perhaps, but as I mentioned earlier the title is TBD. It’s on a long mission to a nearby star where an Earth-like planet was found by observations from our own solar system. To reach this star system, a consortium of business and government agencies invested in a massive program to build a starship that would allow humans to go to this new world and begin exploring it in person, a first step towards a much larger colonization effort.
My story is about the crew of this Stellar Explorer, and their journey to set foot on a new Earth in another star system. They are a capable group, hand picked for their resilience, skill, and willingness to renounce family, country and friends, giving up years of their lives on a mission of exploration.
In this future history, humans have already set up colonies on the Moon, Mars, in orbit around Venus, and several moons of Jupiter and Saturn. We’ve become very good at setting up artificial environments, but they are expensive and exist mainly to harvest the rich resources necessary to sustain the exploding population on Earth. Little mining is conducted on Earth anymore, in an effort to rescue the collapsing ecosystems there after centuries of abuse at the hands of industrialists and modern warfare.
Interior Sketch – Main Arboretum
Living off-world in artificial environments isn’t pleasant for the working population. It’s claustrophobic, even in the larger domed cities, and it’s dangerous as even a small accident can kill large numbers of people (and have over the course of this future history). There is a thriving leisure travel industry that promotes exotic cruises to locations throughout the solar system, although only the very rich can afford such luxuries. In spite of our expansion into the system, the most sought-after, expensive properties are the few remaining open spaces left on Earth. Places where you can walk and live outdoors.
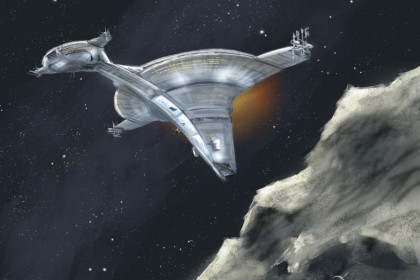
Close rendezvous with an asteroid.
The discovery of an Earth like planet in a nearby star star system sets off a 100 year race to build and test the technology necessary to get humans there and become a true interstellar species. Many worlds had already been discovered using astronomy observations, but the catalyst was the first actual image of a blue world. Seeing another living planet for the first time inspired all of the human race. It would be a new home where people could live in the open, free of artificial spaces and the threat of ecological collapse. And real estate there would be outrageously expensive.
That’s all fine, but it sounds like every other science fiction story. What makes yours so different?
The best science fiction I’ve read doesn’t focus entirely on cool technology and spaceships, although that’s often part of the mix. It focuses on us, the people who are living and breathing (and reading) today. Filling a novel with spaceships and rayguns is fun but for me the more interesting part is the human story.
Concept Sketch – Status Report
What happens to a group of people who are stuck inside of a large spaceship on a journey that will take years? What do you do to pass the time? Who goes crazy from the monotony? What happens when you break up with someone, and you still have to live near them? Even though this Stellar Explorer is big, and carries tremendous exploration capabilities at the new world, it is an isolated island of humanity on a long, lonely voyage. Think about a large, luxurious ocean liner. For a week or two it’s fantastic. You have great food, entertainment at your fingertips, exercise facilities, lots of booze, and exotic destinations. But if you were on that same cruise ship for six to ten years, with the same group of people, it would start to drive you nuts.
Character Sketch – Tarika Donnelly
Perhaps a better analogy for this Stellar Explorer are the science stations in Antarctica. In fact, there’s a great documentary called Antarctica which I watched while thinking through all of this. I highly recommend it. The people living at McMurdo station live in artificial communities in a part of the world that can kill you outright if you’re not properly prepared. They are isolated and most rotate out after six months, although a number of people have committed themselves to year-round living. They become a microcosm of humanity, working day to day in a place that is beautiful and deadly with little outside assistance or contact.
What makes you think you can write a good science fiction novel?
Honestly I don’t know if I can write a good science fiction novel. It may be a complete disaster with a cool cover. I have no illusions that writing is easy. It isn’t. I may only be good at building the world and drawing it, I don’t know. But as they say “write what you know”, and I know science fiction. I also know a hell of a lot about the dysfunction of professional organizations and being trapped in high tech environments with people that you either want to hug or strangle, take your pick. Somehow there’s a connection, and one that I think will be worth exploring.
My only published work at the moment is a coloring book, with more on the way. I’ve tried my hand at writing many times, and some of the first were on a typewriter (kids, ask your parents what these were). Short stories, film scripts, novels, I’ve collected a number of them over the years and while I admit that most of them weren’t finished, and none of them published, a few of them weren’t half bad based on the comments from the few who read them.
The first degree I studied in college was film production. It was a small program in a community college but you did need to think about your stories and it inspired me to begin looking at the craft of writing. At the time I struggled with it. I was young, admittedly inexperienced, and it showed in my stories. I understood the mechanics of writing, but fell short on capturing life. I set it aside many times and would occasionally get inspired to write science fiction.
Nothing I’ve tried writing has had the same depth and momentum as this Stellar Explorer idea, and I hope that over the next year or so you will find it interesting enough to stick around with me while it comes together.
A Stellar Explorer closes in on a moon orbiting a gas giant
What’s the status of this novel, and what’s next?
I’ve already completed a good portion of the first draft. It’s been a learning experience for me as it is the most ambitious writing project I’ve undertaken. I knew going in that writing a novel is a lot of work, and nothing I’ve learned so far has proven me wrong. After I finish the first draft there will be a number of edit passes before it’s ready for publication.
At this time I have no publisher, this is entirely a project of my own creation. There are a lot of self-publishing routes available to me, and there’s still plenty of time to make that determination when I get closer to being done.
I intend to begin introducing the characters and the world to you all as I progress. I hope you come along for the ride and enjoy the journey as much as I have so far. Cheers
Winding into Fall of 2015, I have been taking my design sketches into more finished pieces. As fun as it’s been creating my #spaceshipaday entries, it’s clear that I also need to demonstrate more finished work like the ones I’m showing here. I set out with several goals for these drawings:
Draw something that would make me want to read this book (clearly from a science fiction aspect)
Tighten up details from my original sketches, while embracing my somewhat chaotic style
Practice more subtle use of color tones (often my color work stays a bit too saturated).
The first two pieces started out as #spaceshipaday line and marker drawings that garnered a lot of compliments and attention through Twitter, Instagram, and on Facebook. My thanks to you all who’ve been following along. I appreciate the comments and compliments I’ve received so far.
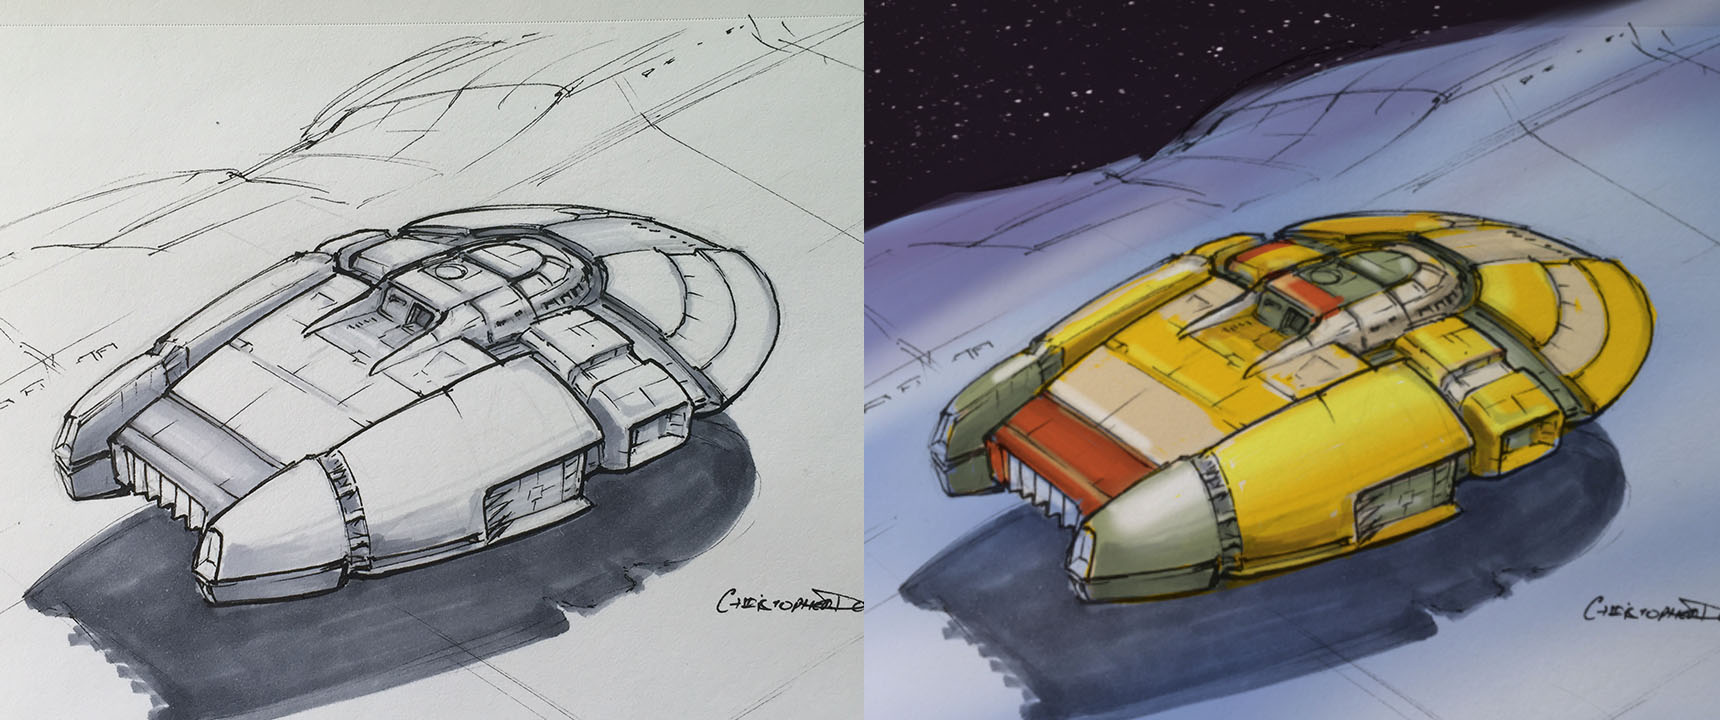
Original Sketch for the John Berkey styled ship
Color pass and extra detail using Photoshop and a Wacom Intuos Stylus
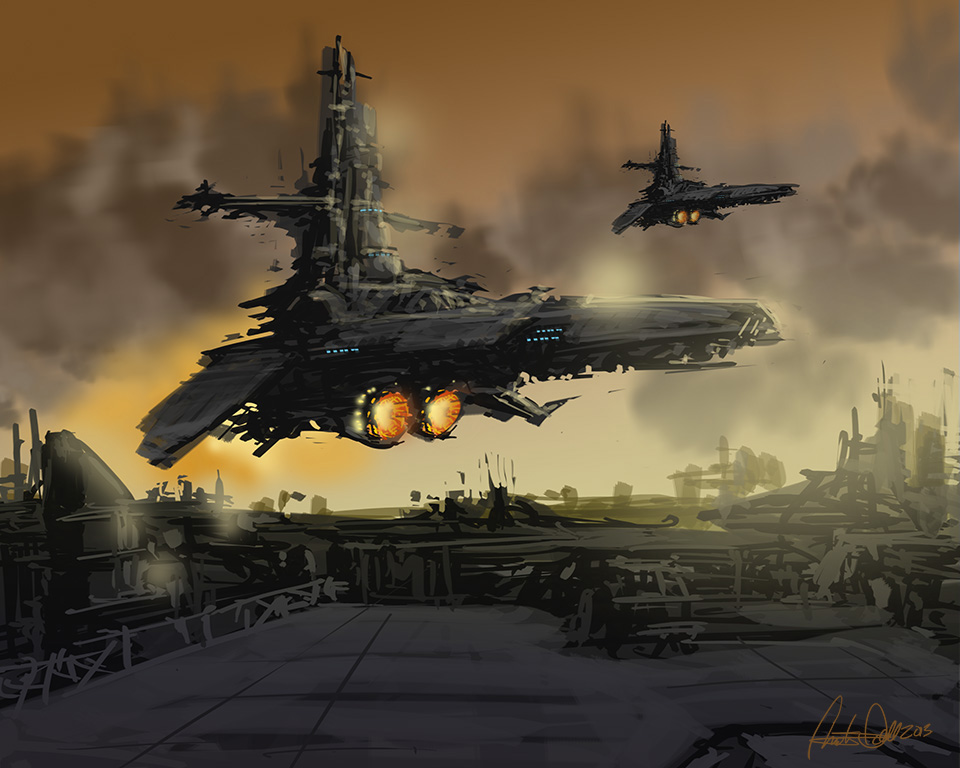
Clearly influenced by my love of John Berkey’s artwork, I wanted to draw something that had the same amount of crazy and wonderful details as his work. Since I’ve time-boxed my initial sketches (45 minutes or less), it’s actually tricky to get in a lot of detail especially if you’re trying to make it fit in some fashion with the rest of the ship. Overall I was happy with the concept, although some pointed out that it’s starting to look like the spaceship from the Coneheads movie, or maybe even Colonial One from Battlestar Galactica (the new show). Influences aside, my focus was more on the process.
The sketch was photographed and taken into Photoshop where I gave it a quick color pass (above). As of this writing, it is still unfinished, I’ll post the final in my Gallery.
Heavy Transport in a deep atmosphere. Rendered with Procreate on an iPad
This next image was also quite popular as a sketch, this time I stepped more into Chris Foss territory. I tried to leave the atmosphere fairly bland compared to the ship itself, although looking at it now I think it could be even more diffused. I realize I’ve left in many of the lines from my original sketch. To me this is still one stage away from being a final cover art piece and my focus has been on trying to achieve an emotional impact with the design and rendering.
Speed Chase – no sketch, entirely drawn with Procreate on an iPad
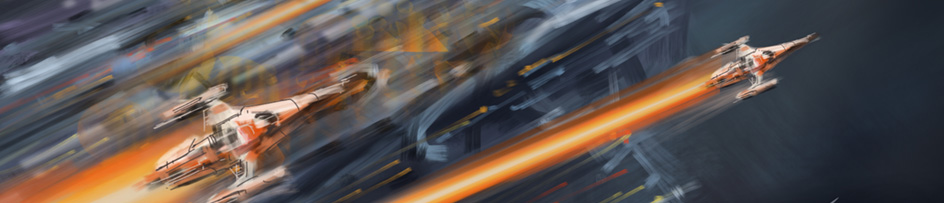
Finally there’s this fun piece that was created entirely in Procreate on my iPad. There was no sketch. Sometimes everything comes together all at once and it all becomes a joy to witness. This is one of those moments where I just let my hand run free with only my artistic lizard brain at the controls. I don’t know of any other way to describe it but everything from the color, composition, and the frenzied style seemed to fit together nicely without a lot of effort. I would be inclined to read this book if I saw it in the store.
One of the benefits of using a great app like Procreate is that it kicks out a video of your entire process. As part of my own skill-building exercise, this particular piece was an exploration in creating form and mood using the light and color from the environment.
Here’s a compressed 2 minute video showing the drawing from start to finish. Enjoy!
I am now taking pre-orders on a new class, How to Draw Starships 101. This is the first in a series in my new Space Art Academy. I’m offering this course at a steep discount so hurry before this offer runs out. I will teach you all the essentials, and more, for drawing all of your Spaceships any day of the week!
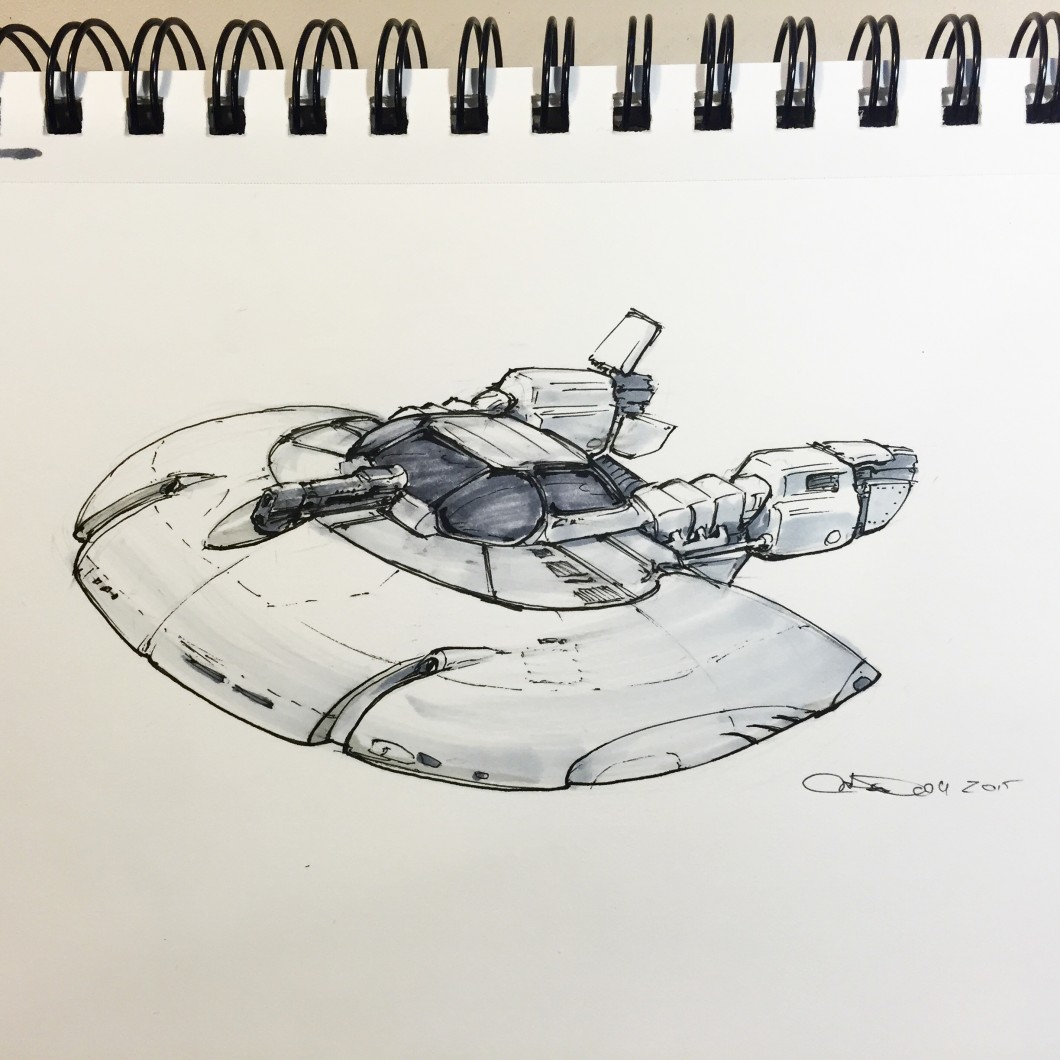
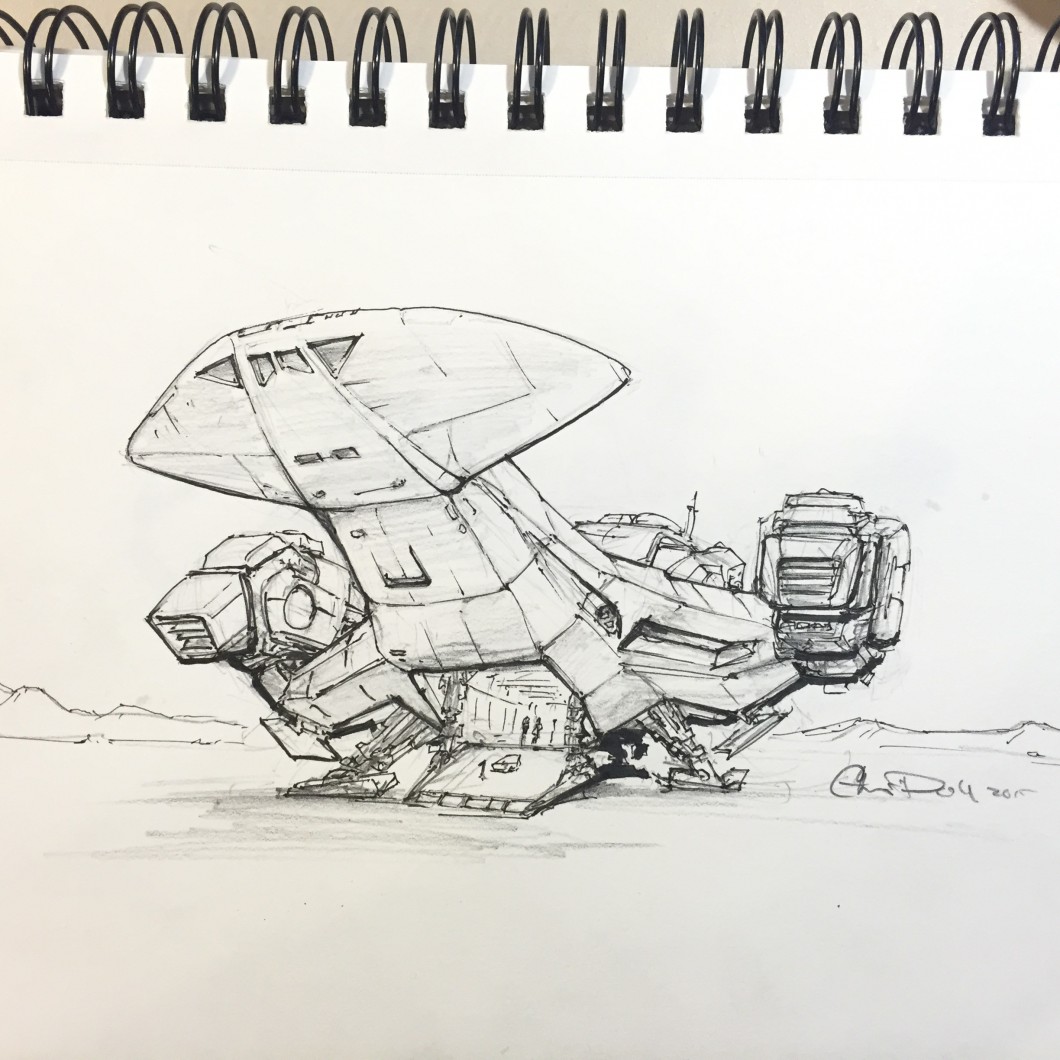
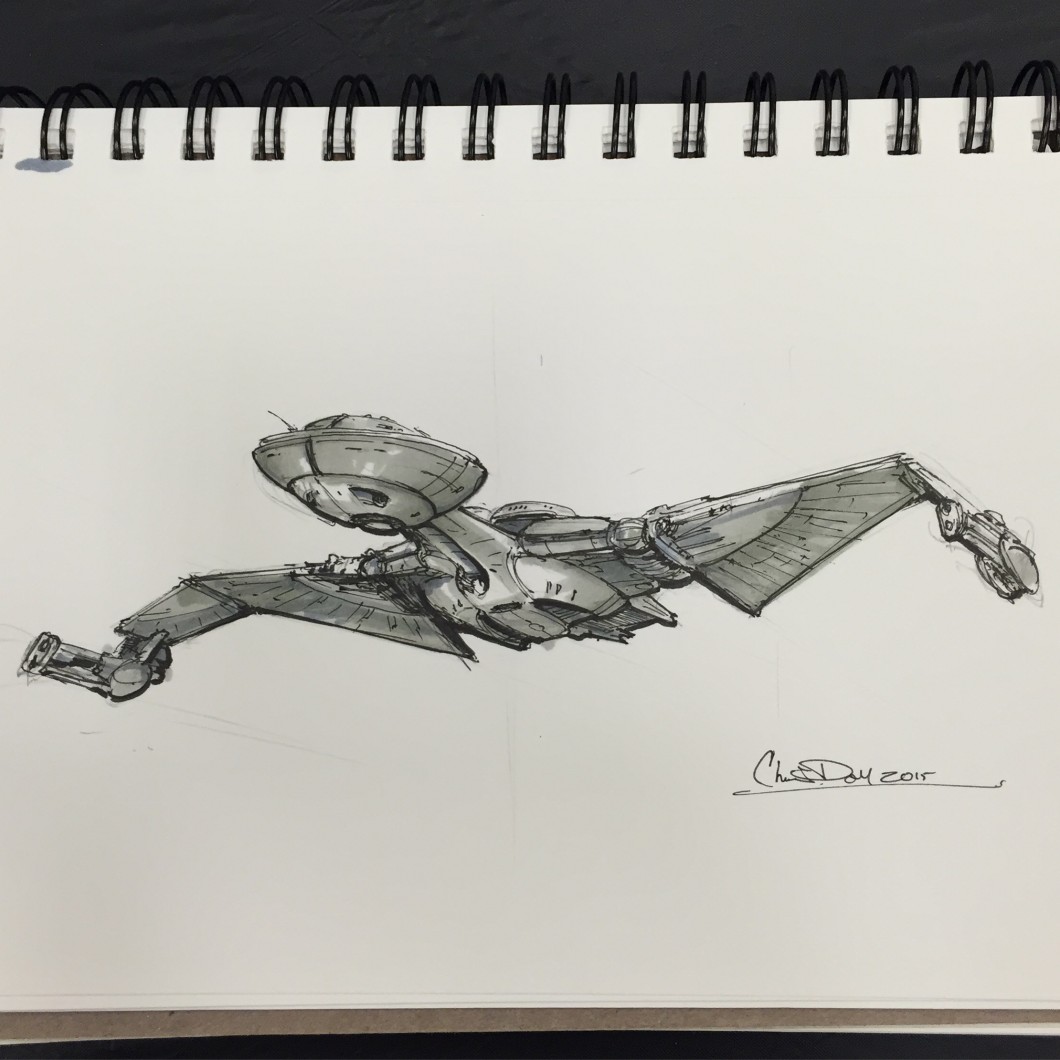
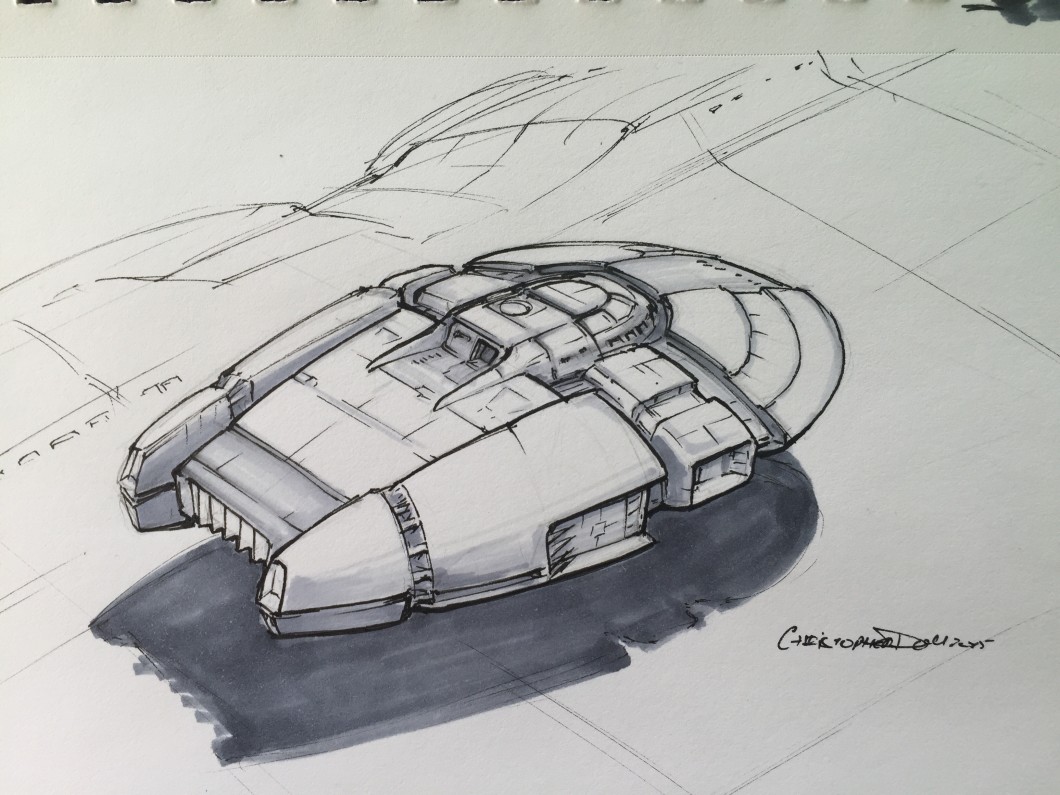
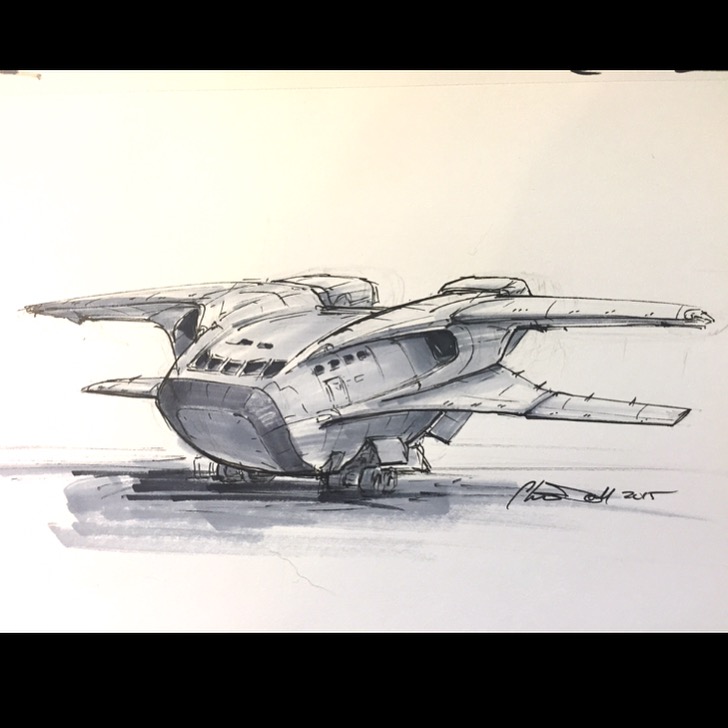
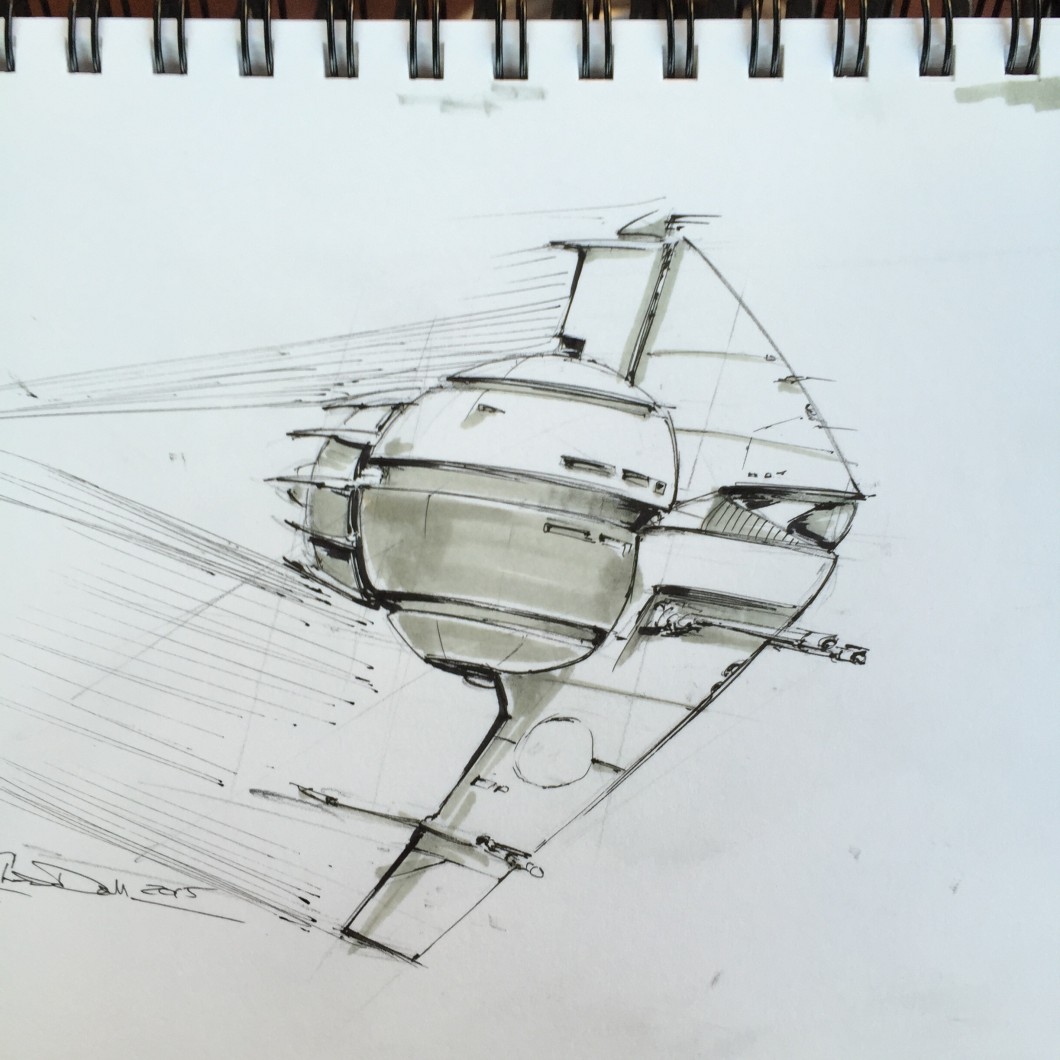
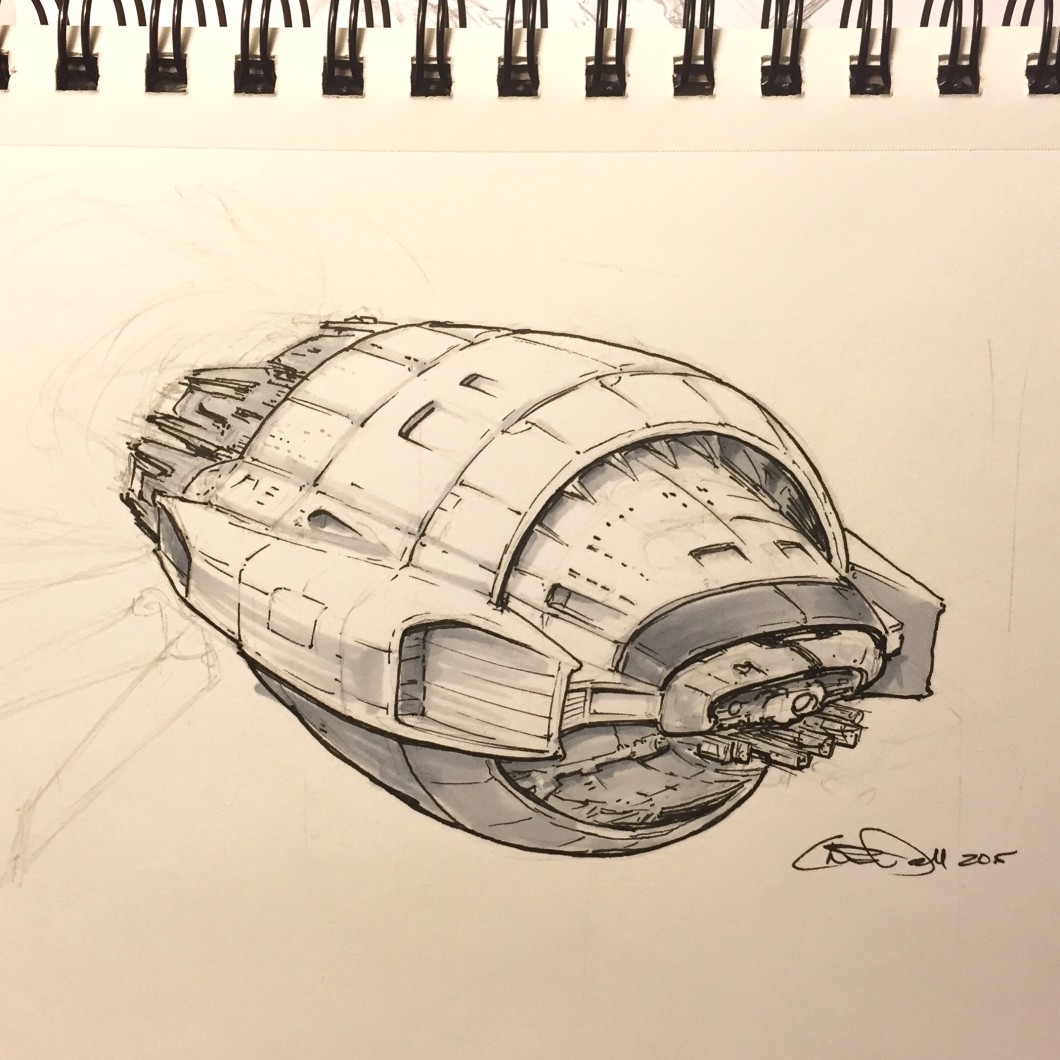
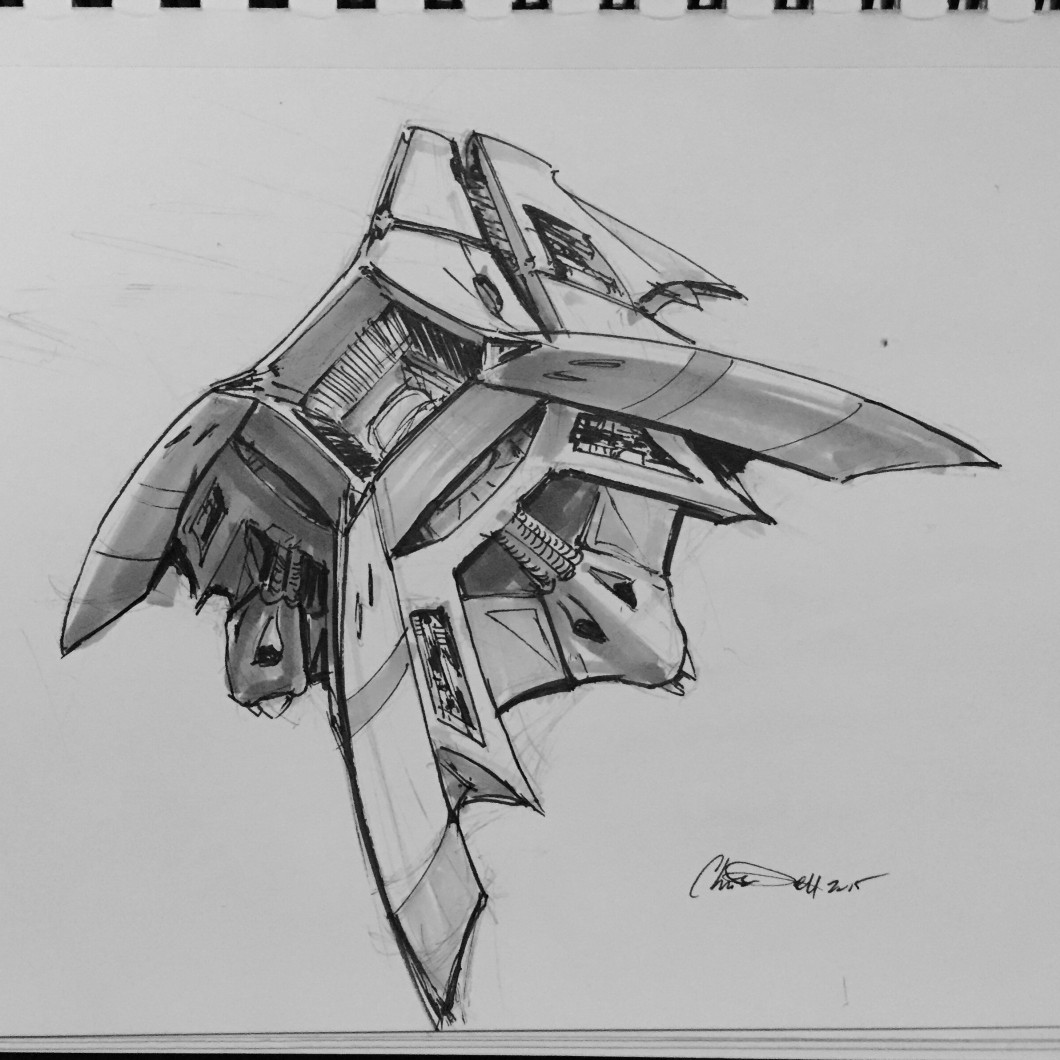
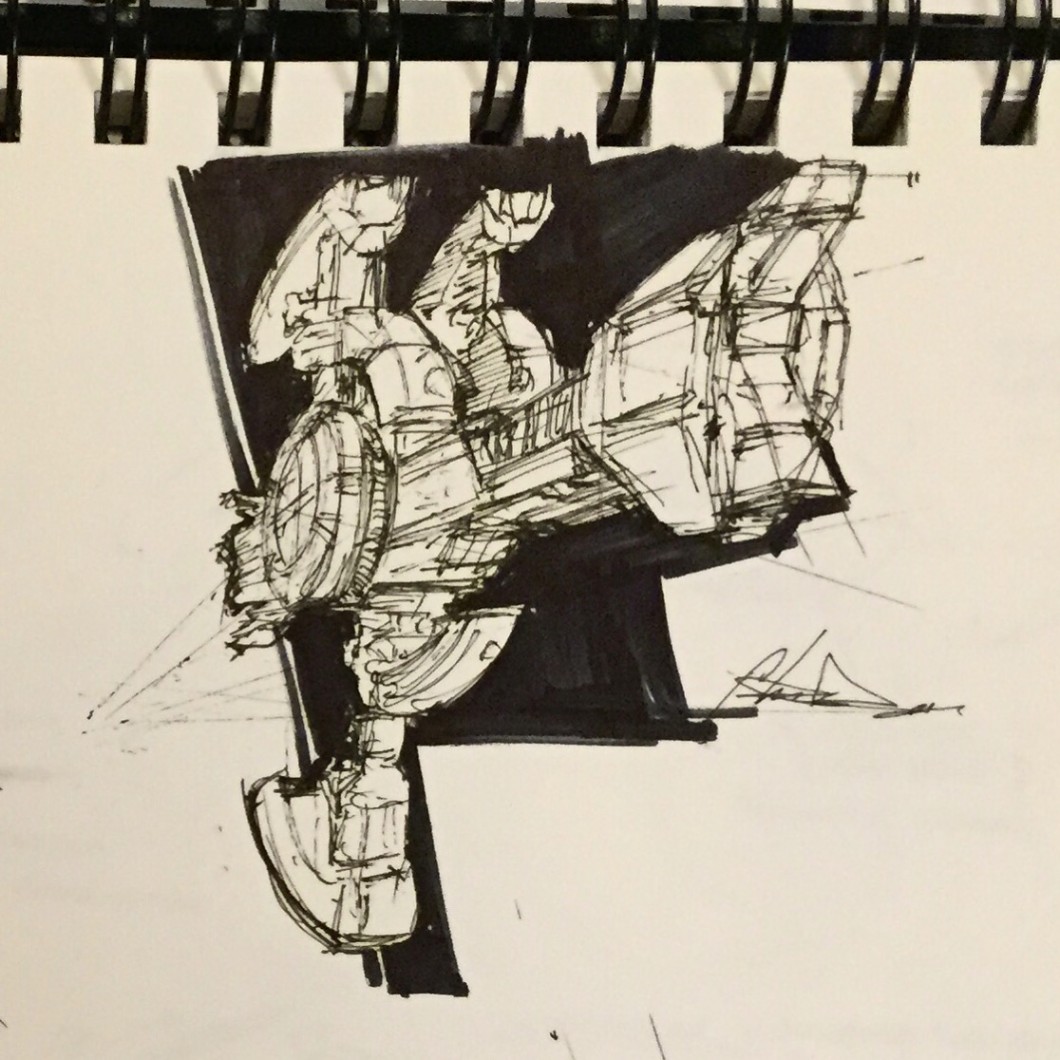
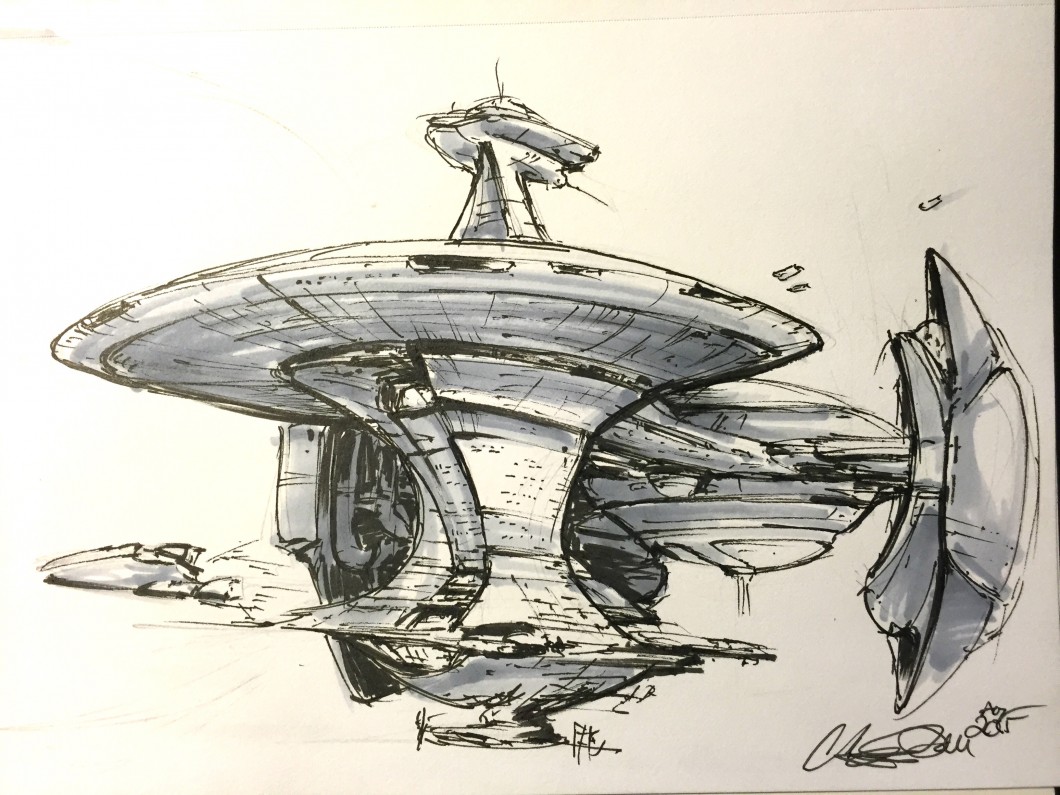
Recently I discovered the #spaceshipaday Twitter thread started by artist and designer, Jeff Zugale. Jeff was drawing his ships the same way I’ve been drawing my own, pens and design markers in a 5.5″ x 8″ ring-bound sketchbook. Each sketch has a 45 minute time limit. His posts garnered so much attention they were featured on Kotaku.
Drawing Spaceships
I’ve been drawing spaceships like this my entire life. My notebooks and sketchbooks are full of them. It used to drive my teachers nuts whenever they’d grade my papers only to see them surrounding by little spaceships and science fiction scenes.
Chris was always drawing little spaceships all over the place. ALWAYS. It’d be annoying if he wasn’t so damn good about it…
– (Annoyed Co-Worker, name withheld)
Drawing is one of the reasons I pursued a degree in Industrial Design, which amped up my ability to draw these scenes with better tools. To this day my notebooks appear to be written in an alien, heiroglyphic language composed of spacecraft and scenes. But I never really shared this with anyone, beyond a few close friends. With nothing to lose, I decided to jump on the #spaceshipaday bandwagon and join in the fun. Thank you, Jeff for starting a cool thread.
My Spaceship-A-Day Process
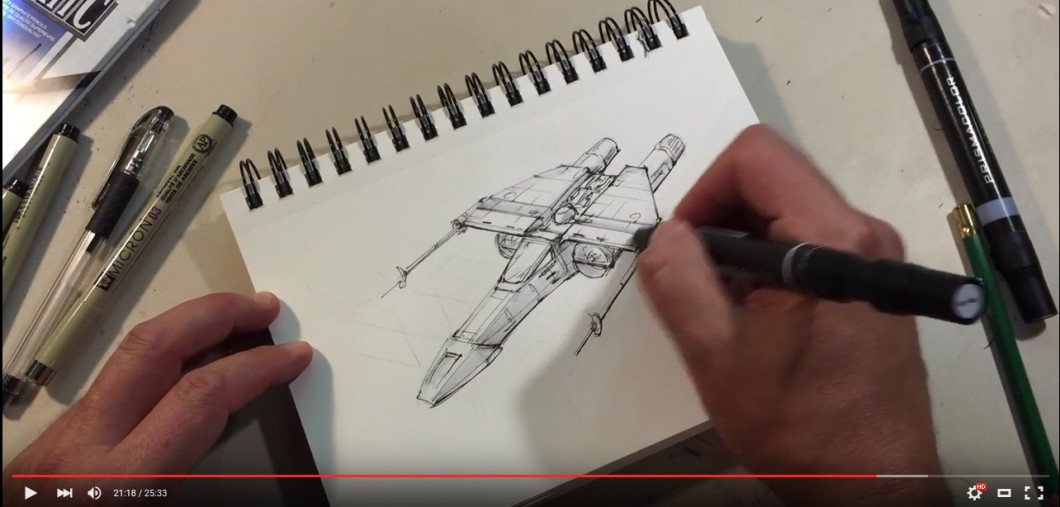
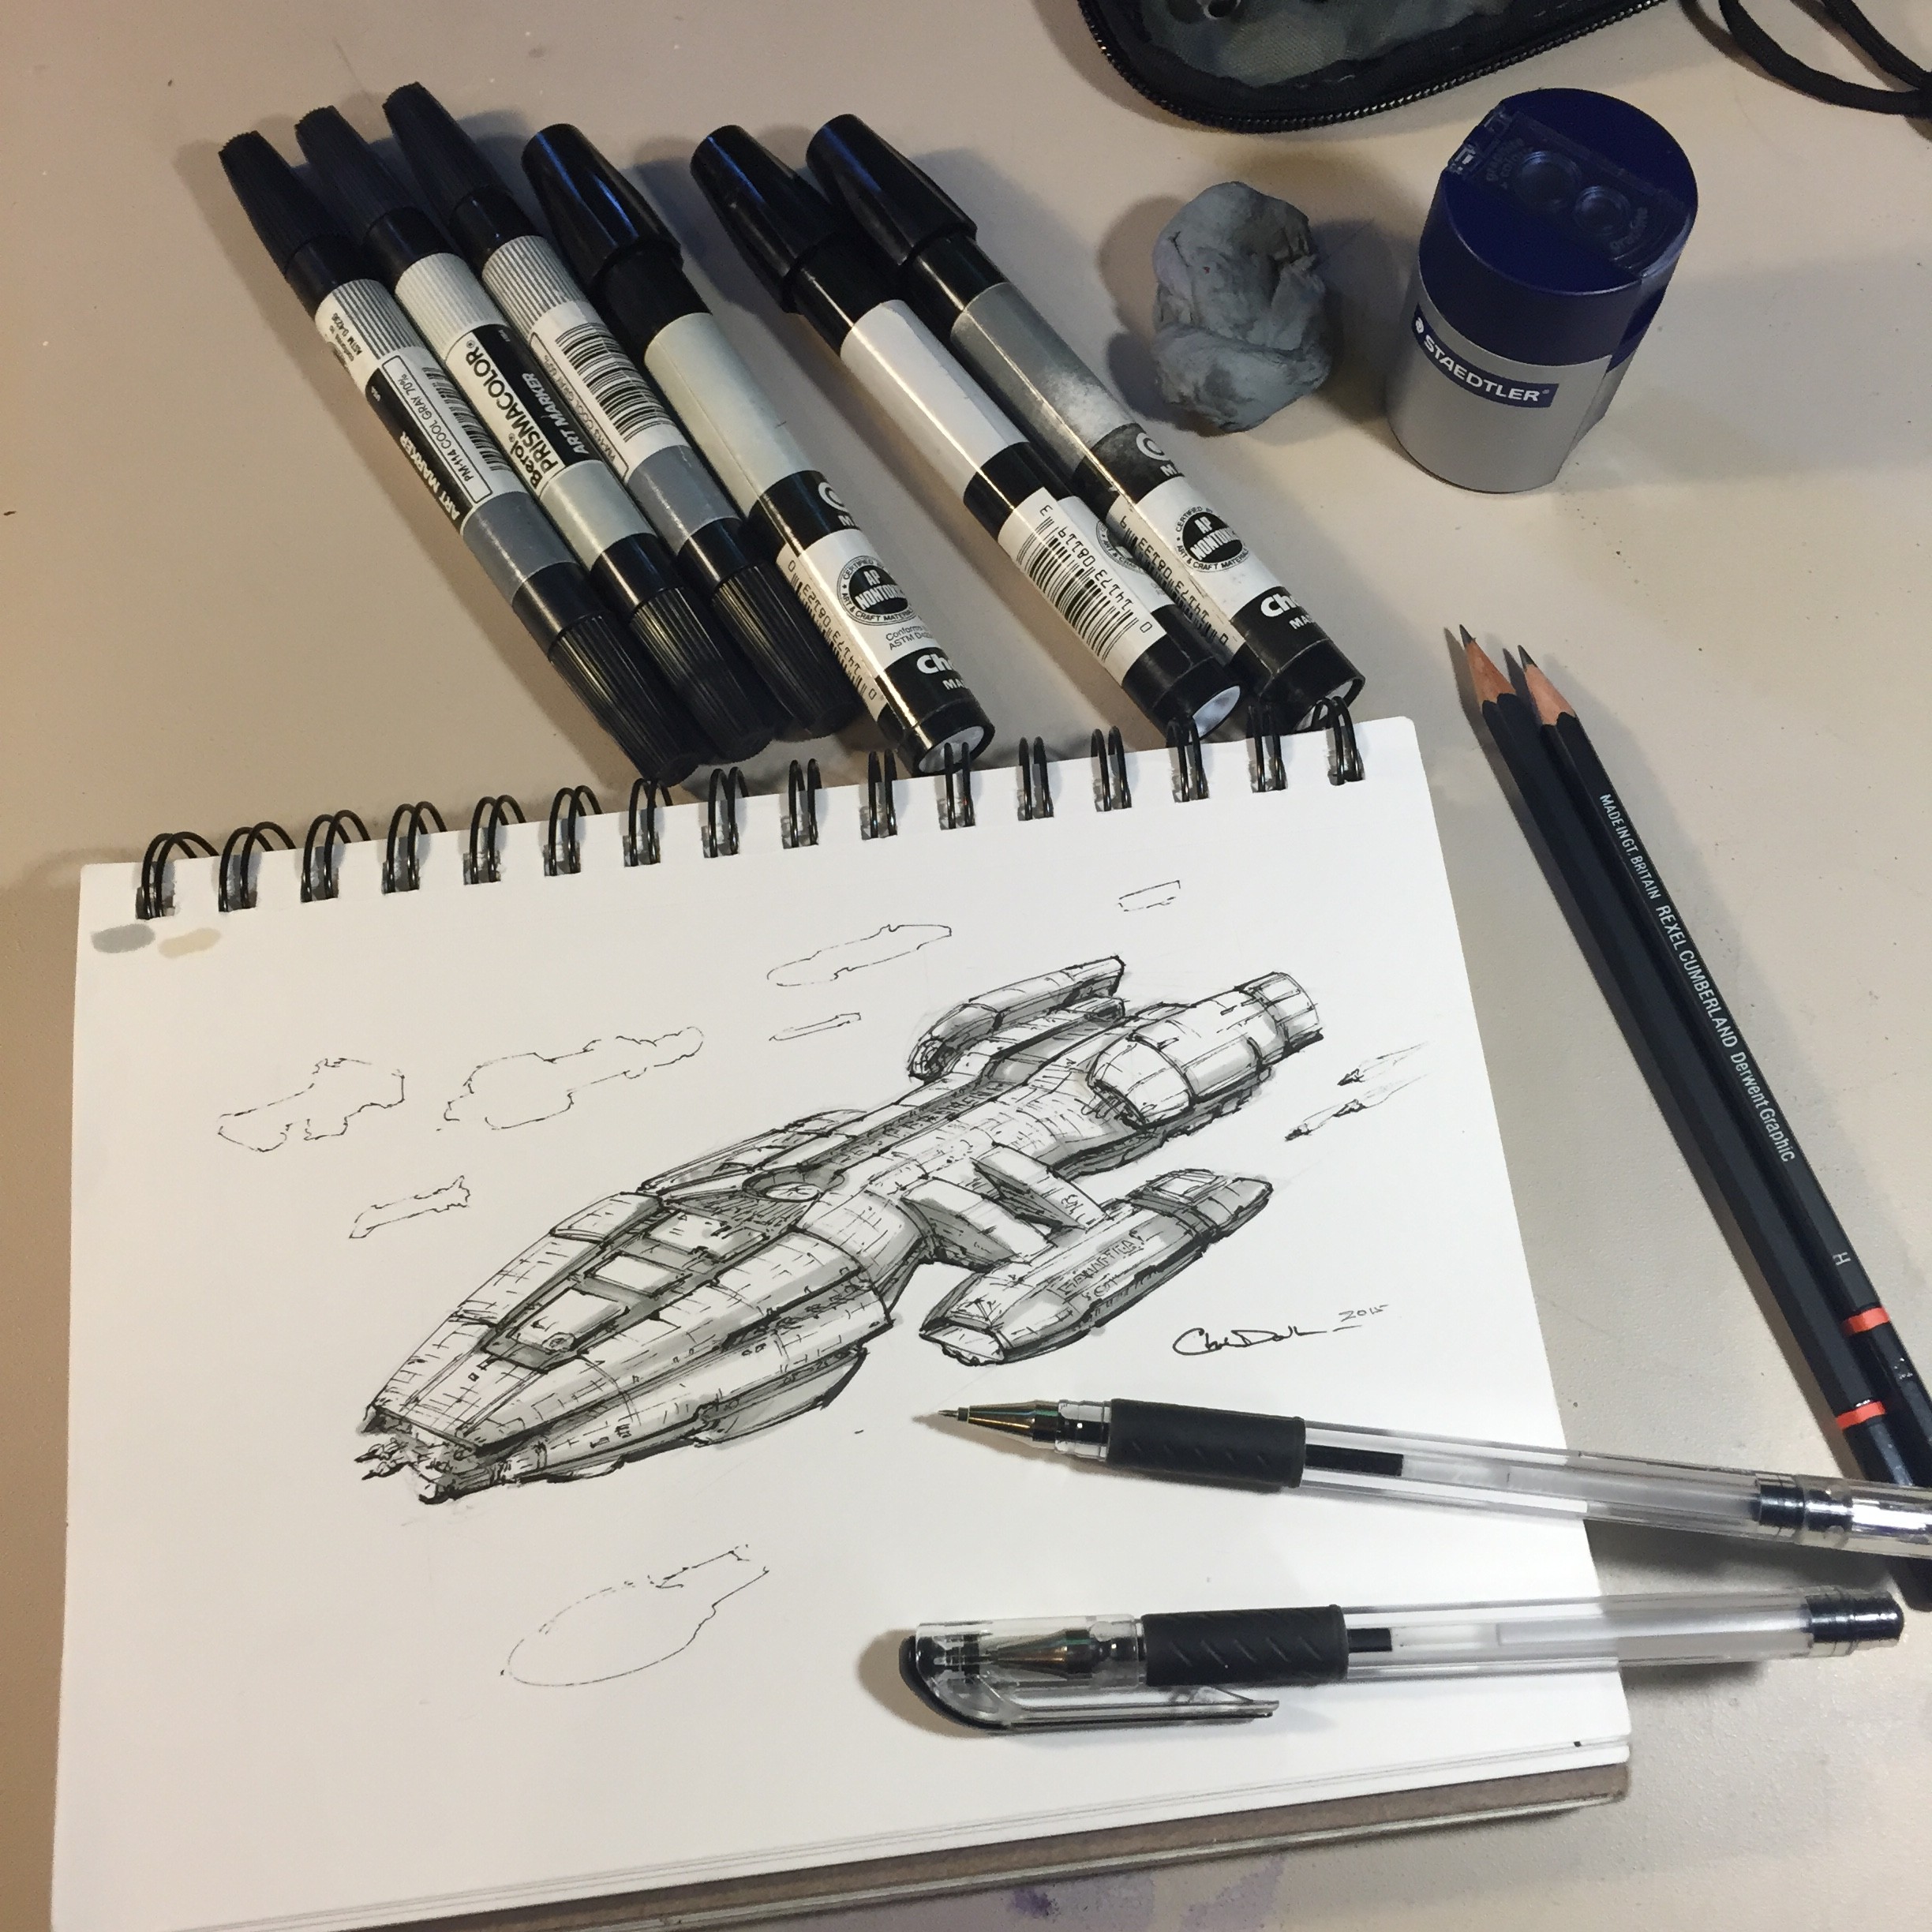
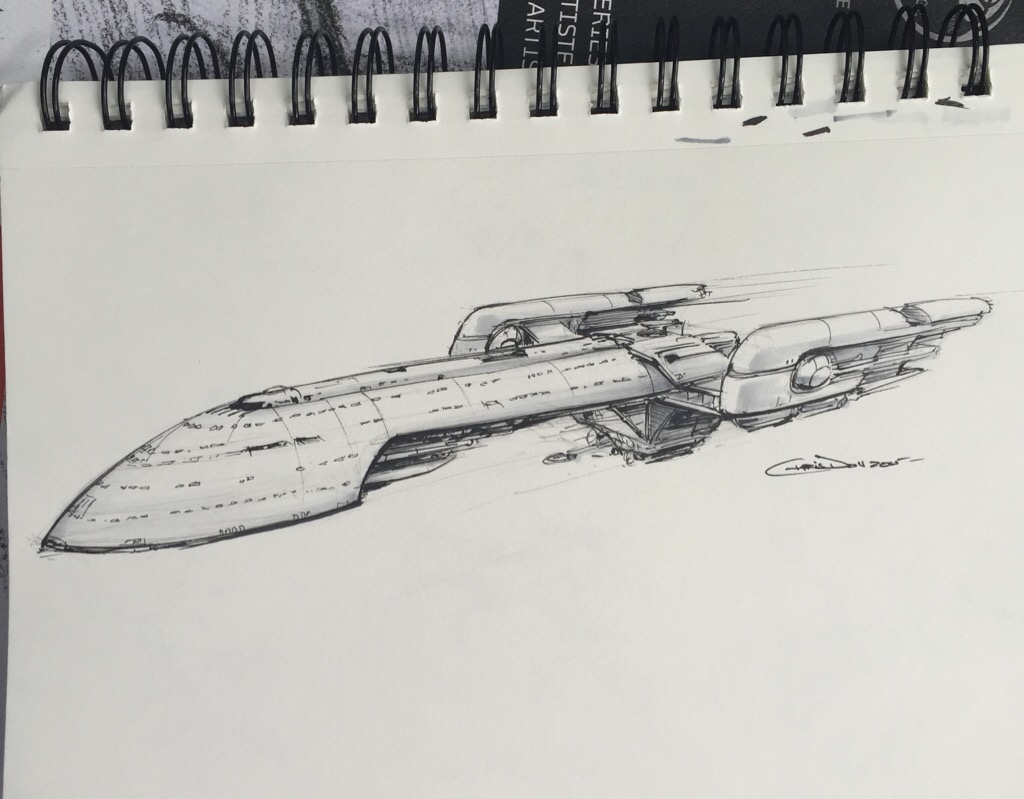
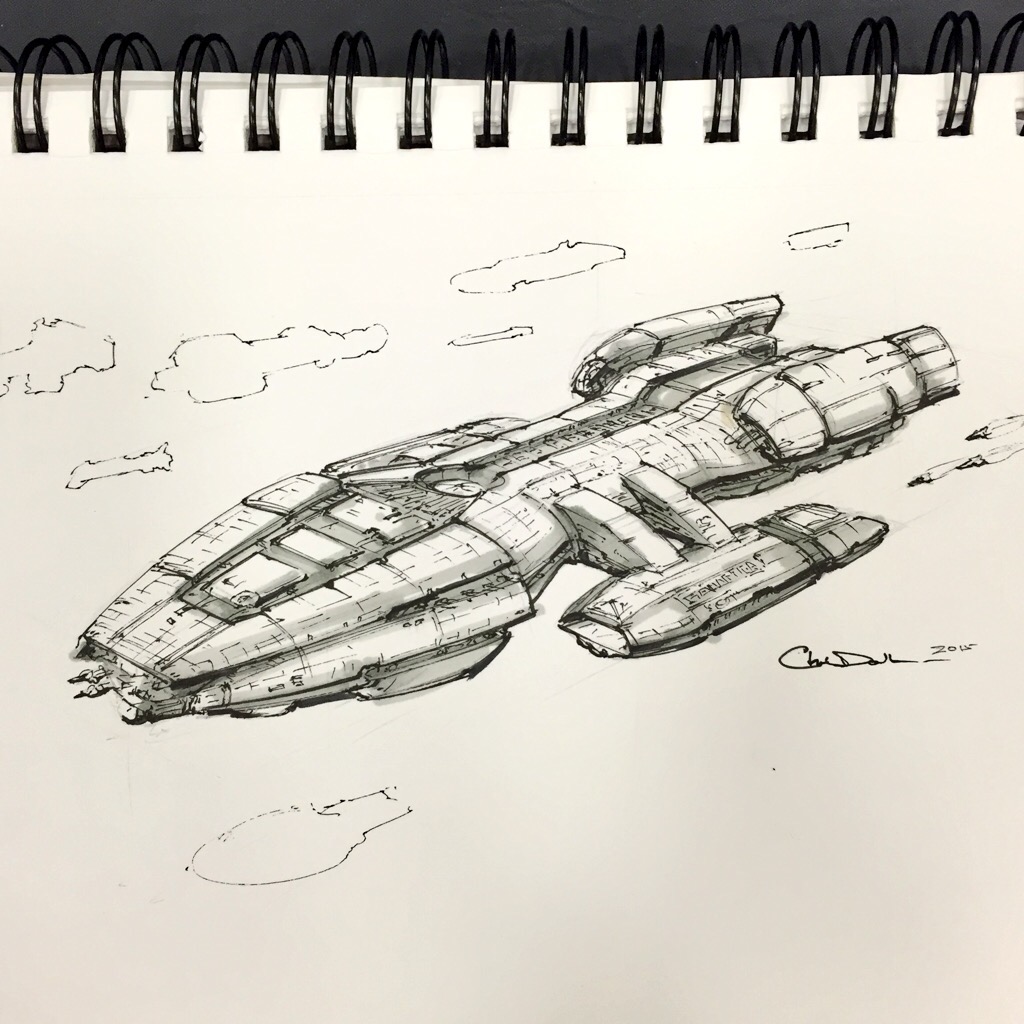
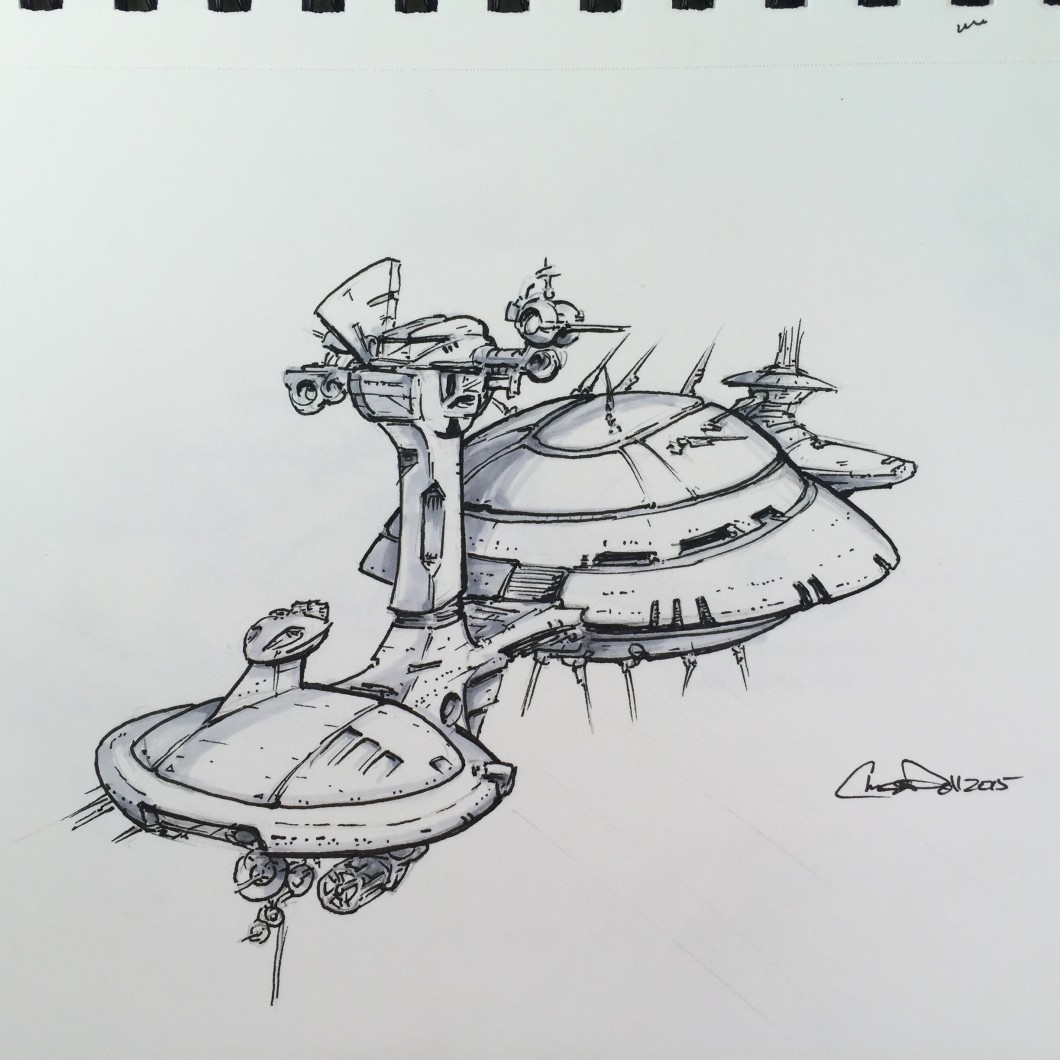
Like Jeff I’ve kept my sketches to a 45 minute time-limit, but I’ll admit some of mine have run to 60 minutes. Sometimes I draw in the rough shape with 2H pencil, then go over it with several fine-line ink pens (.03, .06, .01 sometimes). Next, a couple of shading passes with light gray design markers (20%-40%, sometimes 70% for darker details). If needed I’ve used a brush pen for more painterly ink tones.
I’ll begin posting my own here on my site, but you’re welcome to follow my Twitter account for active updates. And let me know in the comments if you’d like to see a video of the process.
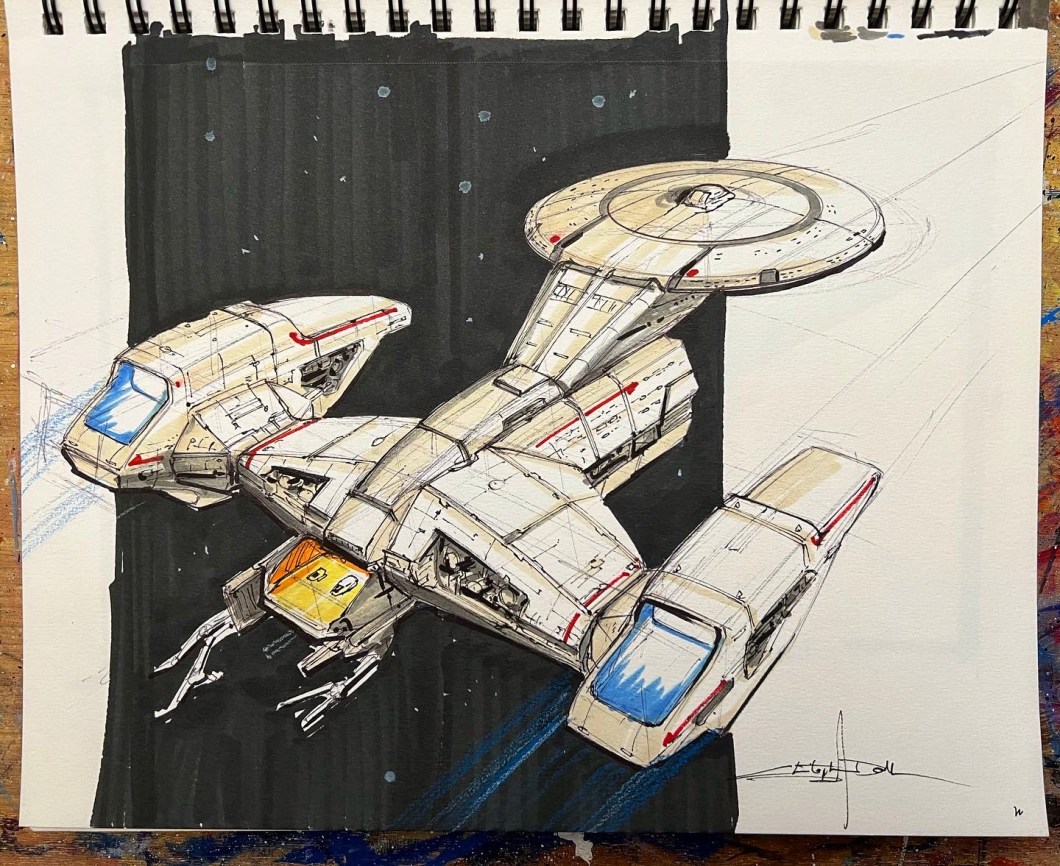
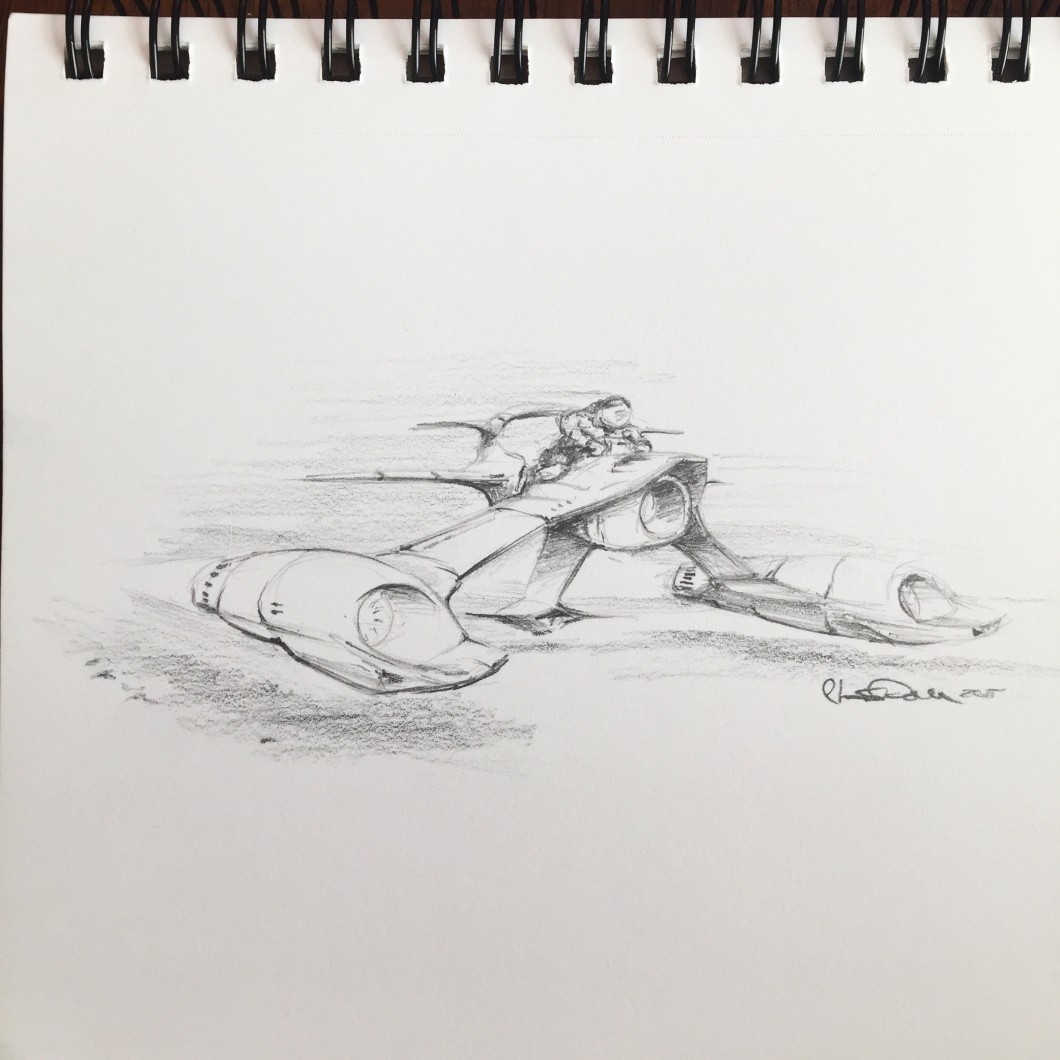
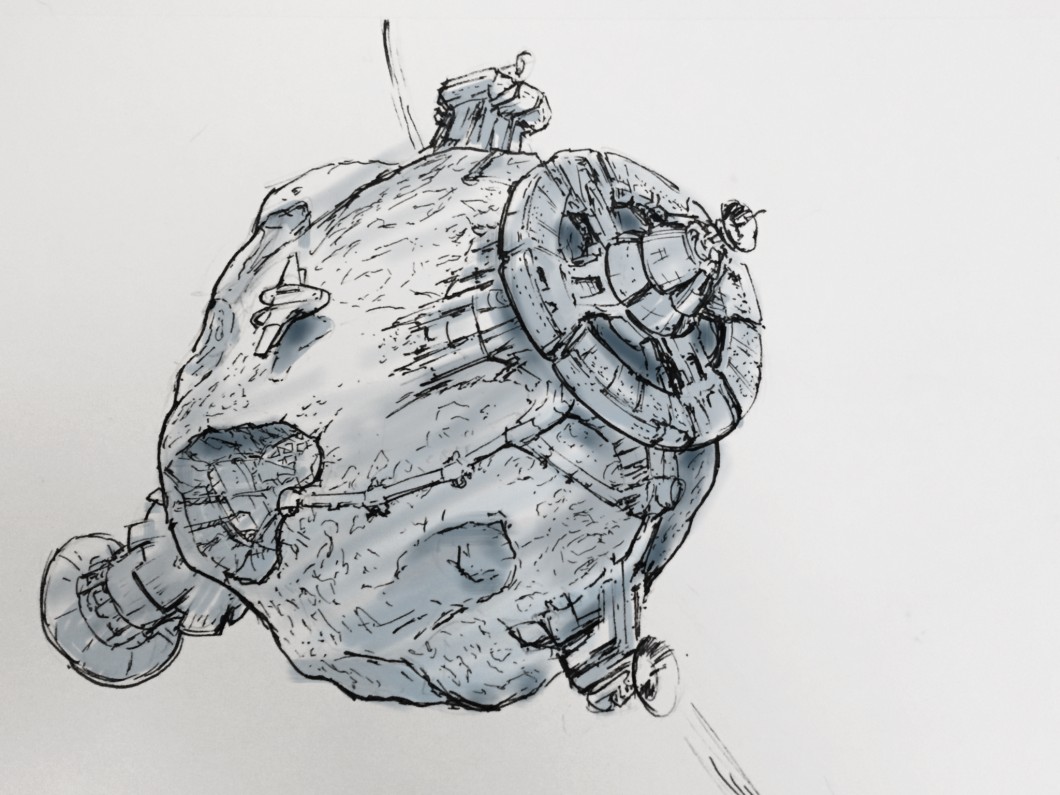
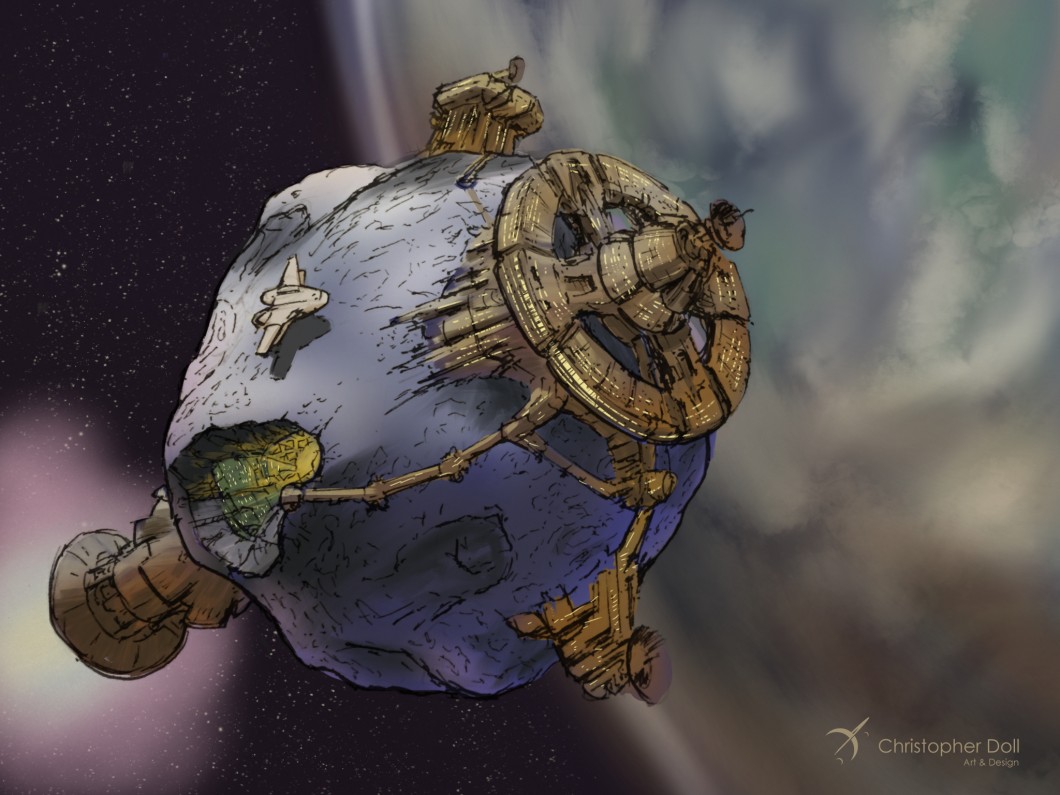
Taking passengers on voyages through the systemIt’s a skiff, with gunsMy mashup of classic Ron Cobb designs and possible sister class to the Firefly transportsCommissioned by General Martok, this Bird of Prey has significant advantages over the previous modelsMulti-role transport and emergency rescue vehicleSome kind of orbital transport craft, multi-wingWinged, orbular space fighterCapable of refueling by skimming the atmosphere of the gas giants, this frigate maintains the peace in the outer systemShip repair and tug vesselMy take on the old GalacticaJust following a vibe on this one. Heavy Moebius influenceAfter arriving at their destination star system, the passengers grafted the remains of their colony ship to a local asteroid. This provides them with sufficient raw materials and fuel to stage orbital landing and support.Interstellar transport with variable wing Alcubierre Drive fieldsStar Trek meets John Berkey
Adding Color
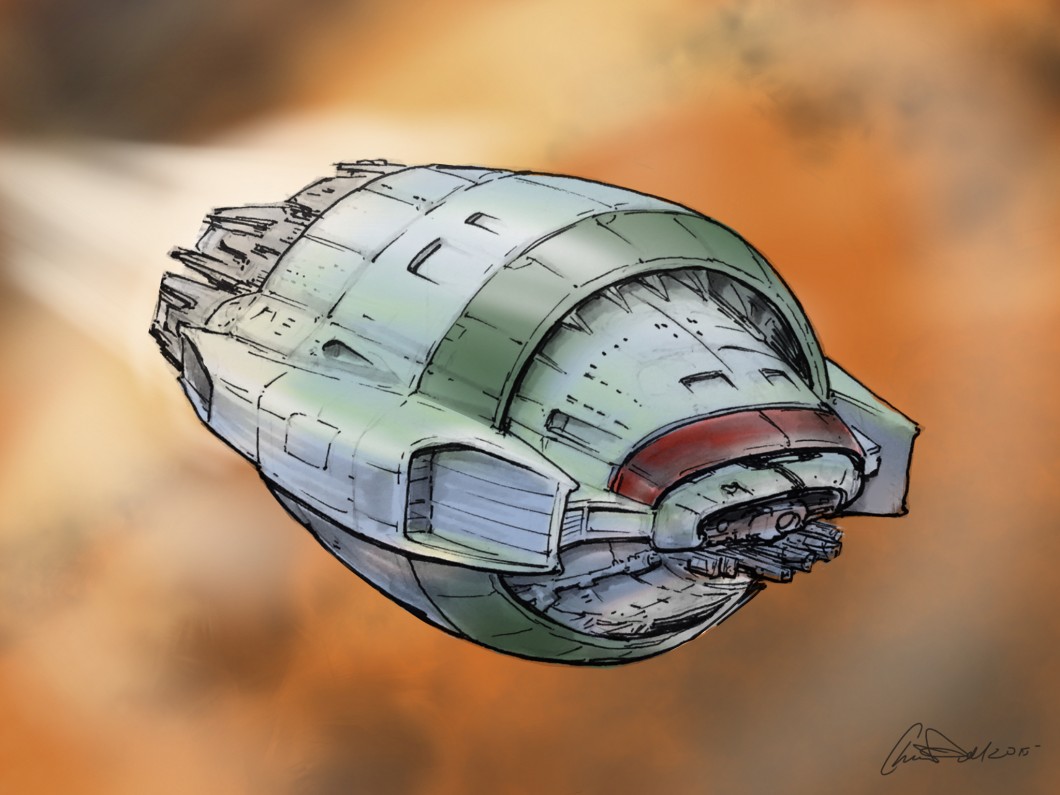
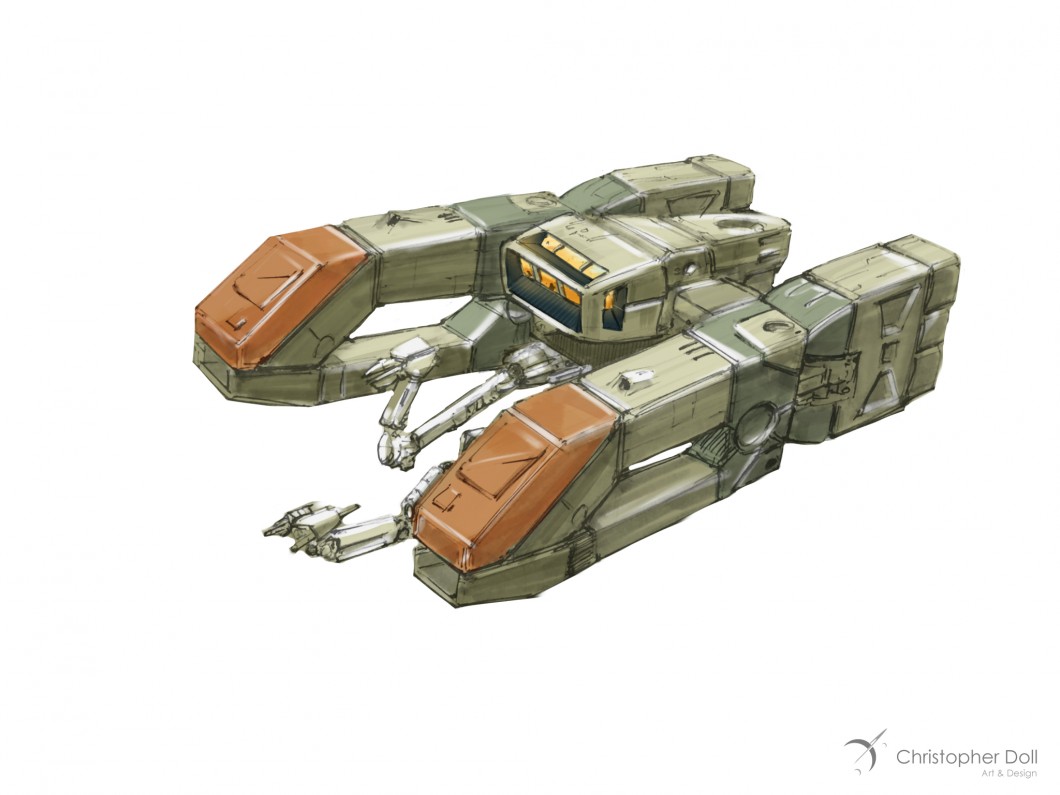
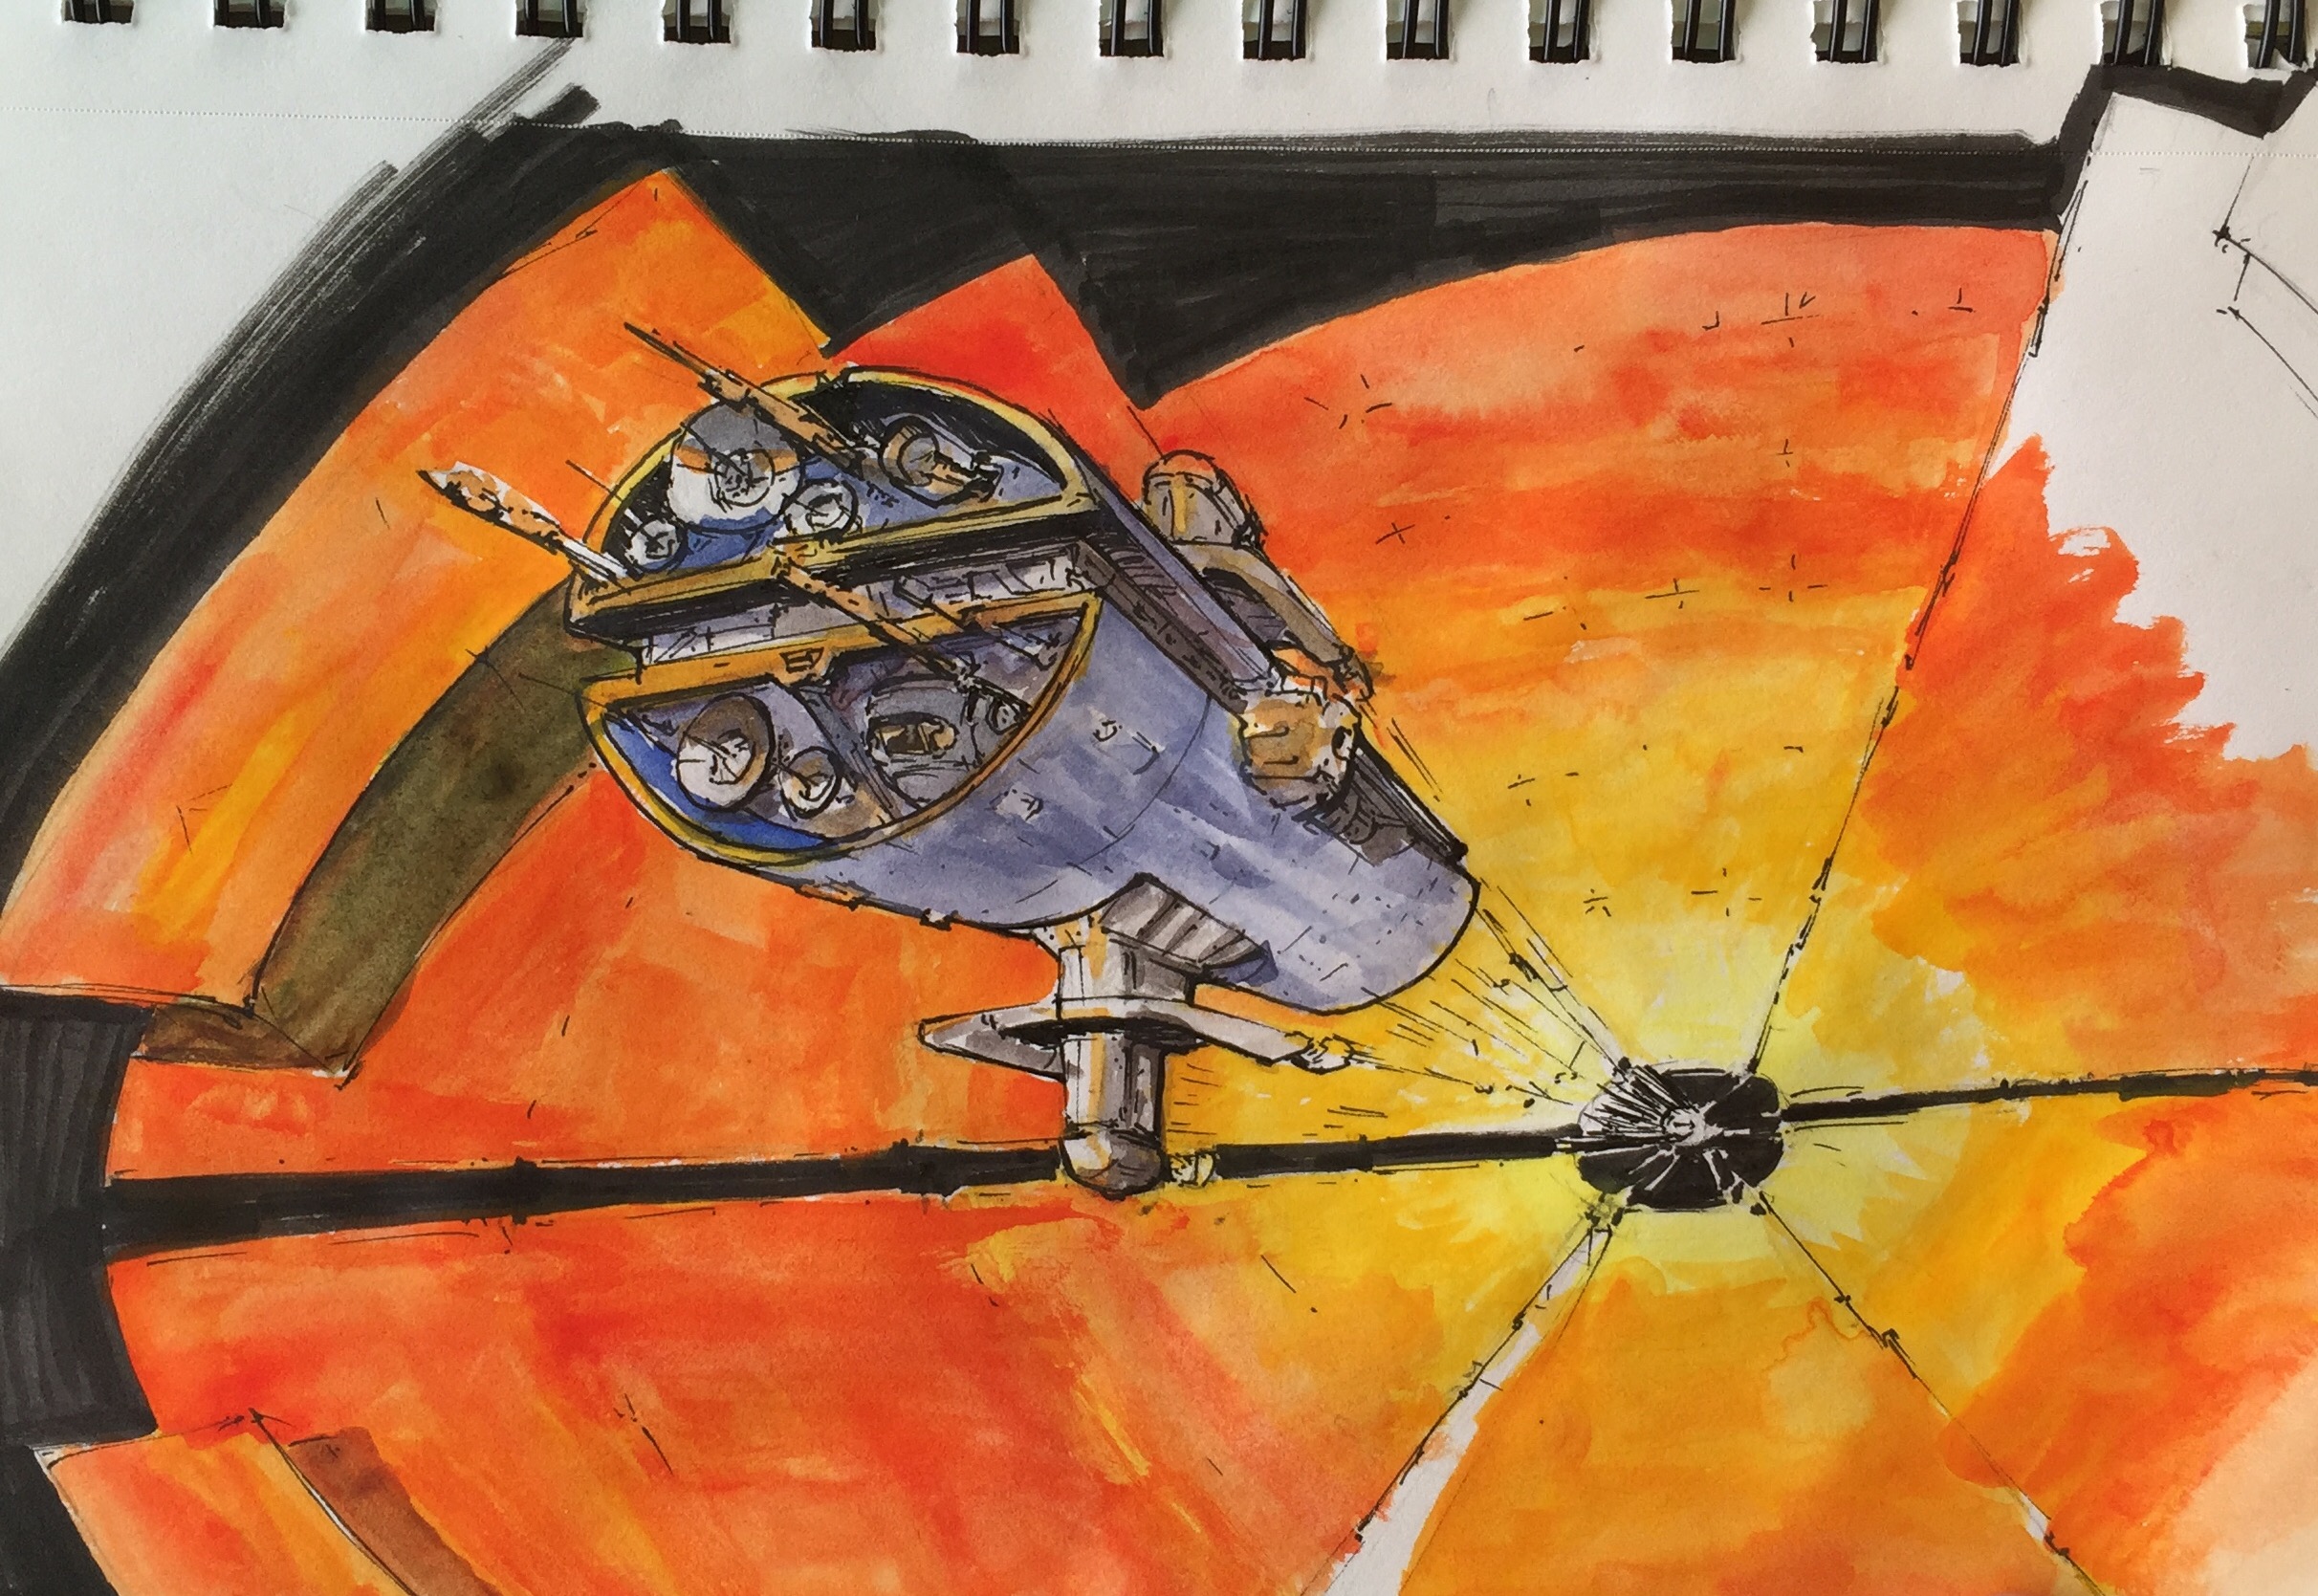
For some of my drawings, I’ve taken them into Procreate on my iPad so I can add some color. Again I try to keep this to a 60 minute time limit, as the goal is to have a colored sketch or mood board view of the spaceship. Later on I will take some selections and do a fully rendered final piece.
I added the hints of a Jovian atmosphere, engine plumes, and shockwaveStraight up color renderingWith background. Procreate on an iPadAn homage to production design art for ALIEN. Digital – Procreate on an iPadAlmost like a cel animated featureA bit more technical, like a Ron Cobb drawingAfter arriving at their destination star system, the passengers grafted the remains of their colony ship to a local asteroid. This provides them with sufficient raw materials and fuel to stage orbital landing and support.
This is also an exploration in tools, like in this case where I tried out a portable water-color set.
My Spaceship in Lego
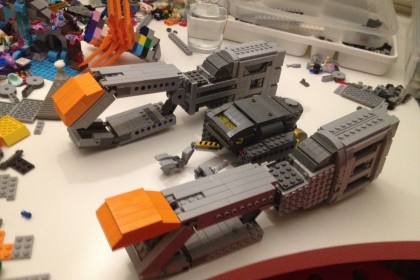
Daniel Fortine, a fellow UX Designer and friend of mine, is very skilled in the brick arts. He really liked one of my drawings, and he’s gone ahead and started building it in LEGO:
These drawings are part of a long-term strategy I’ve been following. For the last three years I’ve been practicing the necessary skills to be a professional artist, specializing in space, astronomy and science fiction art. Mostly it’s been an exploration of tools, media, and processes (including both digital and traditional methods). I’m also beginning to gain exposure as an artist, so I guess to some degree it’s just me sharing some cool spaceships with the world and saying “Hi, I can do this”. Granted if you’re the sort of person who needs a spaceship design, feel free to reach out.
Author Becky Chambers is preparing to release her first Science Fiction novel, The Long Way to a Small Angry Planet. Becky contacted me Spring of 2014, looking for cover art for her book and the finished cover is finally revealed.
While clearing off some space on my iPad, I found a bunch of sketches that I’ve never posted. When I sit down to paint, I always warm up with some sketches. Doesn’t matter if I’m working in a digital format or traditional media. The warm up helps me get into the groove.
Sometimes these sketches take on a life of their own and become finished pieces. Other times I just lost interest or the idea didn’t quite gel the way I wanted. And some of these were merely an exercise to try out a style or trick. As I look back over the last year, I’ve probably spent too much time in the quick sketch stage but it’s helped me knock off the rough corners here and there.
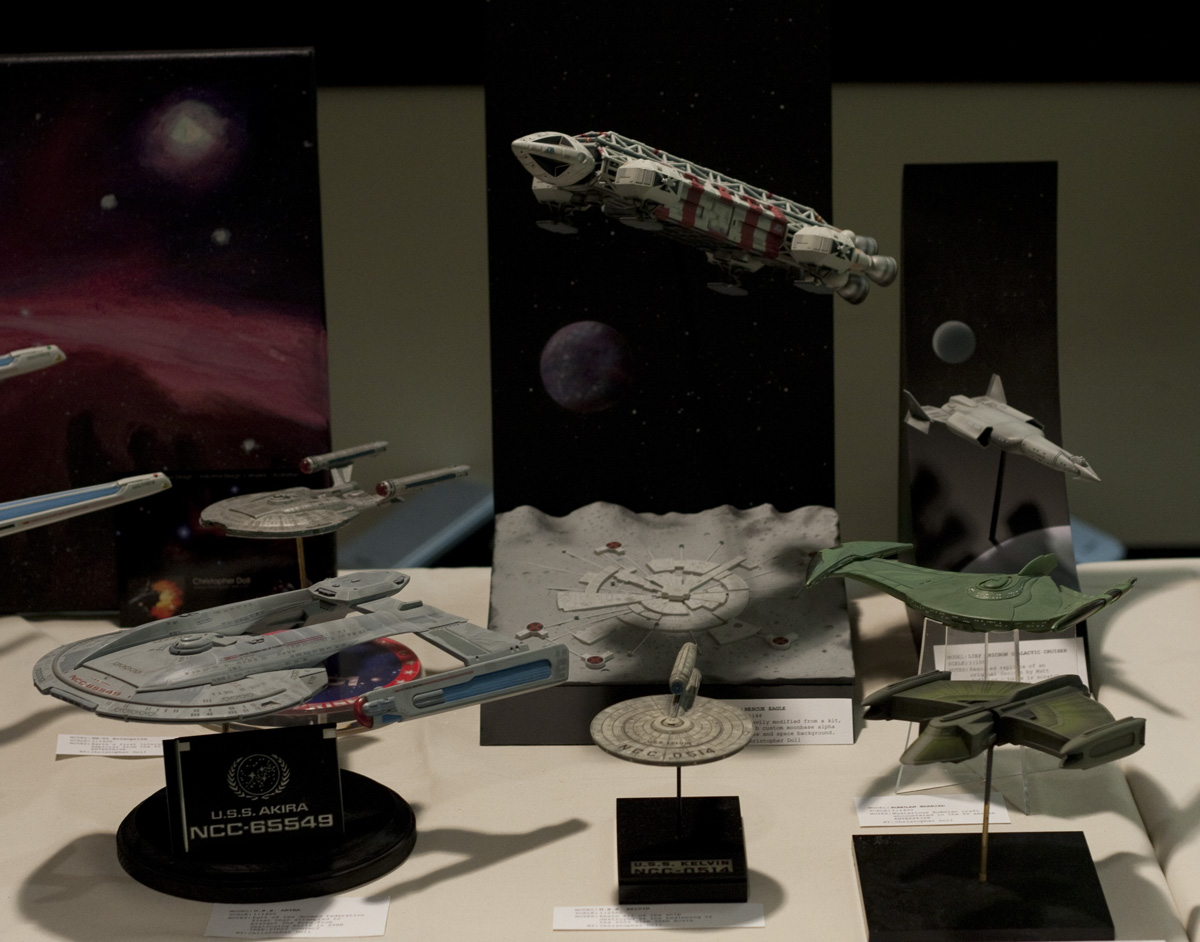
Last weekend Emerald City ComiCon hosted their first scale model show, Model Mayhem 2013, here in Seattle. My thanks go out to the folks who run Emerald City ComiCon, and to my fellow model builders from the Galaxy Hobby Science Fiction Model Club for making this wonderful event happen.
The show almost didn’t happen, as the original organizer was unable to carry out the preparations. At the last minute I picked up the task as we already had space dedicated to the show. Initially this was to be a contest for area modelers, but given the remaining time we elected to present our work as a display-only. This format has proven quite successful for the Seattle IPMS Club (International Plastic Modeler’s Society), and allowed us to bring in a large number of our kits.
Lots of visitors
Based on our own off-the-cuff counts, and this is a conservative estimate, we think we had at least 5,000 people come through our room this year. That’s quite a large number for the scale model community, and it was likely far more than this.
We were rather impressed with the number of people who found our little room – far more than I can remember seeing in some of our previous shows. It was the largest Emerald City ComiCon to date, and unlike many of our model-themed shows this ComiCon crowd brought us a lot of people who may not be aware of our hobby. And among them there were those who fondly remember building models when they were young.
Show me the models!
Our display featured a great cross-section of the models we build – spacecraft, vehicles, figures, busts, and even a carnivorous plant. A perfect way to demonstrate a wide range of subjects. John, Preston, and Paul also brought kits to work on during the show, which proved to be a popular demonstration for the crowd.
I mostly build spacecraft from science fiction movies and shows, and I brought every finished kit I had that didn’t need extensive repair. This is one of the unique aspects of a model display show like this, you get to see a lot more of everyone’s models. With a contest, participants usually just focus on their latest projects.
The most common comments I had on my models were:
“Did you sculpt these yourself?” – More a question about the spectacular figures on display, and by far the most asked question of the day. Most of the figure kits were garage kits – sculpted and cast by ambitious artisans, often far more elegant than a mass-market figure. They require clean-up and painting, sometimes a more robust stand that better features the work. And our club has some top-notch, award-winning figure modelers. Very impressive indeed.
“I built a model of the Enterprise as a kid, but I thought it was larger” – The only classic Enterprise models I had on hand were smaller (and much more accurate) kits produced ten years ago by Polar Lights, not the original AMT Enterprise which actually is larger.
“Are these for sale?” A question that caught many of us off-guard a bit. The answer is “Yes, but the price may be higher than most people are willing to pay”
“SPACE:1999! I remember that show!” My Rescue Eagle and Moonbase Alpha model drew a lot more comments than I’d anticipated. Still one of my favorite science fiction TV shows from the 1970’s, it was fun to see how many people also had fond memories. Far more people mentioned it than I’d anticipated.
“AUDREY II!” – My little Audrey II was a crowd-pleaser. And such a simple kit really
Next Year – Model Mayhem 2014!
We’re looking forward to expanding the show next year to include a full-on model contest with prizes, a make-and-take for the kids (very popular in our other shows), and more hands-on demonstrations.
For those of you who visited Model Mayhem 2013, I’d like to thank you on behalf of the Galaxy Hobby Model Club, IPMS Seattle, and of course the folks who run Emerald City ComiCon. We had a great time showing off our hobby and hope that our excitement was shared.
If you are interested in learning more about the Galaxy Hobby Science Fiction Model Club, you’re welcome to attend our regular meetings which are open to the public. We meet on the second Thursday of every month at Galaxy Hobby Shop in Lynnwood (check the link for location and details).
Did you visit Model Mayhem 2013?
If you dropped by to see Model Mayhem 2013, thank you! Tell us what you liked and didn’t like!
I recently received an iPad3, a thoughtful and quite surprising birthday gift from my lovely wife Stephanie and our daughters Allison and Jessica. That I’ve not yet owned a tablet of any flavor has more to do with shrinking gadgetry budgets, not from a lack of interest.
I’d convinced myself that drawing on an iPad wouldn’t be nearly as rewarding or effective as the wonderful (yet very expensive) Wacom Cintiq line, which I also have not tried out. How wrong was I? Wrong enough to wonder out loud “why didn’t I get one of these sooner?”
I quickly tried out a few of the more popular drawing apps, settling on SketchbookPro and Procreate. Both are powerful enough to let me cut loose with some speed paintings, which allow me to learn the tools quickly while not getting bogged down in fine details that would otherwise derail my efforts.
The trick to drawing with a tablet is to find a good stylus, a pen designed to work with the capacitive touch screen. None of these provide nearly the level of control or performance of a decent Wacom tablet of any flavor, but many give you more than enough control to have a lot of fun. And to have such tools in a small, comfortable form-factor like a tablet makes for a highly convenient art studio at your fingertips.
Luckily for me, I work with a group of User Experience Designers who have already tried out a number of stylii for these tablets. Most feel like you’re drawing with an eraser, although it’s much better (in my opinion) than trying to paint with your fingertips. We’ve had fun trying them all out:
So far, I’ve rather liked the Wacom Bamboo stylus, although the spongy rubber tip means that you really cannot be bothered knowing exactly where your marks will land on the screen. Sure, it will be within the 1/4″ or so area that the tip covers, depending on the angle. I find these are best for loose, impressionist styles.
The Adonit Jot line takes a different approach, giving you a clear disc on the end of the pen. You can see much more of your drawing contact point, making it a far better tool for precise drawing.
In both cases, the more traditional pen-sized stylii work better for drawing than the smaller, more portable ones. Next I will be trying one of the new, pressure-sensitive Pogo Connect Stylii but the price is making me hold off while I spend more time with the Bamboo and Jot.
Drawing and Illustrating on a tablet isn’t perfect, but I’m finding that it’s pushing my learning curve in a good way. I’ve set myself a series of goals, starting with “once good speed painting a day”, meaning something I’m willing to share. I spend between 20 and 90 minutes on any one of these, with some turning out better than others. Already I’ve noticed a tendency to stick with similar color tones and patterns, as well as drawing tools provided by the apps. I don’t mind so much that the theme remains science fiction / astronomy related for now, I’ll be tackling other subjects once I detect that I’m slowing down.
Speed Sketch – some spacecraft
I’m even happy with flat-out copying artwork that I’ve enjoyed – like the image above, which was painted using the cover of the book SPACE ART by Starlog Press (old, old book). I’ve always enjoyed the book’s Saturn painting, and needed a break from blue-tones (didn’t get away from them entirely, but it was a good way to learn some new tricks).
For now I’m sticking with these sketch-level paintings, and having fun with the process. But I’m feeling the need to tackle some of the pieces I’ve listed for the next level – something I’d be happy to print and/or sell.
* UPDATED – I’m finding that I turn to SketchbookPro with the Adonit Jot Pro Stylus for more technical illustrations, and Procreate with the Wacom Bamboo for free-form illustrations. For both the apps, and the pens, each seems suited to a specific role, meaning I’ll be toting both along for a while.
This article was based on material I presented at Wonderfest 2003 in the “Advanced Scratchbuilding Course”, and was previously hosted on one of my older websites. The article has been slightly updated, but remains intact.
What is Scratchbuilding?
Scratchbuilding isn’t a specific art or activity, but more of an approach. It is an approach that encompasses skills that can be learned from many other areas. This is my personal approach to creating a model like Moya. I would strongly encourage you to evaluate the approach and skills you read here with others you encounter along the way, as every project is different and may require alternate methods. Consider this a good starting point.
Most modelers build from kits, which have several advantages. The parts are pre-made, engineered to fit, and you have an explicit assembly order carefully illustrated by printed instructions. The shortcomings can include accuracy, as necessary short-cuts taken by manufacturers can sometimes lead to soft detail or sizing issues. The instant you begin complaining about the accuracy or quality of a kit, you’re ready for scratchbuilding! In my case, no commercial model kit was available for Farscape’s Moya, and there haven’t been any made since (yet). I was fond of the show, and enjoyed the design of this living spaceship. I had no choice but to consider sculpting one myself.
Kit bashing is often a first step for scratch-builders. Taking parts from existing kits to make new ones is rewarding, but you’re still relegated to using someone else’s parts � also your scale is pre-determined by the parts. Clearly there would be no easy option for me to kit-bash Moya.
A common myth is that you have to be a master modeler to scratch-build. That is not true at all � everyone has the base skills needed to scratch-build. All that is required is a desire and a plan. If you keep the complexity within reach of your skills, maybe push them just a bit here and there, and you can do it too.
You have no instructions!
There are no parts to work with, you make them all yourself
Accuracy and quality are up to you, your skill level, and your comfort level
You aren’t forced to use found parts that are out of scale. Kit bashing forces you to use parts designed by someone else
How do I get started?
So how does one get started? First you need to select a subject – seriously. Making basic decisions is the core to any scratchbuilding project and this is the first. More importantly you need to ask, and answer, as many questions as you can about your model. Will it be hollow, what scale is it, how big will it be, are there any moving parts, how many parts etc.
If you’re re-creating an existing design then you need to secure as many source images as you can. Look for clear shots that define the form and, if possible, find them in orthogonal views (top, front, left, right, etc.), because you will be drafting them later. The best views are straight-on shots – use dynamic views more for color and surface references.
Now you need to break out your pens and draft model scale views of your model. By model scale, I mean drawings that are sized to your final model. Many questions will be answered by these drawings. They are your instructions and will become reference markers later on.
Choose a subject
Ask, and answer questions
What scale is it?
How big will it be?
Will it be hollow?
What will it are made from?
How many parts? You need to decide based on your project
Collect source images, if possible
Draft plans � draw your own instructions
Orthogonal views – top, side, front, bottom
Make Templates from your drafting
My Project – Farscape’s Moya
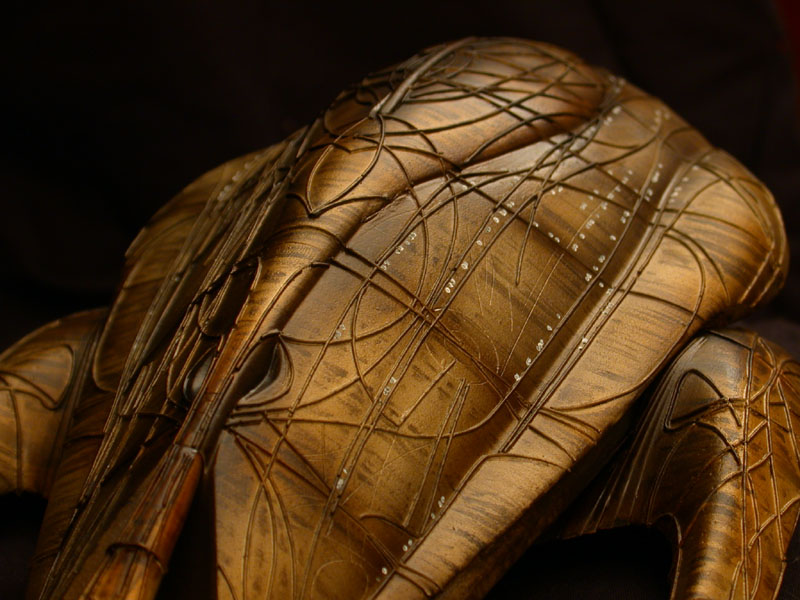
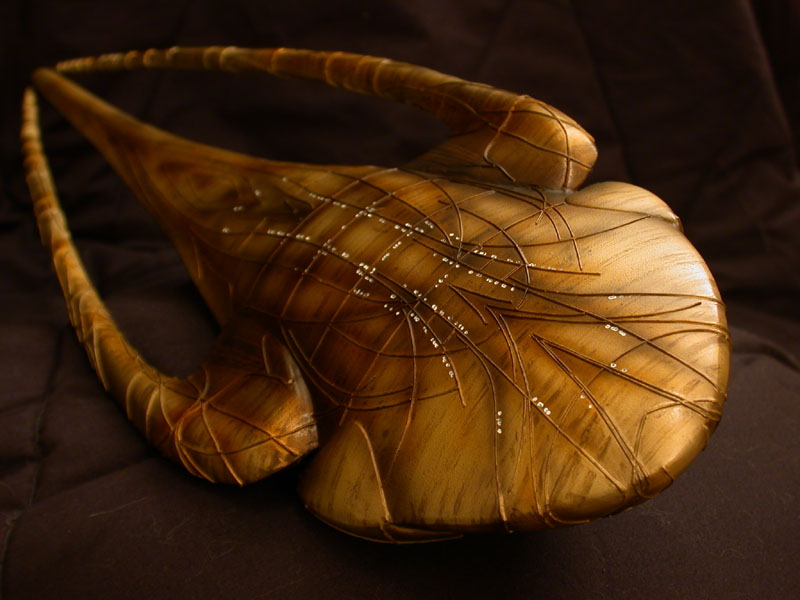
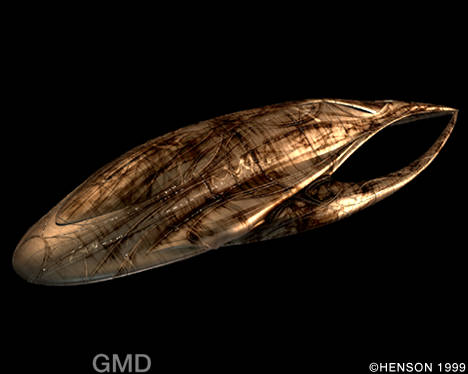
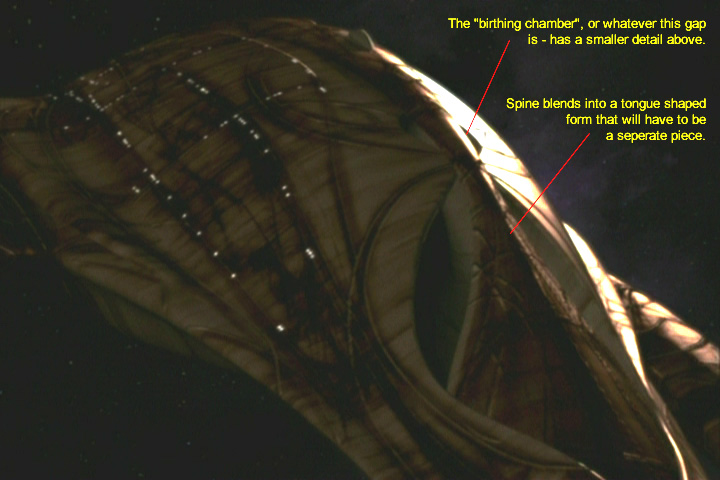
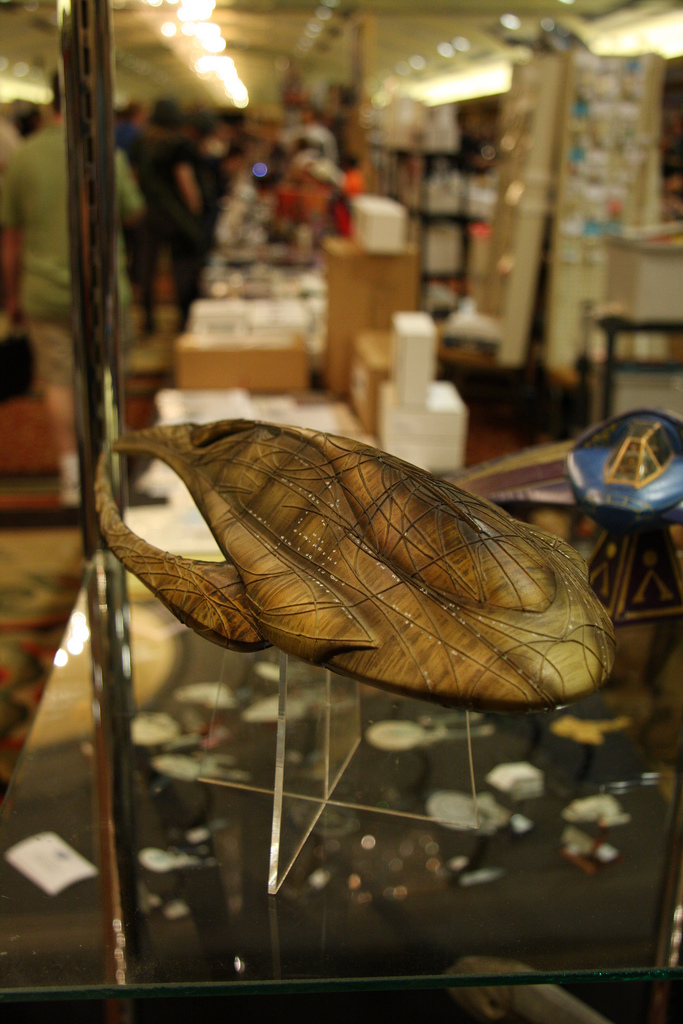
Today’s example will be my scratchbuilding project � Moya, the living spacecraft from the TV show Farscape. She is referred to as a Leviathan in the show, a living bio-mechanical spaceship. As you can see there isn’t a straight line on her. Worse, she’s covered in contour lines that would be a bear to emulate.
I knew there was never going to be a model kit of this ship, and nobody in the garage market appeared to want to sculpt one. It was after my first trip to Wonderfest that I decided I would take a stab at making my own Moya.
For the better part of a year I answered my own series of questions. I knew that this was going to be a difficult project, full of new techniques, so I wanted a larger size in the end � 16 inches. It needed to be hollow so that I could light it from the inside. This meant I would have to cast the parts.
We will see, in the following slides, how the master was created. The master or pattern, in modeling terms, is the primary form used for casting later on.
Gather References
Reference material was virtually non-existent. I found much of it online, took screen-captures with my home PC, and found some great shots in books and magazines. The special effects company wasn’t keen on sharing their images with me, unfortunately, although I did try.
Once you get a lot of material, print it out so you can reference it on your workbench later. The bigger the better, but often I would combine detail shots onto one page. I ended up having enough pictures to fill a small book.
Drafting
Once I felt I had enough decisions made, and enough reference material, I began drafting the ship in AutoCAD. This helped me generate the section lines needed for the buildup. If you don’t have access to CAD software, or do not know how to use such tools, grab some drafting supplies and draw it out the old fashioned way. It’s important to have reference drawings at the exact scale of your final model.
Once you have your plans, and your reference material, you’re pretty much ready to go.
You will be using all of your modeling skills, usually. In my case I had to learn skills along the way, but that’s okay. Plan extra time in your schedule (if you have one) so you can compensate for any time slippage.
Start with whatever tools you have, and add more as you need them. I’m not going to call out special tools, as they are typically tied to specific techniques. Learning new techniques is a part of the modeling hobby, so don’t be afraid to research and try as you go.
Lofting
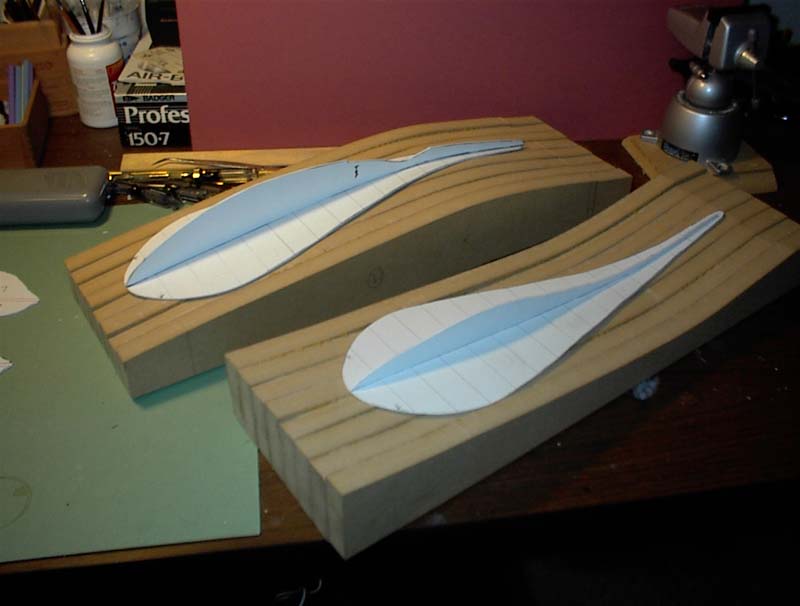
I built Moya’s main body using a technique known as lofting. Lofting is a nautical term used to describe the construction of a boat hull using consecutive ribs laid along a keel. This is a fairly common practice for complex, organic shapes. I will walk through this process.
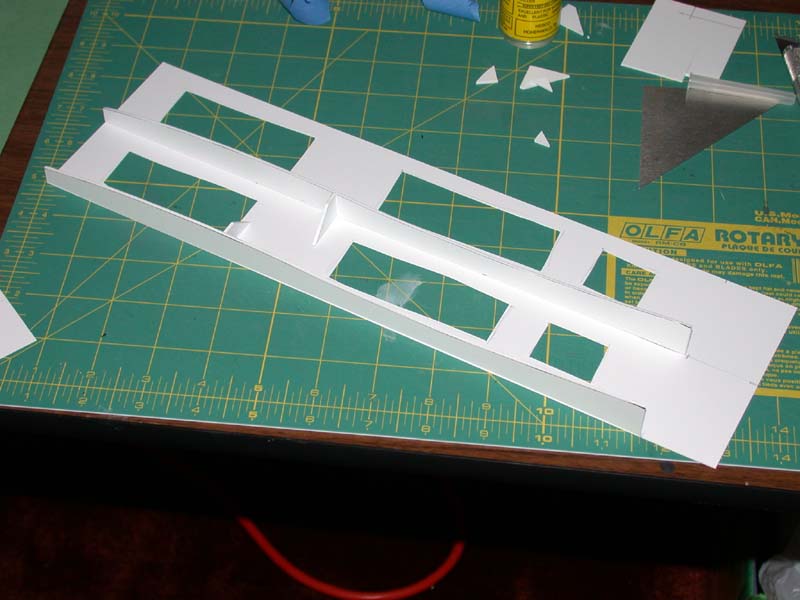
Since I had the side and top profiles, and a series of sections, transferred to styrene, I could begin assembling the body.
There was no flat surface I could work from so the first thing I needed to build was. . .
The base or keel. Technically this is referred to as the �datum� – a geometric form or line that is used as a reference for construction or definition. The top shape of this keel was derived from the part line along the side of Moya. I built one base for the top, and one for the bottom. When put together, the splines fit perfectly. It was on these bases that I mounted the profiles and sections.
It was critical that the spline on the base was dead-on accurate. Not only would it be a base to work from, but it would also define the part line of my final pieces!
Once I was happy with the base splines, I mounted the profile assembly to the surface. The side profiles were then glued to the base profiles using TENEX, a powerful liquid styrene cemet. Today, since TENEX isn’t readily available, I’d recommend Ambroid Pro-Weld or something similar.
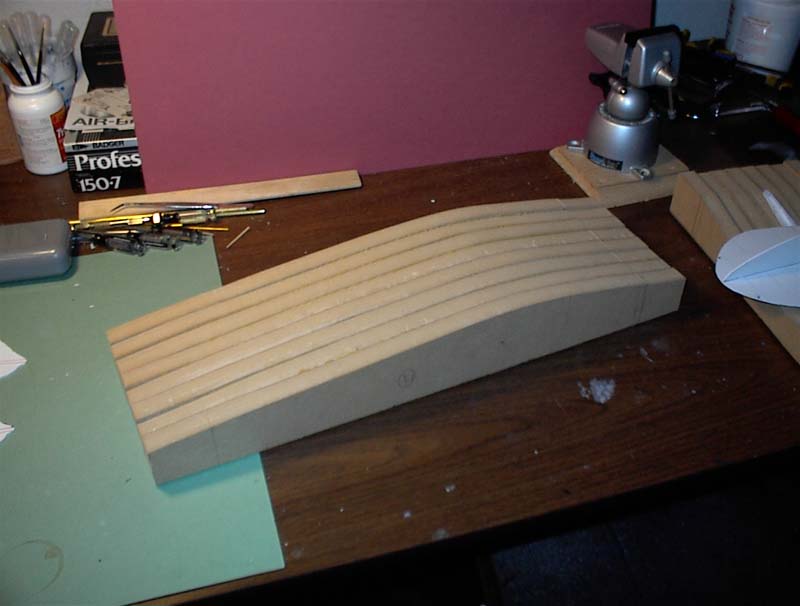
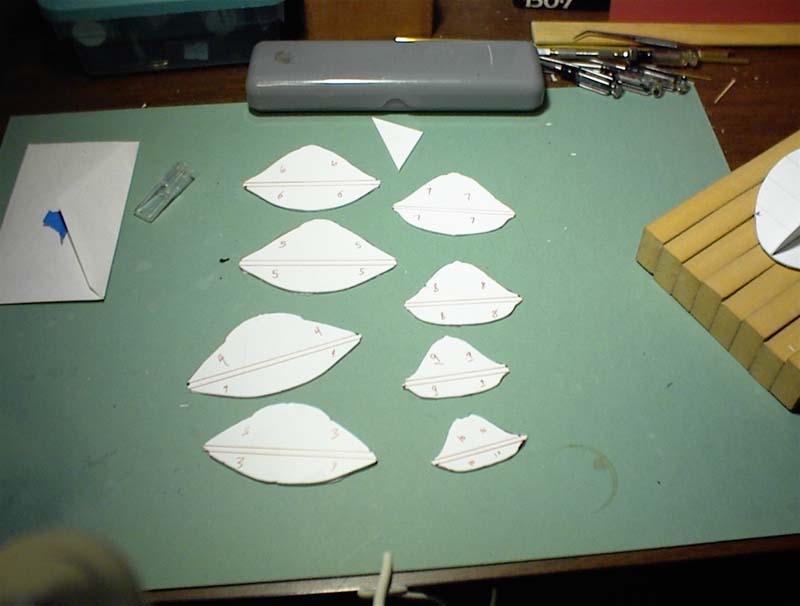
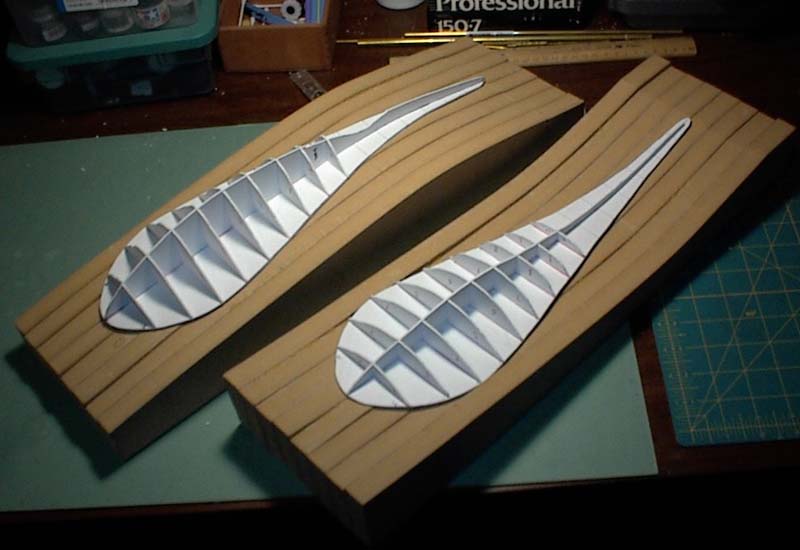
Sections were cut from my drawings and glued onto the profile assemblies. Each section had a 1� gap between them, and was set at 90� to the flat base.
Once these were placed, the forms were checked for symmetry. If the left and right sides do not match, now is the time to make adjustments. Every error at this point will be compounded later, so it’s good to make sure things match up the way you’d like them to.
After all the sections were laid in, I began cutting section fillers of foam to go on the inside gaps. I could’ve simply loaded this with expanding foam, or even magic-sculpt, but I had the foam and it was very quick.
As you can see, once you begin filling the gaps, the shape really begins to be noticeable. I even began delineating detail lines.
Magic Sculpt was mixed up and used to cover the surface in thin sheets. I worked slowly, doing a few inches at a time. The Magic Sculpt was rolled thin using a wooden dowel.
I knew that later on I would have to scribe channels on the surface for the detail lines. Just gluing wire on the surface wouldn’t be sufficient � wire is round and a channel would help set the wire into the surface. This would help in molding and casting copies as well. Magic Sculpt has an excellent surface property that allows for easy scribing and manipulation.
Arm construction
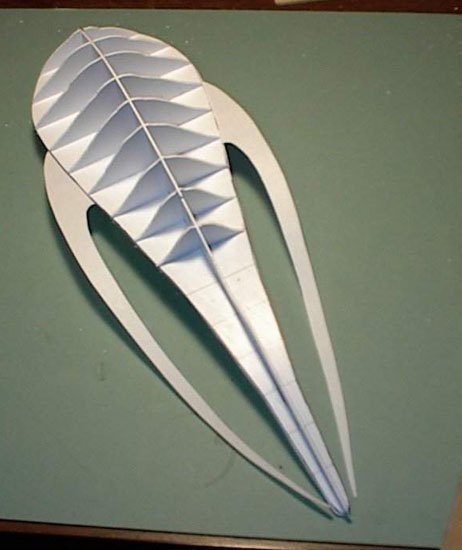
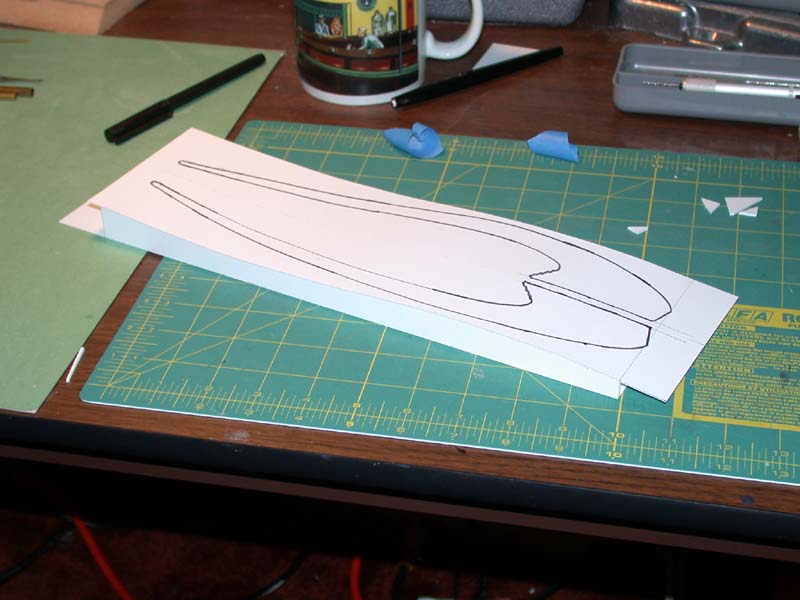
The arms were a different problem. While I still had a common part line through the middle, they were small enough to be built as a single piece. However they were actually more complex forms than the main body. They were inherently asymmetrical, but needed to be symmetrical with each other!
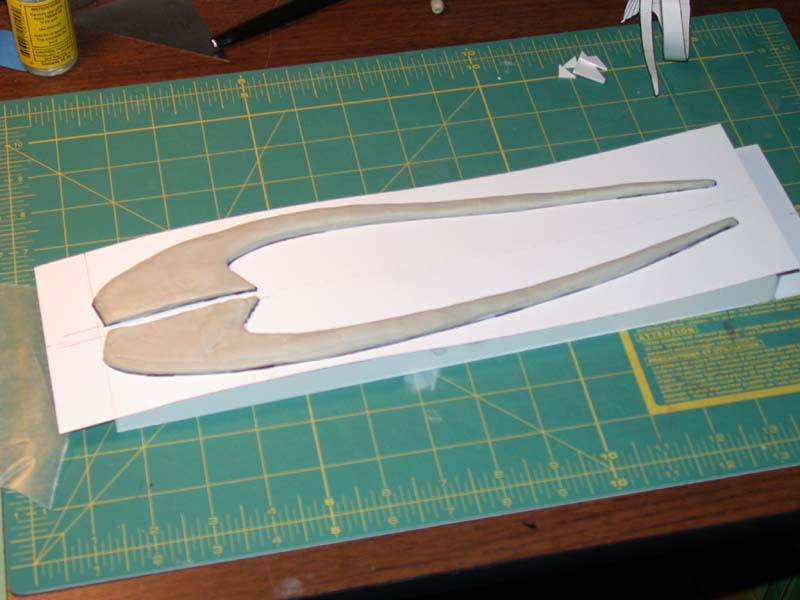
I decided to break the problem down by identifying the side view part line as a baseline to work from. I had the top views plotted, symmetrically, in my drafting, so I transferred those to a flat sheet of styrene. Once glued to the base, I now had a properly contoured surface to work with.
Magic sculpt was added along the lines. I didn’t care much about thickness, as I knew I would be sanding these down later. The arms are really thin.
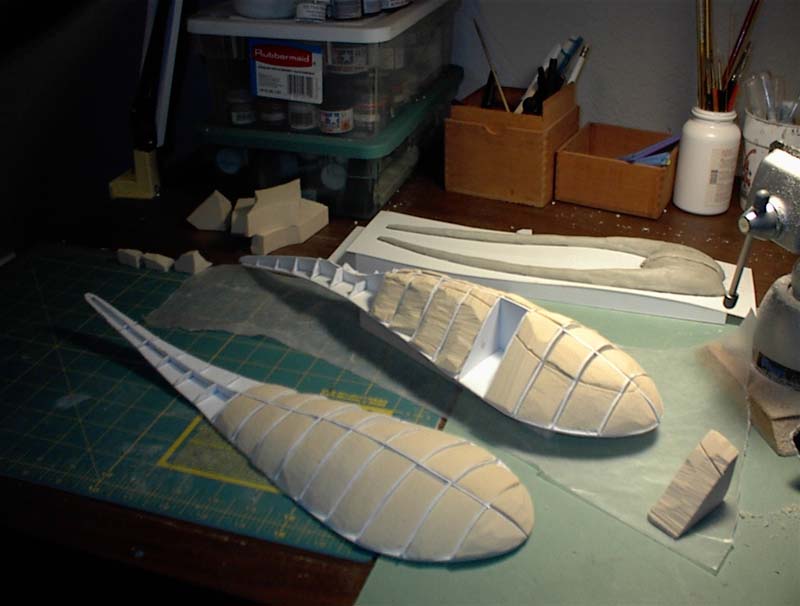
Once I had the arms completed, and the main body, I began working the forms by sanding. You can see that I got back down to the foam on the main bodies. Those areas were simply filled in with spot putty.
At each step I checked the forms using my templates. Symmetry was critical and I battled accuracy issues the best I could with the images and drafted plans.
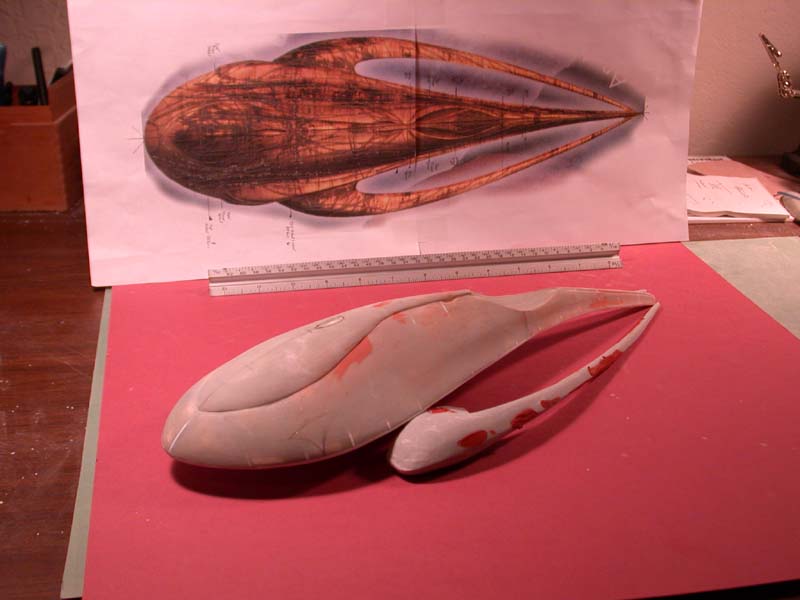
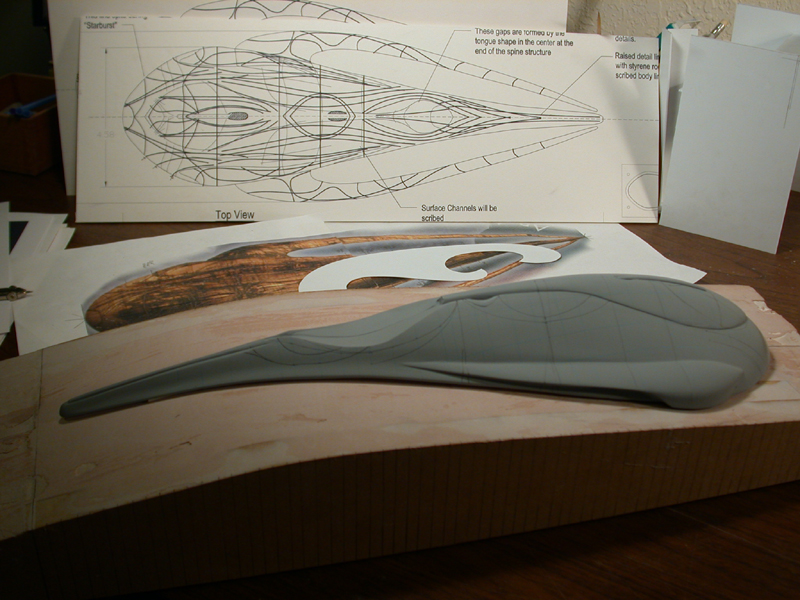
As you can see on the right, I managed to secure a top view of Moya. I printed it out at my model scale and was able to check my work along the way, with a high degree of accuracy.
The detail piece in the rear was quickly carved out of foam, and covered in Magic Sculpt.
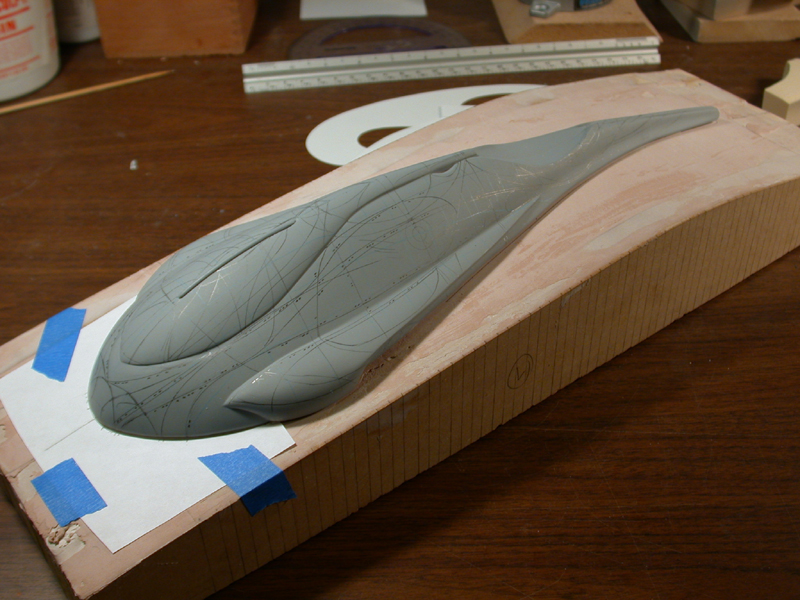
After all of the gaps and surface defects were filled, it was time to prepare the surface for detailing. Moya had a lot of raised lines (a lot!) that needed to be meticulously plotted. I shot primer over the surface and gave it a quick, light sanding with 400-600 grit sandpaper. I was now ready to proceed.
Detailing
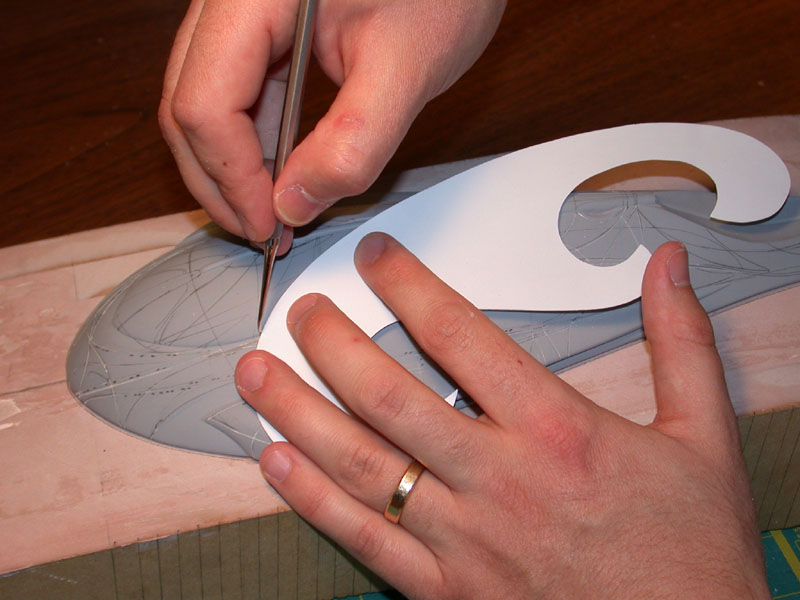
After about three weeks of work, I finally had the forms to where I wanted them � exactly. Now began the task of marking the surface lines. I felt like I was creating an Aboriginal tattoo. But with my references, printed to scale, and a curve template that I cut from styrene, I was able to plot the lines with a pencil.
Amazingly, side-by-side symmetry was very, very close.
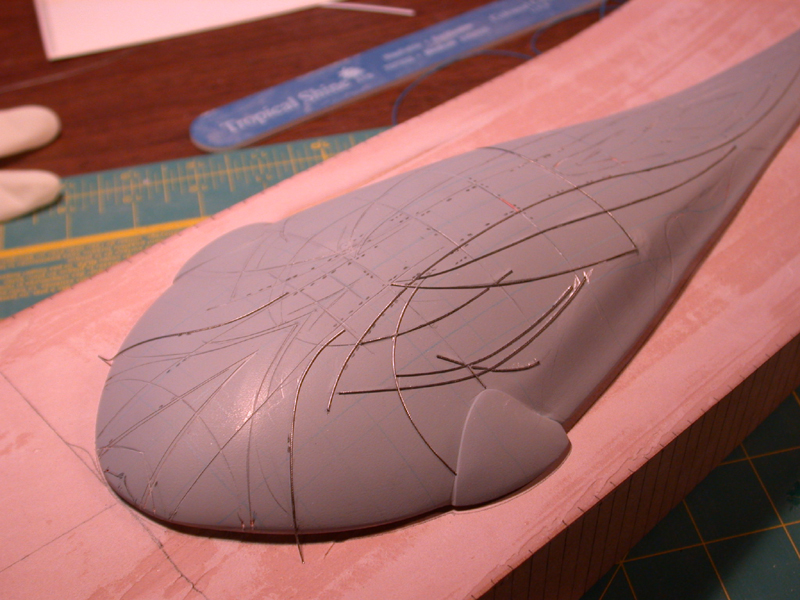
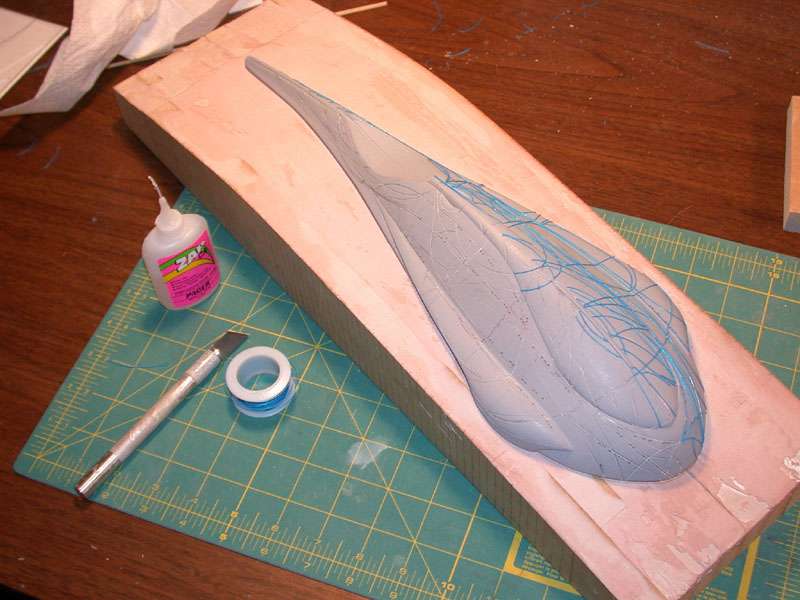
Once the lines were completed, I took a scribing tool and created channels all along the surface for the wire. These channels allowed the wire to settle into the form and gave the CA (liquid super glue) more surface area to bond with. Ends were cut appropriately.
The first wire I used was far too stiff, and was miserable to cut so I switched to the blue Radio Shack wrapping wire you see above.
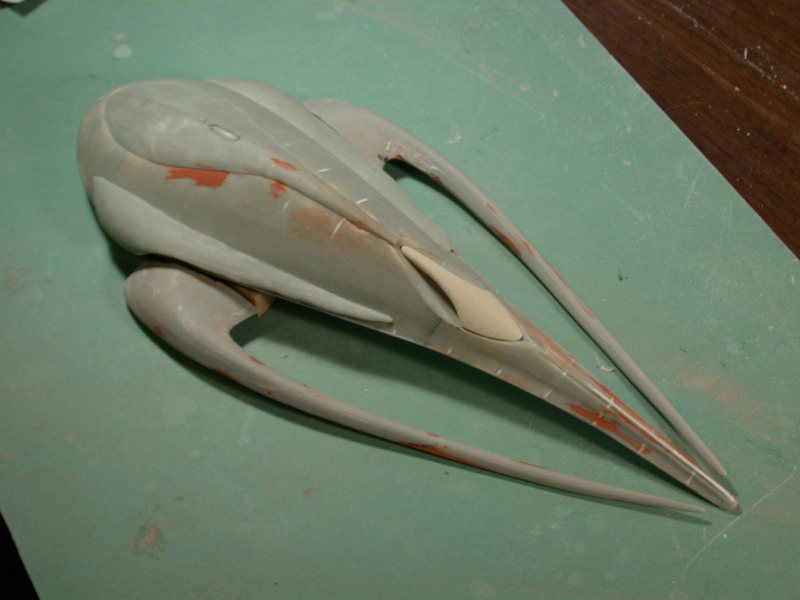
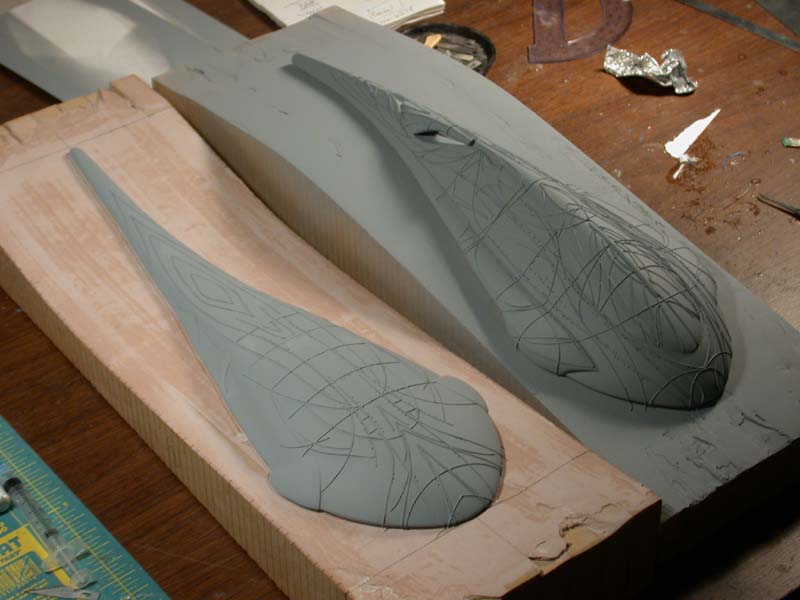
Shooting your masters with primer really brings the forms together and allows you to see any flaws that may have built up along the way. For Moya, I used primer after I first got the forms built, and then after I got all the wire laid down. My favorite primer is Duplicolor Sandable primer, which can be found in most auto parts stores. I used gray primer for this project, but I typically use black primer for final models.
I was able to make final corrections to the lines and add a few other surface details. At this stage you could add all sorts of greeblies, but care should be taken to ensure that they’re in scale with your subject � don’t just slap items on!
Molding and Casting
I won’t go into molding and casting too heavily � there are other resources you should reference for more information. But it was a critical issue with this project.
This was a new area for me and I relied heavily on a good friend of mine who worked with the processes and materials regularly, and had created a kit of his own. Added to that the classes I attended at Wonderfest and people I knew online, I was able to tackle this technique with only a few setbacks.
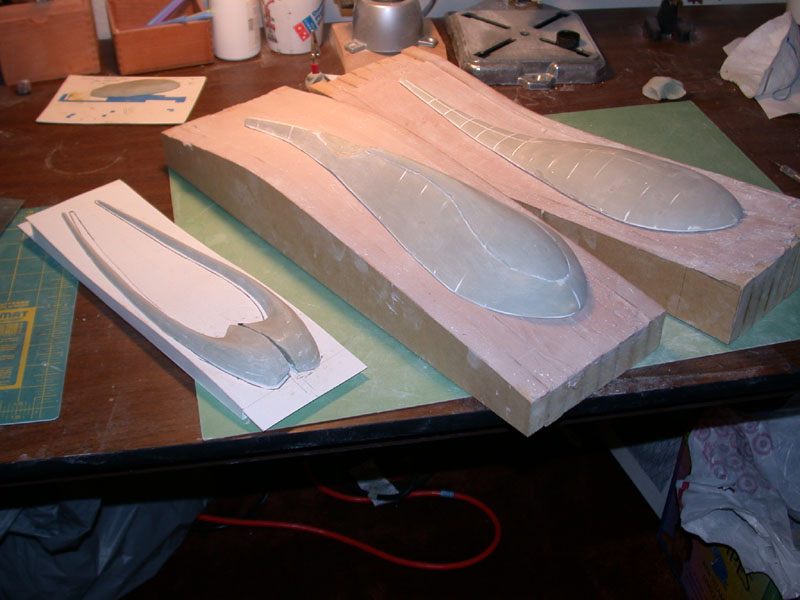
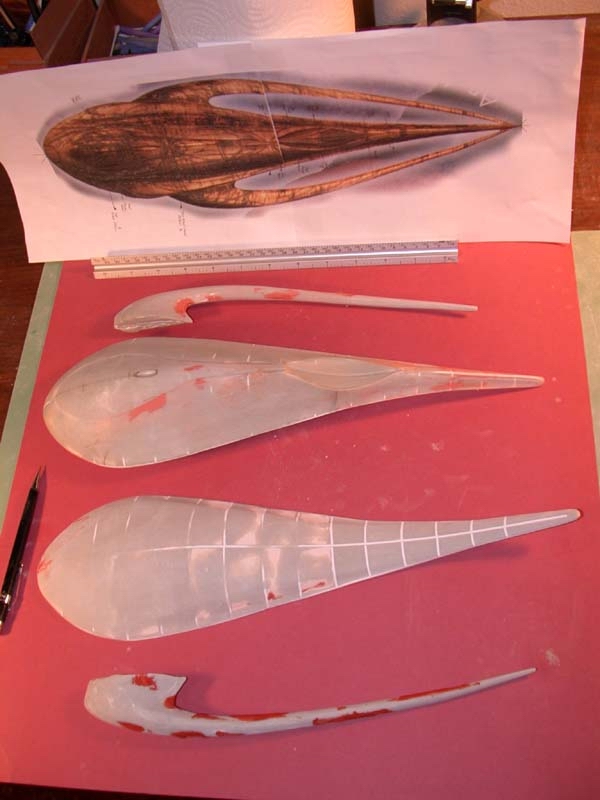
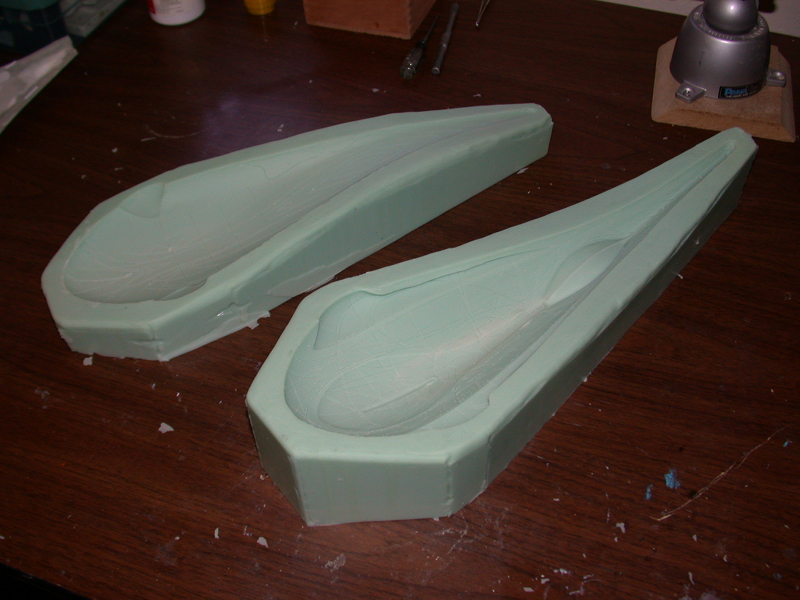
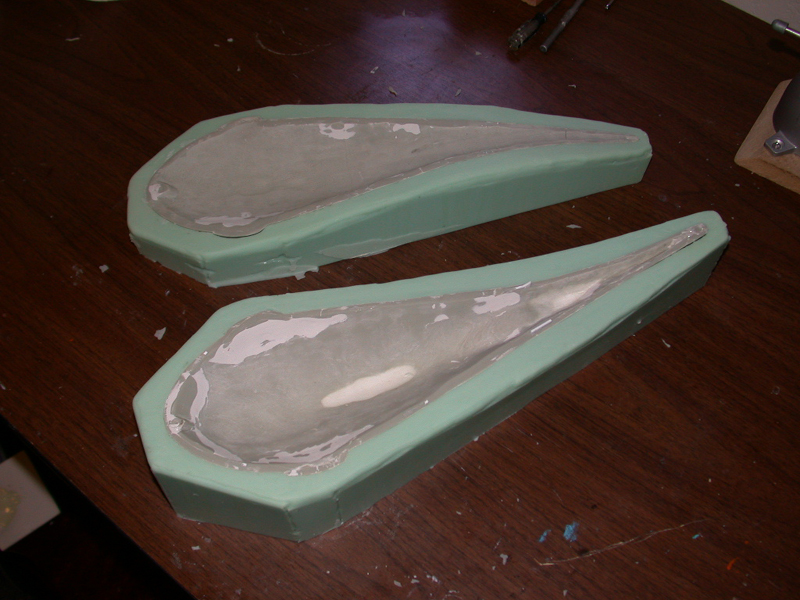
Above you can see the positive molds of my masters. The part lines were now a part of the mold.For part thickness, But I still had one more step to do. These molds only captured the surface detail of my original forms. Had I proceeded to pour the other side of the mold, my parts would have no thickness! The best way I found to define the part thickness was to cover the open mold, with all its detail, in a thin layer of some material, and THEN pour the back half of the mold. Basically, you’re making a sandwich of silicone RTV mold (with detail) on the bottom, a 1/8″ to 1/4″ thick layer of some material, then the top cap of the mold (also in silicone RTV).
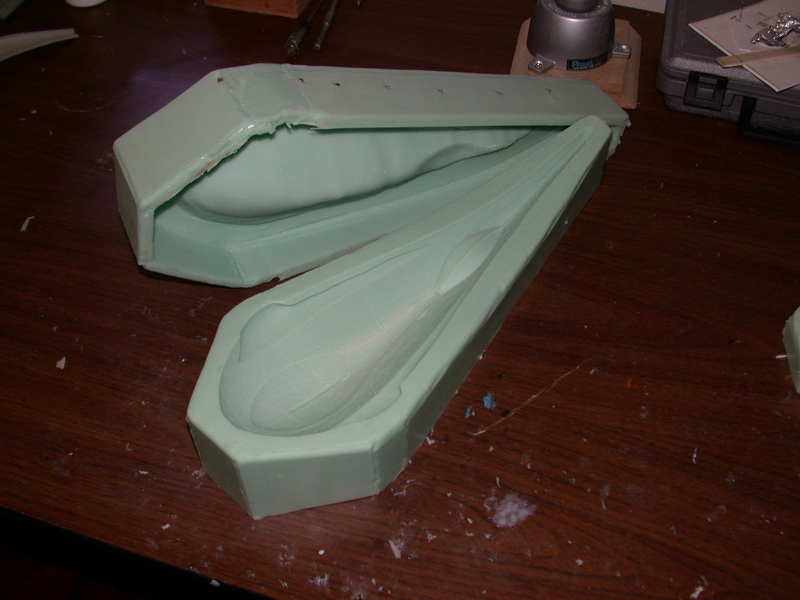
I filled the cavities with a thin layer of magic sculpt. I tried to keep them as thin as possible, and cut to the surface of the mold.
I then poured the top of the mold � with pour spouts and vents place appropriately. Brass rods were used inside the top to give it some support. With all the weight of the cap there was a chance it would sag.
This, by the way, is an unconventional mold process that used a lot of mold rubber. But the pouring the castings was extremely easy. Because the molds were so heavy, they held themselves together by gravity. I never had to clamp the molds to prevent the casting resin from running out. Once the parts were cast it became a simple matter of assembly and painting.
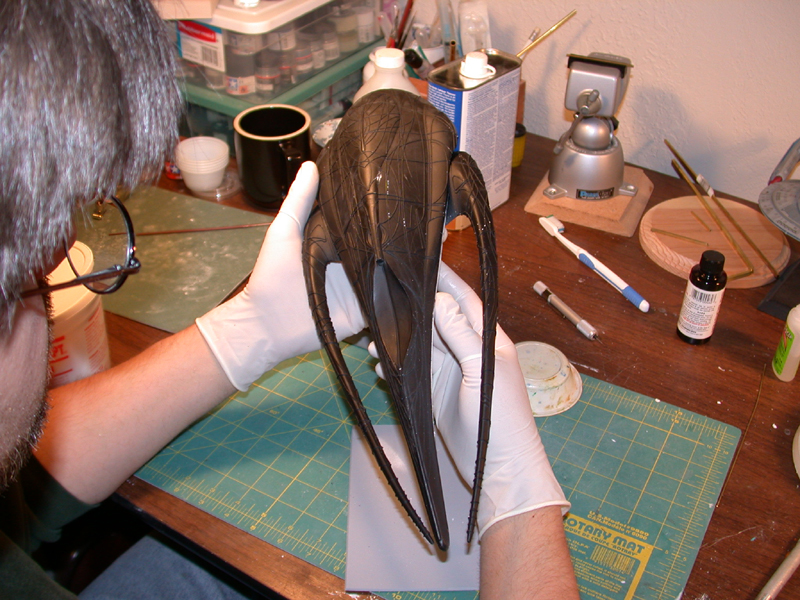
And here’s a shot of a casting that I’d cleaned up, assembled, and covered in my favorite black primer. Building the kit that I created was one of the most surreal experiences I can remember. Have fun!
Moya Today
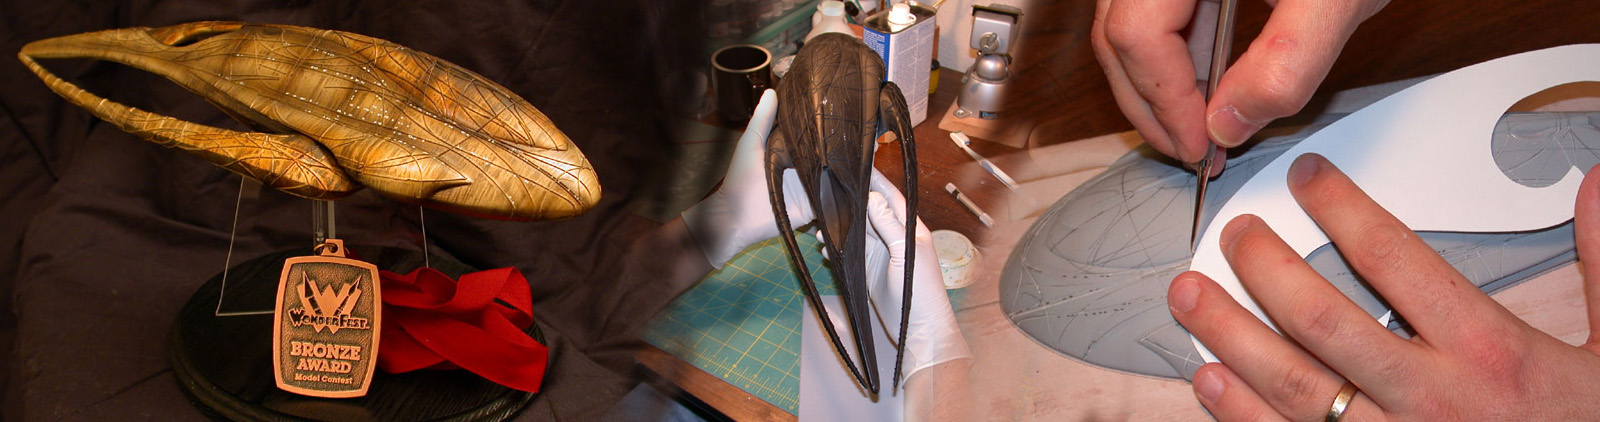
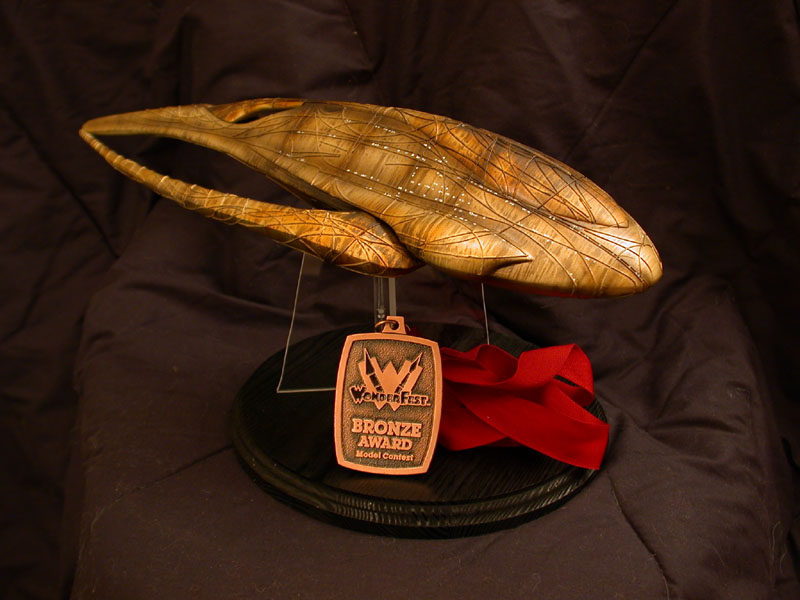
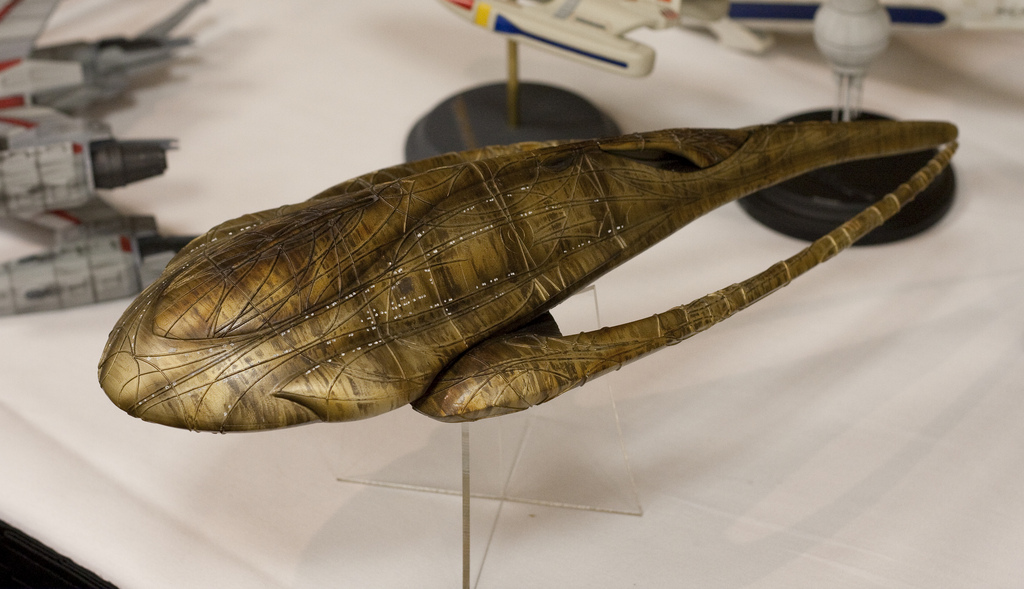
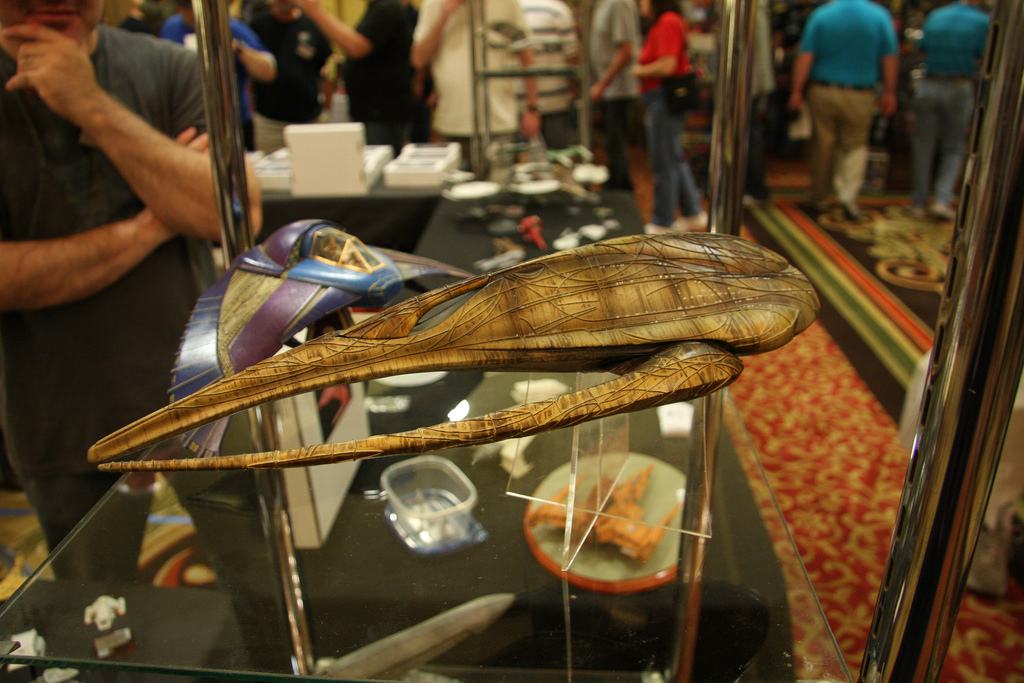
My finished Moya model won a Bronze award at Wonderfest 2002, which was more recognition than I’d anticipated. I ended up selling that one to a good friend of mine, and each year it’s brought back to Wonderfest as part of his display models. A second build-up was also sold, and today I do not have a build-up of my own. Although I’ve retained several good copies for future buildups.
For a brief time I sold copies of Moya as an aftermarket resin kit. There are still a few out there, so if you’re interested in getting one for yourself I’d recommend hitting up Federation Models.






 Christopher Doll is an artist and designer from the greater Seattle area.� He specializes in astronomy, space travel, and science fiction themes. His work has been featured in a number of books, articles, and on the cover of several novels.