
This week I was featured on the Amazing Stories website in a series that profiles Space Artists, members of the IAAA (International Association of Astronomical Artists). I’m honored and privileged to have been selected for this article alongside artists that I’ve looked up to over the years. If you get a chance, check it out:
Author: Christopher Doll
-
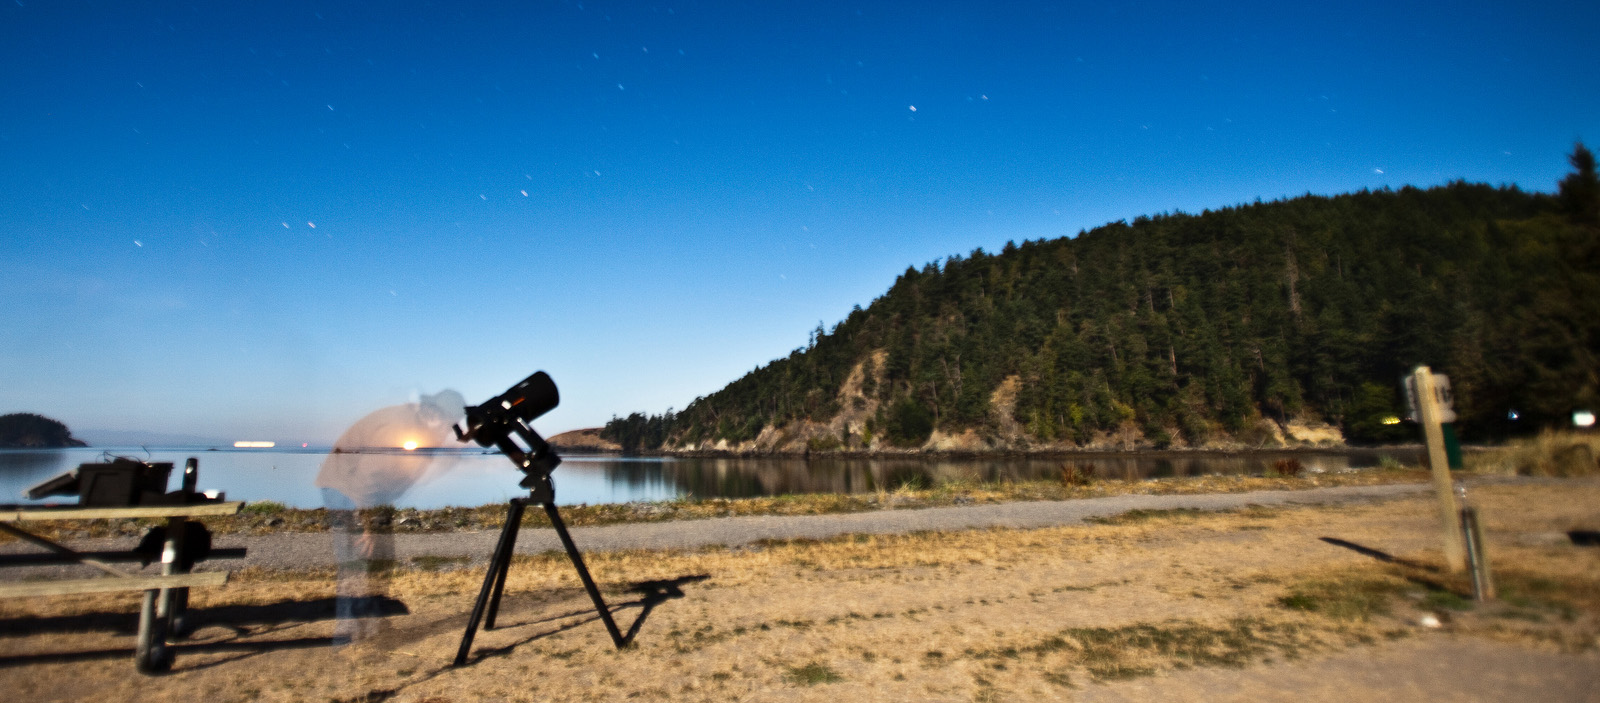
Camping Under Dark Skies
After responding to a tweet by the folks at Orion Telescopes, I was invited to contribute some thoughts on my experience camping with telescopes and astronomy. The article appeared last week on their site, take a look!
Camping Under Dark Skies: What to Bring
�

(Photo above by Scott “seattleforge”�Thoms )
-

Open House – Thursday, June 6th at Trabant Coffee in Seattle
If you happen to be in the Seattle area next Thursday, June 6th, drop on in at Trabant Coffee on 2nd Avenue and James Street. I’ll be hosting an open house for my first gallery showing there. We’ll have wine, beer, snacks, and of course Trabant’s amazing coffee. My work will be on display at Trabant for the month of June.

602 2nd Avenue
Seattle, Washington -
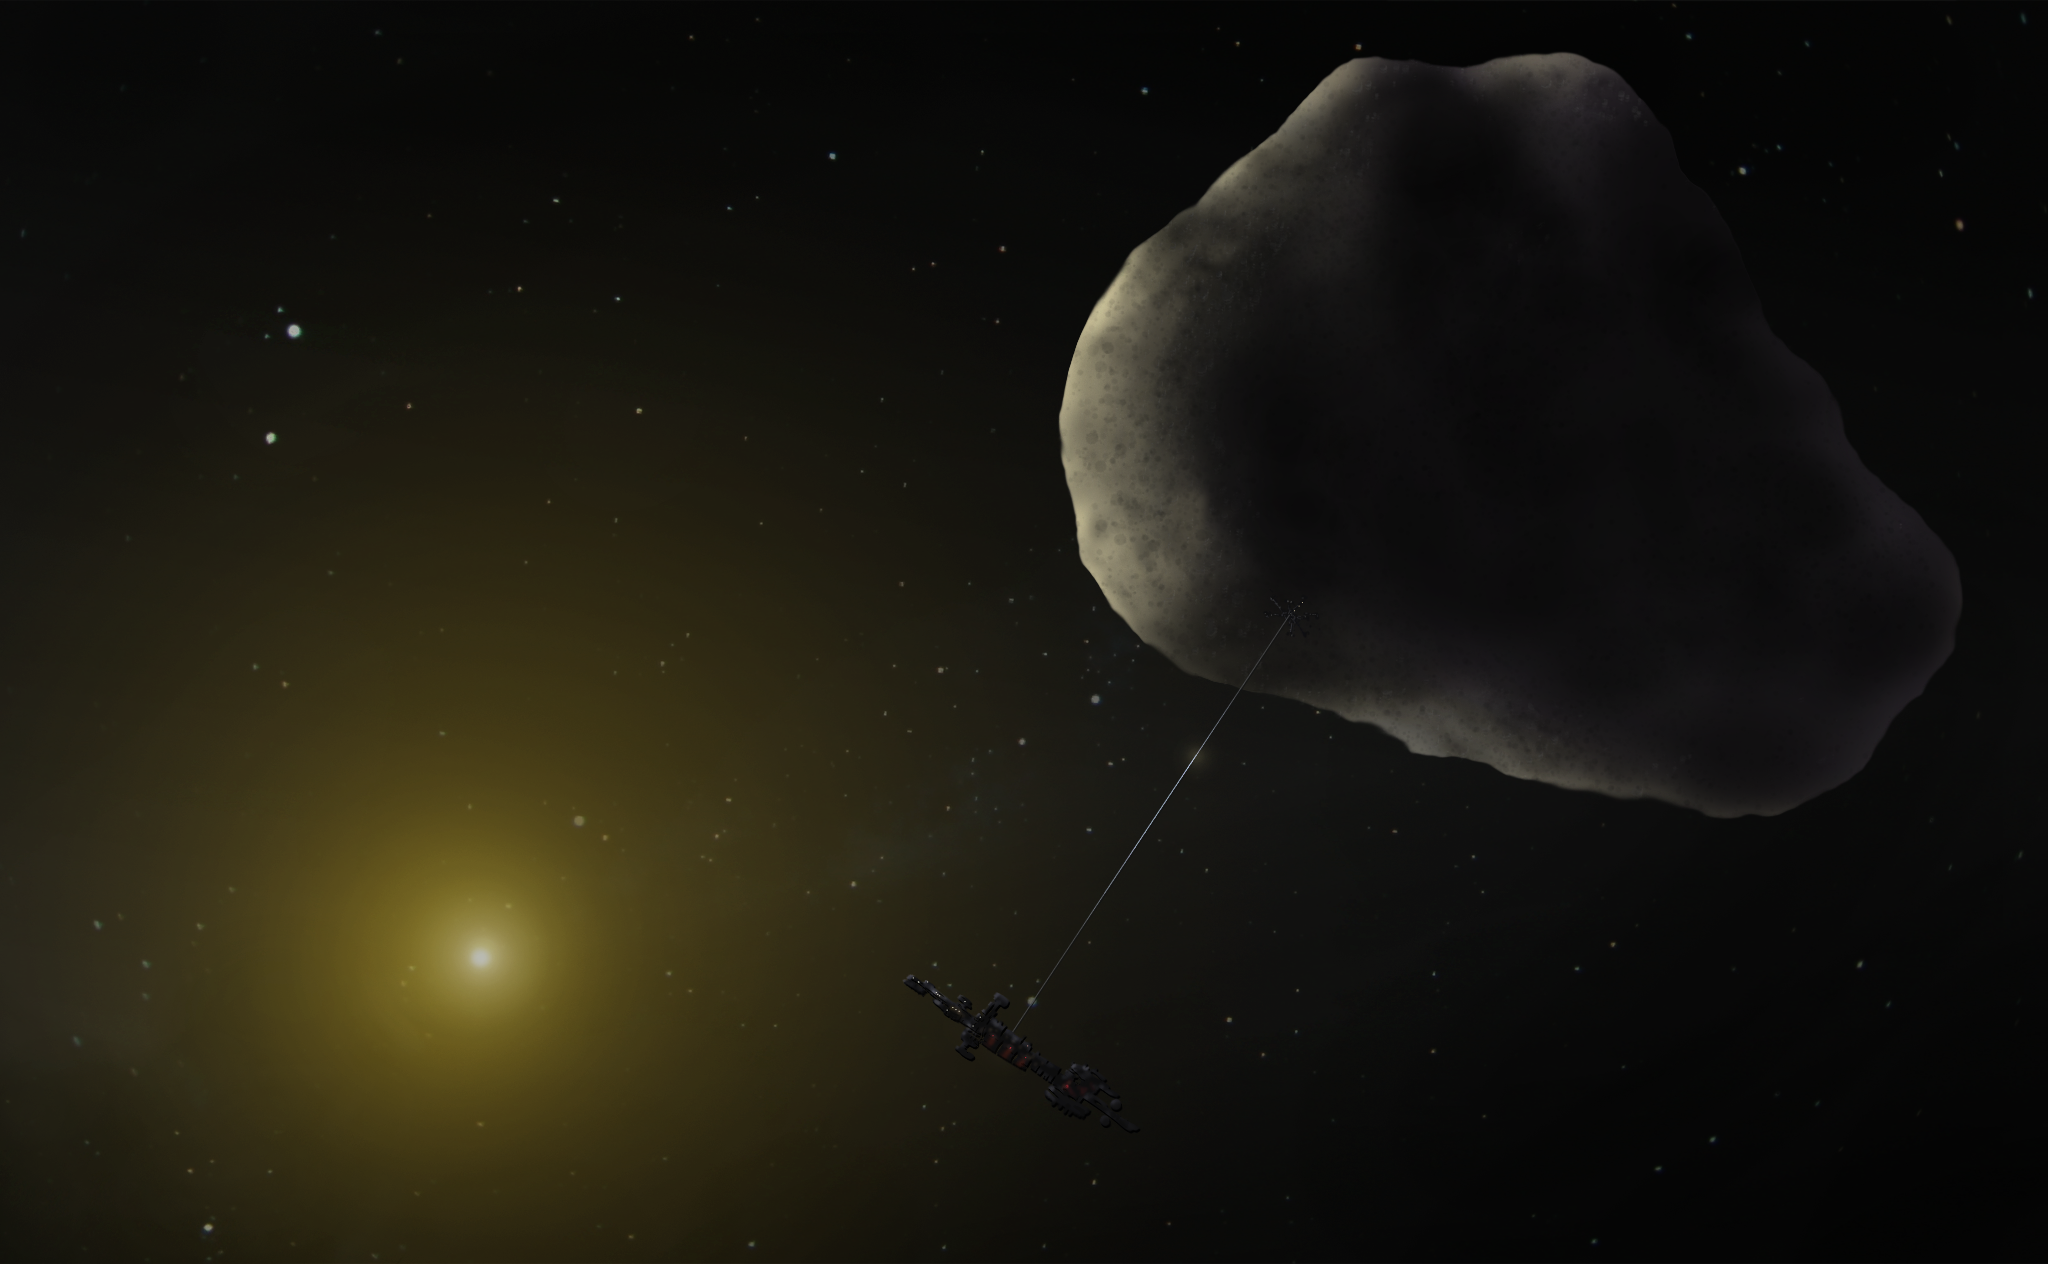
My First Artist Credit
One of my pieces was used in an online Russian article about Asteroid Mining and Planetary Resources. This is my first credit as a space artist, and I’m thrilled to check off another “to-do” off the list.
I began the year with the intention of bootstrapping my artwork into a business of its own. Using the best suggestions and plans I’ve accumulated over the years on how to start any business out of pocket and with the tools at my fingertips. As I said before, this is a marathon not a sprint. I have no illusions of becoming fabulously wealthy by painting space scenes. It’s simply something I enjoy and feel compelled to create. The only trick really is to just do it.
By putting my foot to the floor I’ve managed to check off a few other milestones on the journey:
- Get my work into a credited show – One of my illustrations will be featured in an upcoming Art Show on spacecraft, sponsored by the International Association of Astronomical Artists (date TBD).
- Gallery ShowingThis coming June, I will be the featured artist at Trabant Coffee on 2nd Avenue in downtown Seattle.
- And I will be on hand at Norwescon 36 in Seattle this coming weekend, my first as an artist at any kind of convention.
In the meantime I am still an active User Experience Designer for software with a number of fascinating projects in progress.
-

Model Mayhem at Emerald City ComiCon 2013

Last weekend Emerald City ComiCon hosted their first scale model show, Model Mayhem 2013, here in Seattle. My thanks go out to the folks who run Emerald City ComiCon, and to my fellow model builders from the Galaxy Hobby Science Fiction Model Club for making this wonderful event happen.The show almost didn’t happen, as the original organizer was unable to carry out the preparations. At the last minute I picked up the task as we already had space dedicated to the show. Initially this was to be a contest for area modelers, but given the remaining time we elected to present our work as a display-only. This format has proven quite successful for the Seattle IPMS Club (International Plastic Modeler’s Society), and allowed us to bring in a large number of our kits.
Lots of visitors
Based on our own off-the-cuff counts, and this is a conservative estimate, we think we had at least 5,000 people come through our room this year. That’s quite a large number for the scale model community, and it was likely far more than this.
We were rather impressed with the number of people who found our little room – far more than I can remember seeing in some of our previous shows. It was the largest Emerald City ComiCon to date, and unlike many of our model-themed shows this ComiCon crowd brought us a lot of people who may not be aware of our hobby. And among them there were those who fondly remember building models when they were young.

Show me the models!
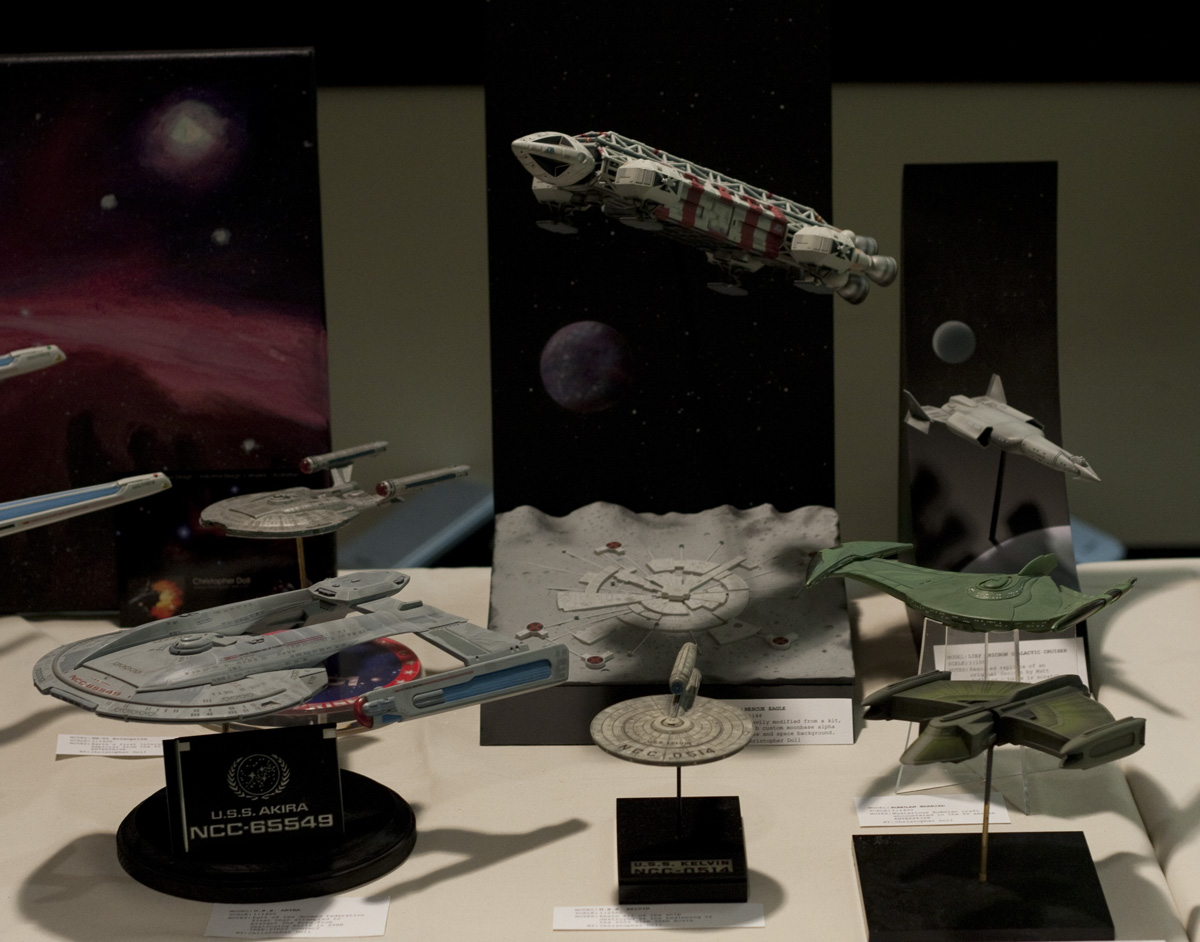
Our display featured a great cross-section of the models we build – spacecraft, vehicles, figures, busts, and even a carnivorous plant. A perfect way to demonstrate a wide range of subjects. John, Preston, and Paul also brought kits to work on during the show, which proved to be a popular demonstration for the crowd.

I mostly build spacecraft from science fiction movies and shows, and I brought every finished kit I had that didn’t need extensive repair. This is one of the unique aspects of a model display show like this, you get to see a lot more of everyone’s models. With a contest, participants usually just focus on their latest projects.


The most common comments I had on my models were:
- “Did you sculpt these yourself?” – More a question about the spectacular figures on display, and by far the most asked question of the day. Most of the figure kits were garage kits – sculpted and cast by ambitious artisans, often far more elegant than a mass-market figure. They require clean-up and painting, sometimes a more robust stand that better features the work. And our club has some top-notch, award-winning figure modelers. Very impressive indeed.
- “I built a model of the Enterprise as a kid, but I thought it was larger” – The only classic Enterprise models I had on hand were smaller (and much more accurate) kits produced ten years ago by Polar Lights, not the original AMT Enterprise which actually is larger.

- “Are these for sale?” A question that caught many of us off-guard a bit. The answer is “Yes, but the price may be higher than most people are willing to pay”
- “SPACE:1999! I remember that show!” My Rescue Eagle and Moonbase Alpha model drew a lot more comments than I’d anticipated. Still one of my favorite science fiction TV shows from the 1970’s, it was fun to see how many people also had fond memories. Far more people mentioned it than I’d anticipated.

- “AUDREY II!” – My little Audrey II was a crowd-pleaser. And such a simple kit really

Next Year – Model Mayhem 2014!
We’re looking forward to expanding the show next year to include a full-on model contest with prizes, a make-and-take for the kids (very popular in our other shows), and more hands-on demonstrations.
For those of you who visited Model Mayhem 2013, I’d like to thank you on behalf of the Galaxy Hobby Model Club, IPMS Seattle, and of course the folks who run Emerald City ComiCon. We had a great time showing off our hobby and hope that our excitement was shared.

If you are interested in learning more about the Galaxy Hobby Science Fiction Model Club, you’re welcome to attend our regular meetings which are open to the public. We meet on the second Thursday of every month at Galaxy Hobby Shop in Lynnwood (check the link for location and details).
Did you visit Model Mayhem 2013?
If you dropped by to see Model Mayhem 2013, thank you! Tell us what you liked and didn’t like!
- “Did you sculpt these yourself?” – More a question about the spectacular figures on display, and by far the most asked question of the day. Most of the figure kits were garage kits – sculpted and cast by ambitious artisans, often far more elegant than a mass-market figure. They require clean-up and painting, sometimes a more robust stand that better features the work. And our club has some top-notch, award-winning figure modelers. Very impressive indeed.
-
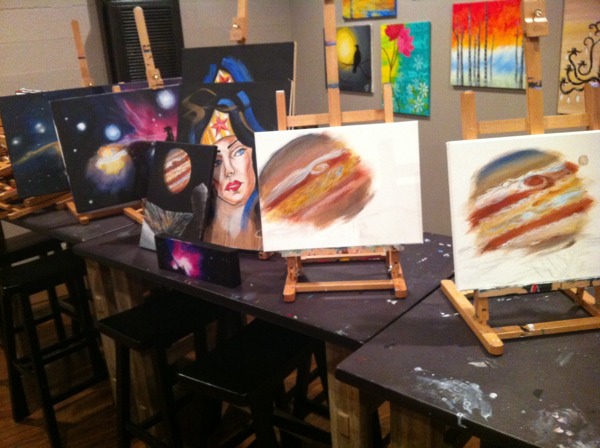
My First Guest Artist Appearance – February 16, 2013
I’ve landed my first gig as a Guest Artist at The Drunken Easel, the weekend of February 16, 2013. If you’re in the greater Seattle area, and want to paint your own space scene, sign up for the 4 hour session at their site. Aside from basking in my charms, lunch will be provided as part of the package (which also includes all the necessary supplies – paint, brushes, canvas, etc).
We will be painting Jupiter, as seen from its moon, Europa. I’ve practiced this scene several times, adjusting it from an original tutorial by artist Michael Carroll from his book “Space Art”

-
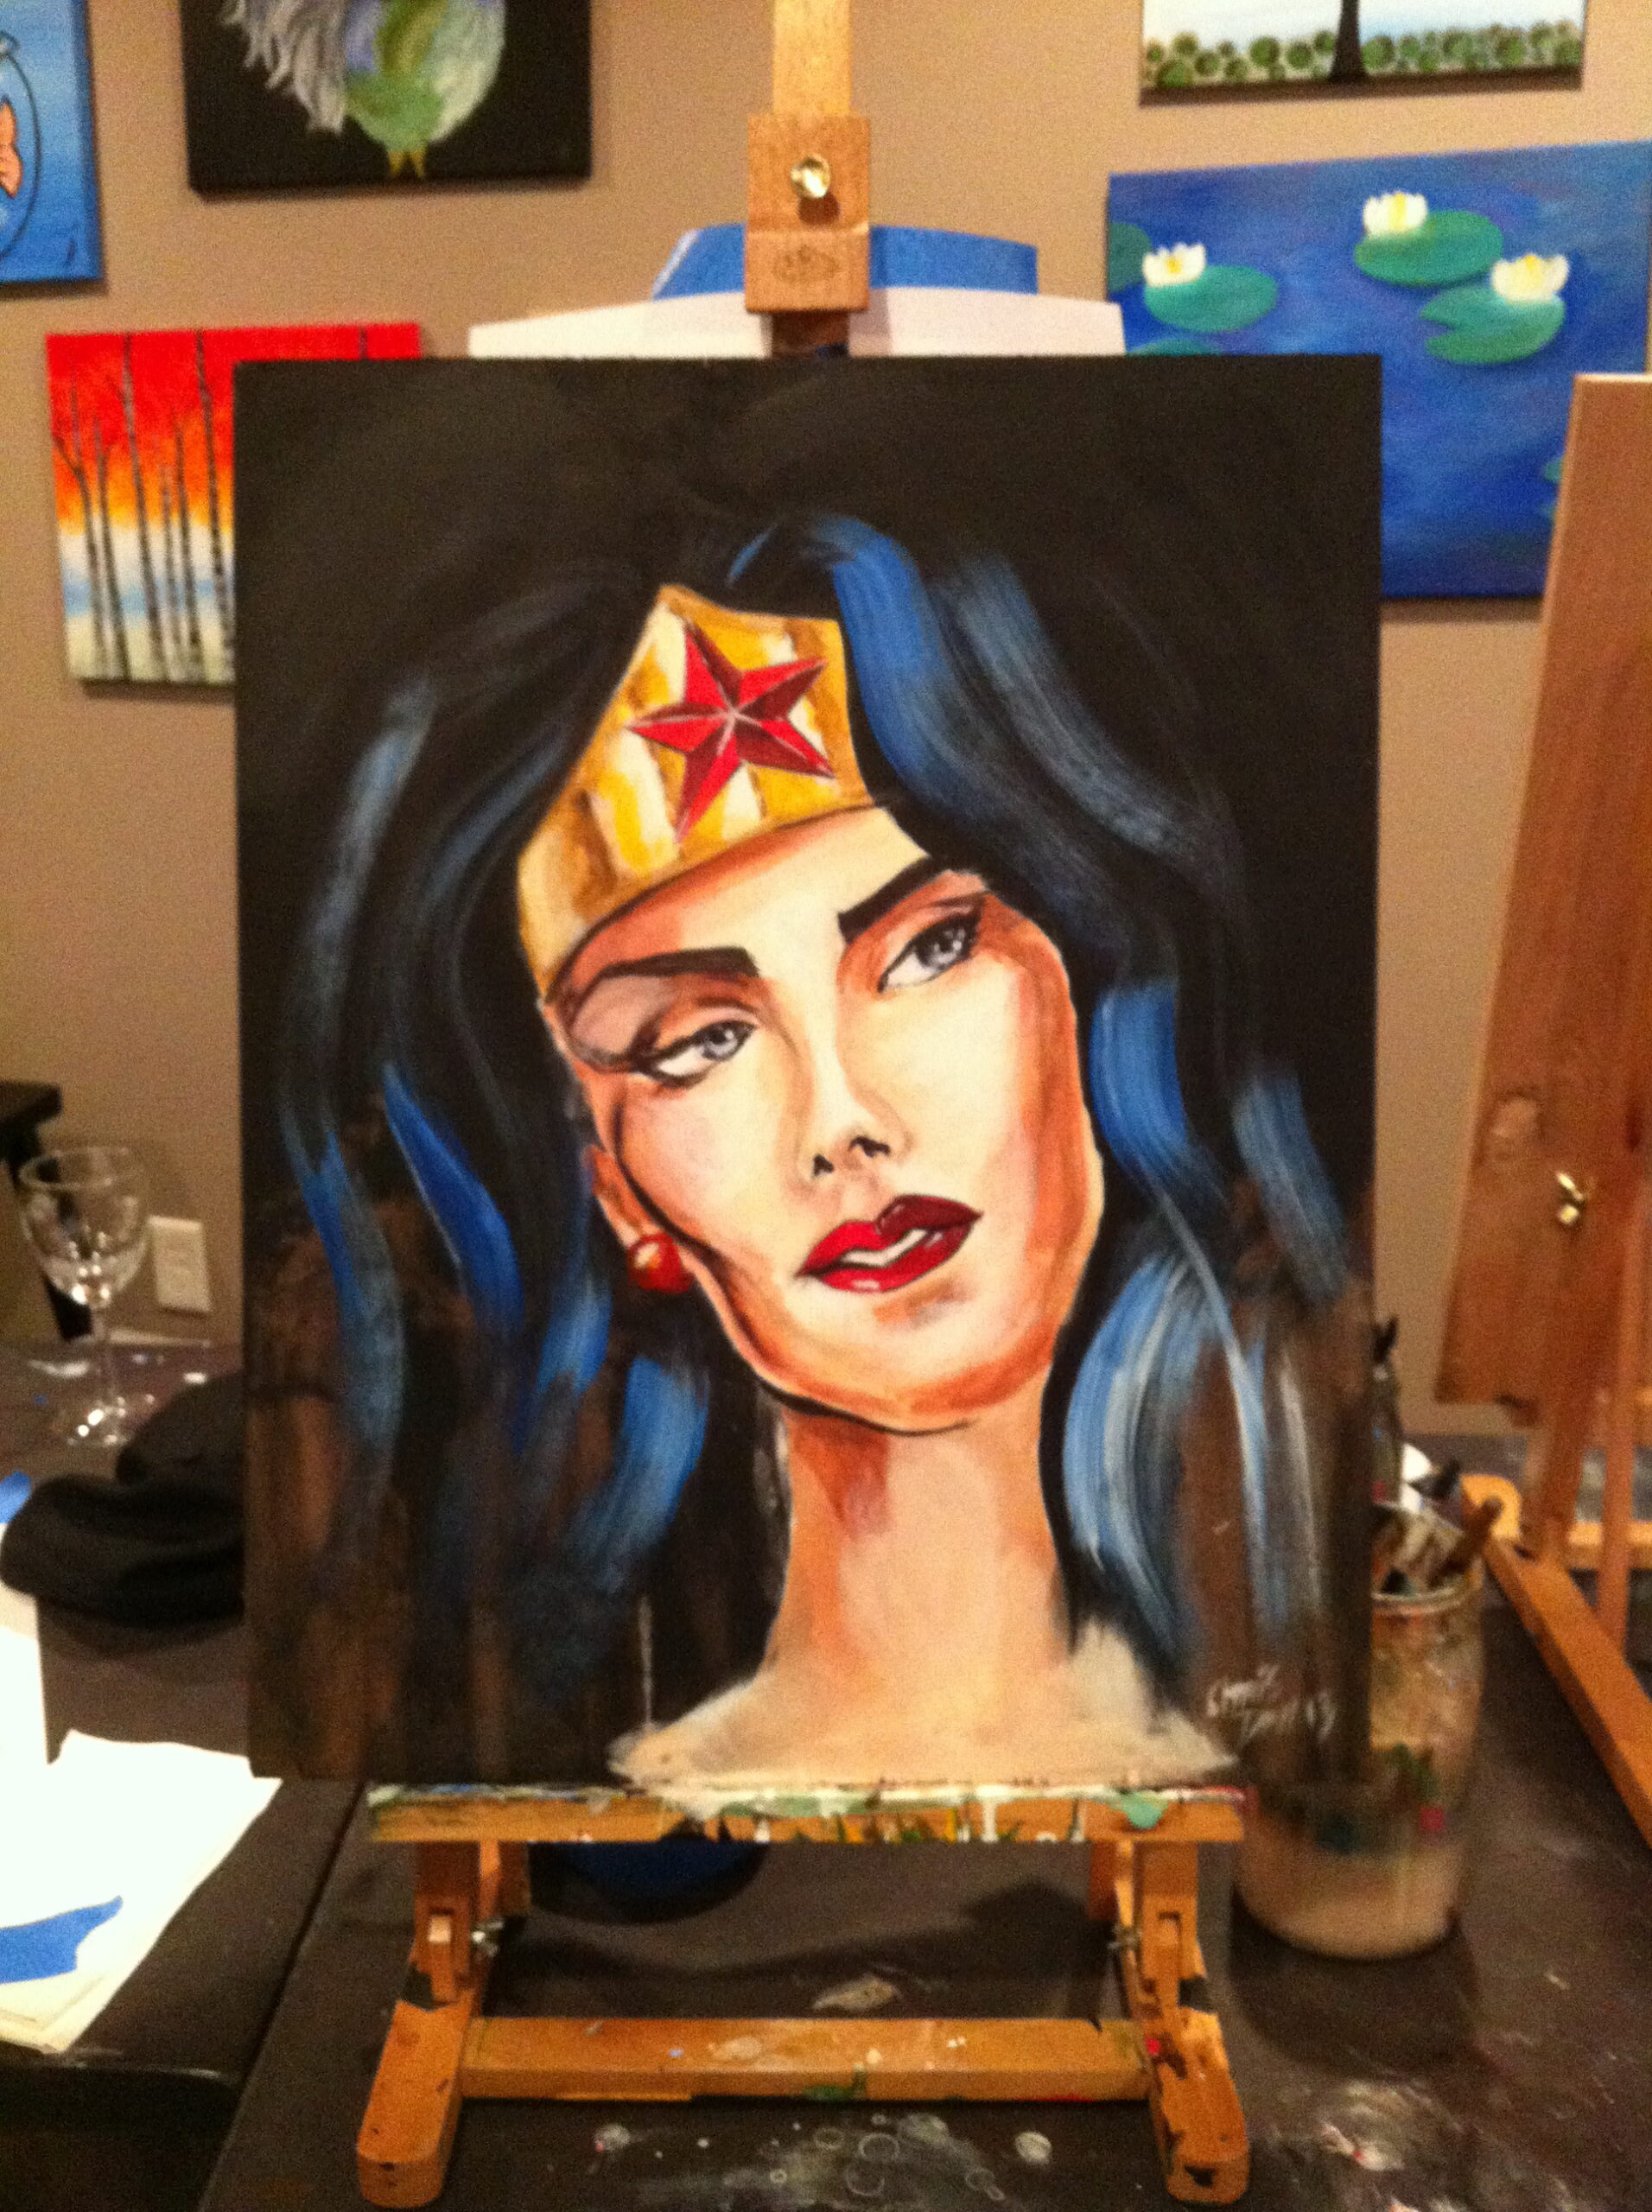
Painting Wonder Woman at The Drunken Easel
My new friends Justin and Janell hosted guest artist Son Duong for an afternoon session at The Drunken Easel in Woodinville, Washington. Son’s art has been used by companies like Skull Candy, and he has a love of comic book heroes like Wonder Woman. For me, this was a great chance to paint a human form – something that I’ve been practicing, but haven’t yet gained confidence to the level where I’m happy sharing any samples.

The class included several Drunken Easel regulars, of all ages, and I was happy to see it wasn’t only comic aficionados.

Son provided a a graphic to use as guidance, which helped in a four hour session, and walked us through the steps as we dripped paint onto the plywood boards we were using as a canvas.

I’ll admit, I struggled, and it wasn’t clear to me why I was having difficulties getting the color tones to work the way I wanted them to. In principle, shading and forms work similarly to the kinds of illustration I’ve been doing with hardware and space scenes. By merely adding the human element, I got tense. We’re born knowing human faces visually, at least those who have sight, and as a result we’re all highly aware of faces that are off by just the smallest bit. Whether it’s the proportions on the eyes, expressions, even the fall of hair on the shape of the head. When any of these aren’t working, it’s easy to spot.

Eventually, with the help of several quality stouts, I loosened up and pushed through the final stages. Overall I’m happier with the end piece than I was halfway through it, and it’s not something I’d be inclined to hide in the garage anytime soon. I consider it a success in that I tackled a subject, and a style, that is outside of my comfort zone.

Son did an amazing job on the sample (shown below), which is up for a raffle on The Drunken Easel’s site. If you’d like a chance to own this yourself, check it out.

-
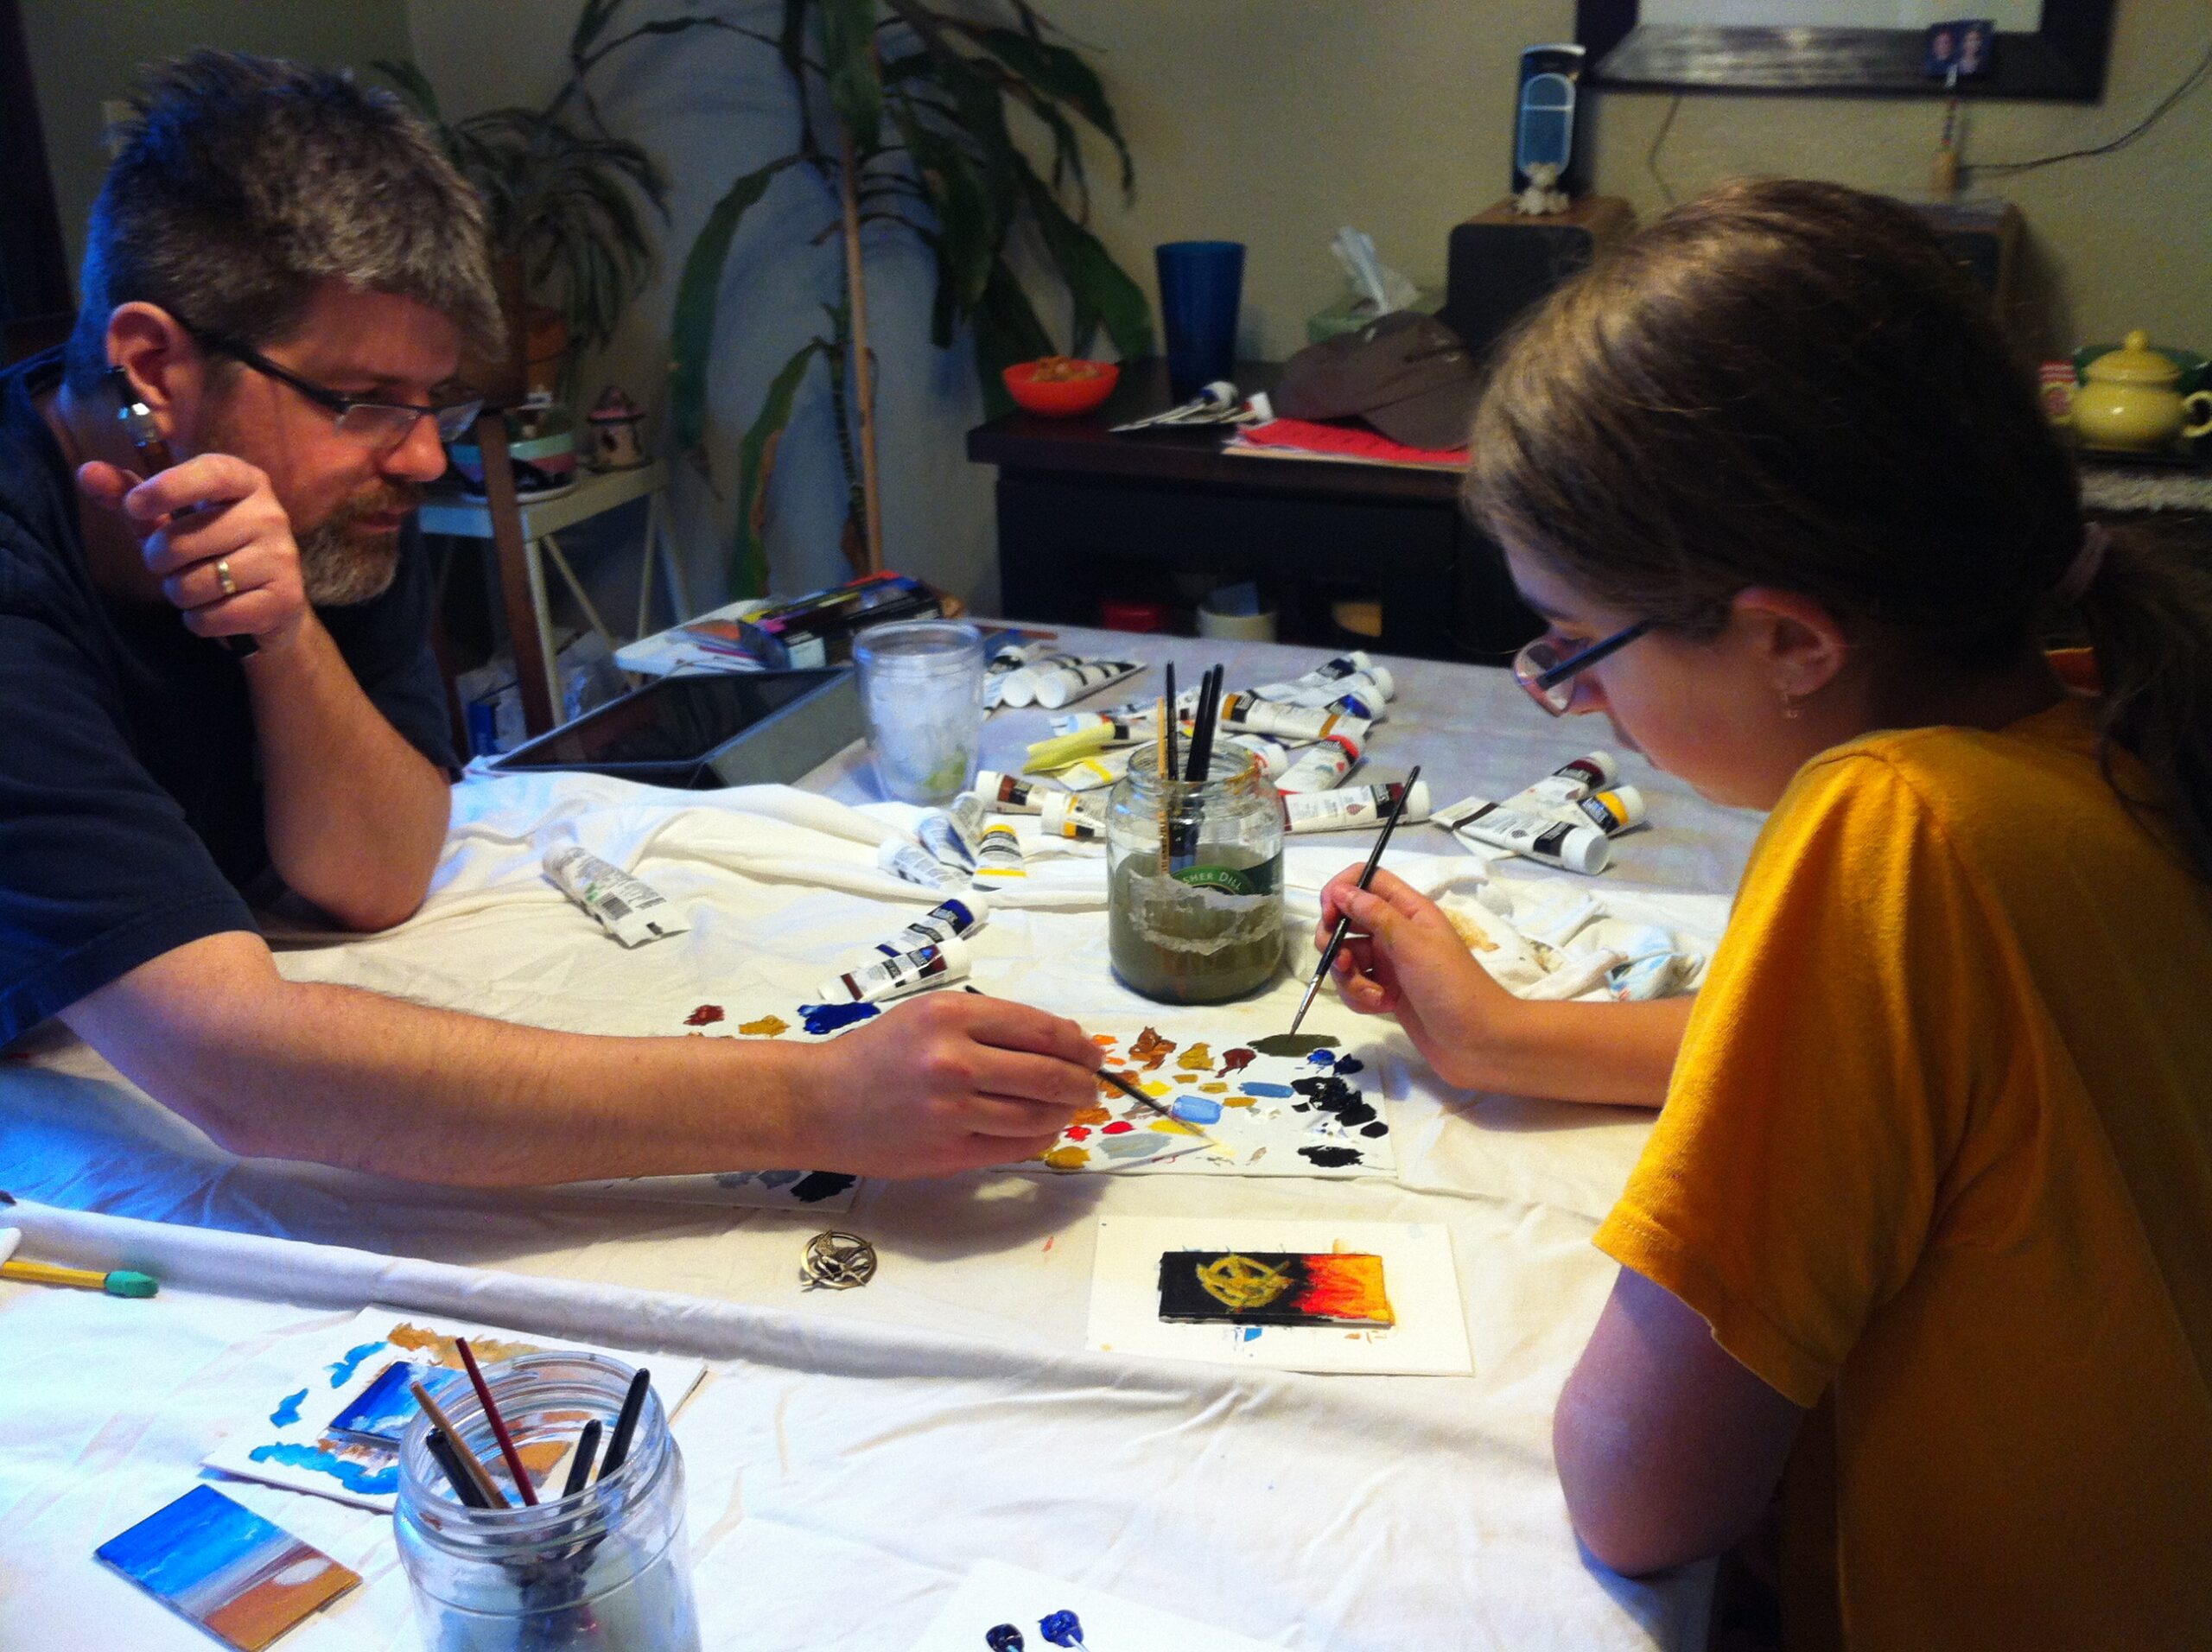
Painting with my Daughters
My daughters have grown up with parents who enjoy many creative, artistic pursuits, and with my recent plunge into the world of art and painting I’ve begun showing them around a paint brush. They’ve painted before, but not with the artist acrylics I’ve been using, and this may have been their first tutorial on painting.

There’s a trick to getting the paint to just the right consistency, something I didn’t find out until much later in college. We started with some ocean beach scenes on little canvas-covered illustration boards. Allison, my oldest daughter, wanted to paint the MockingJay pin from her favorite book last year, The Hunger Games. She’s much more the perfectionist about these sorts of things, just like I was, and exhibits the same frustration when she can’t get things exactly the way she’d like.
Jessica, on the other hand, was gung-ho about getting her beach painted with a palm tree. At 8 years old, she blasts into projects like this with great enthusiasm. No fear, no hangups, just give her the brush and she’s off! Both stuck it out for several paintings before showing fatigue. They didn’t realize we’d been at it for a couple of hours.

Both of them tried out my little beach scenes (above), and then did their own. It was a way to spend time with the girls, sharing with them some tricks and skills without the interference of a glowing screen. But for me it was fascinating to see elements of my own personality play out in their excitement, frustration, and their own view of the world through these little pieces.
-
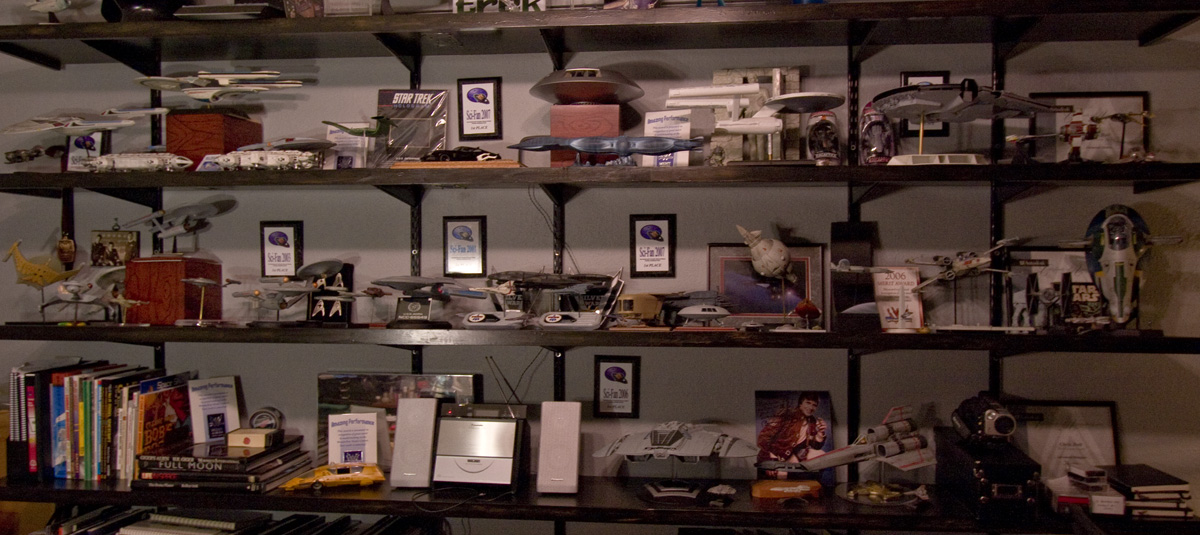
My home studio, The Bunker
“The Bunker” was my favorite suggestion as a name for my home studio, thanks to my pal “Crazy Joe” Nedjberger. It won out over some equally good suggestions like “The Dollhouse”, “Dollshop”, “BlackBirdCD’s Cave”, and so on.
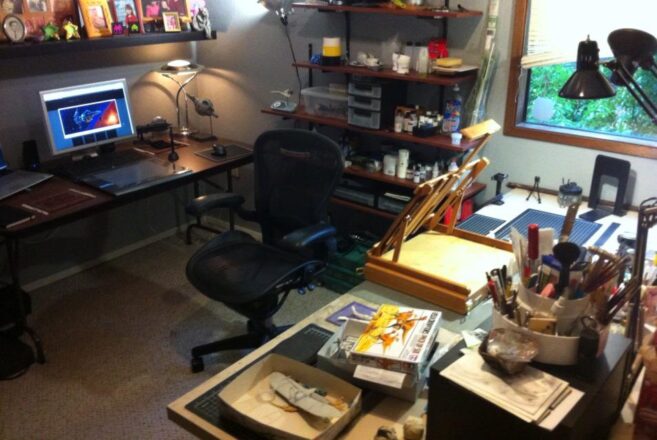
The room itself is the fourth bedroom of our split-level house in Bothell, Washington, and the largest bedroom in the house. It was partitioned by one of the previous owners in the originally unfinished downstairs. For years it’s been the home office, craft area, and model-building space all crammed into one. Having such a dedicated room is one of the luxuries our modest house offers, but as is the nature of such a space it was rarely comfortable to walk into, much less work-friendly than it needed to be for my new career as a Freelance UX Designer and artist. Let’s face it, the hobby room is the last to be sorted out and organized unless it’s used on a regular basis.
Gone were the piles of half-started, in-progress spaceship models, paperwork and tangles of cables from long-forgotten computer hardware. That’s all out in the adjoining family room now, or in the refuse pile. That which is to be retained has been brought back in carefully, put in its appropriate place, as I re-configured the desks to be more efficient for my work.
Digital on one side:
And my workbench for painting and model building on the other:
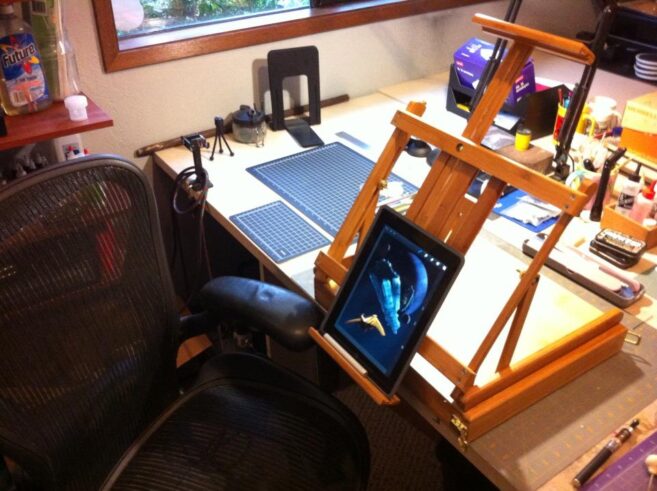
The feature image of this post shows the shelves that I use to display finished models, awards, and books that I turn to regularly for the work that goes on here. It still needs a little love, but that’s for a later date. The photos only show 2/3 of the overall space, the rest is dedicated to my wife’s craft station, and a large closet. Four people can be seated at the central island where the easel is sitting. It’s a good sized room.
Originally planned as a weekend project, the cleanup has extended into nearly ten days of careful re-organization using the existing furnishings. It will never look this clean again, but I’ve already noticed how the change has improved my own efficiency, and my own demeanor when I’m in the space.
If there’s any lesson to be gained from this exercise, it’s gotta be one of the most basic – “clean your room”.
-
Welcome 2013 – New Year, New Opportunities
2013 brings with it for me a new direction for my career as a designer and an artist. I will continue to provide User Experience guidance for software companies as a consultant through my own company, Rendezvous Design. In addition, I’ve created a plan that will allow me to devote the time and energy necessary to build a name for myself as a multi-faceted artist. The fact is, I’ve always been an artist but I’ve never put my foot down on the accelerator and made it part of my life. Instead of obsessively sketching these scenes in every notebook within reach, or building scale models in the confines of “The Bunker” – my workshop at home), it’s time to explore a path I’d not considered viable in the past. Now, in the midst of crushing economic conditions I’m taking a bit of a leap of faith. Faith in my own skills.
I must be mad.
In preparation for this transition, I’ve been filling out the portfolio on this site with my latest work. It remains mostly Space and Science Fiction imagery, but I’ve discovered the joy of painting scenes from real life in and around the Seattle area.
So what’s the plan? At the moment I’m pulling together enough finished pieces to be used as display items in galleries, local venues, and events. I’m in the process of sorting out the technical details of printing these pieces here, to sell on my site and in person. Most of the work I’ve done in the last month is at sufficient scale for excellent reproductions on canvas. In addition, there is a consortium of colleagues that are building their own body of work and we’re discussing the possibility of an organized show later in the year. Scale models will make their way into the mix as well, although the details remain to be sorted out. And, as always, I’m maintaining a program of exercises to build up my skills.
For those who’ve read so far, my thanks for your attention. Now on to 2013
-
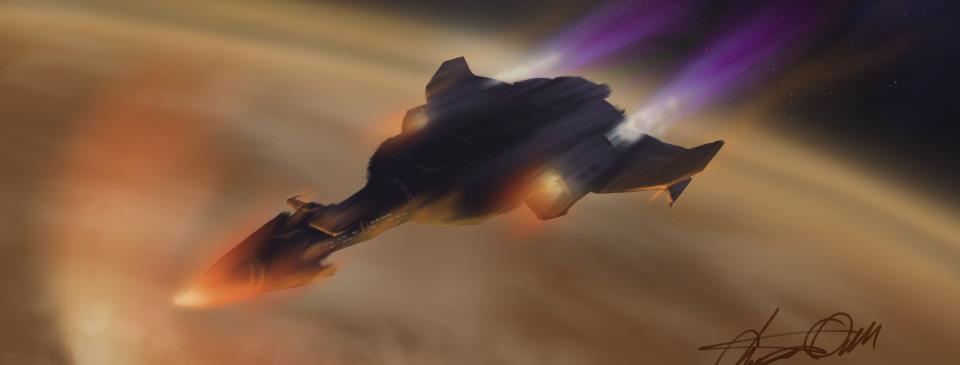
New Directions
Today is my last day at Vertafore, a software company where I’ve spent the last year as a User Experience Designer near my home in Bothell, Washington. It’s always a bit sad to leave those you’ve grown to know and have worked with over a period of time, and I am fortunate to have worked with one of the best teams of UX Designers and Researchers in my entire career, but I couldn’t pass up the chance to take things in a new direction.
For me, 2013 marks my return to the freelance world and an exciting opportunity within the e-Commerce space. But that’s not all. This move will provide greater freedom for me to see if I can turn some of my hobbies into something that will support themselves and, more importantly, my family.
I have no illusions that any of this will work out the way that I imagine when I allow myself to dream about the greener grass on the other side of the fence. Although I may have the necessary skills, at least to a sufficiently meaningful level of quality, success or failure will depend on how well (or poorly) I manage the basics like motivation, the procrastination demons, and self-doubt. Luckily I’m gifted with just enough self-delusion to make this sort of thing work out, in the long run.
If nothing else, it’ll be an exciting ride. Cheers to 2013!
-
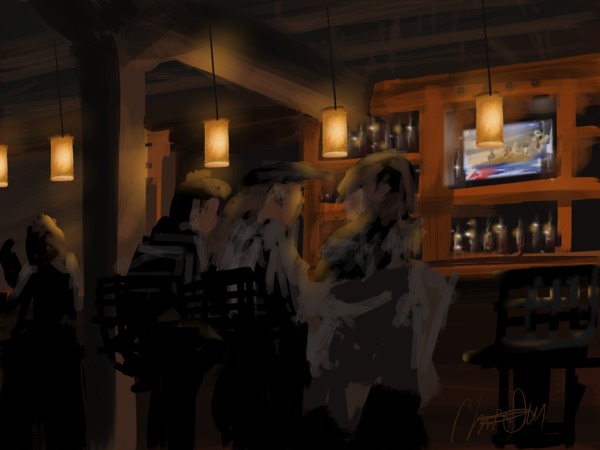
Painting the Real World (not sci-fi, space stuff)
As I’ve grown comfortable with the iPad, and painting with Procreate, I’ve found the convenience of painting scenes on the fly a wonderful way to practice rendering from the real world. It’s a good break from the space subjects I’m so find of, and helps me shake off the artistic dust, to see the world from a painter’s eye.
I don’t consider these finished pieces, merely sketches. These were all done while sitting in a pub, a coffee shop in Seattle, and the skyline was sketched after a dark morning commute. I waited until I parked to pull out the iPad.


-
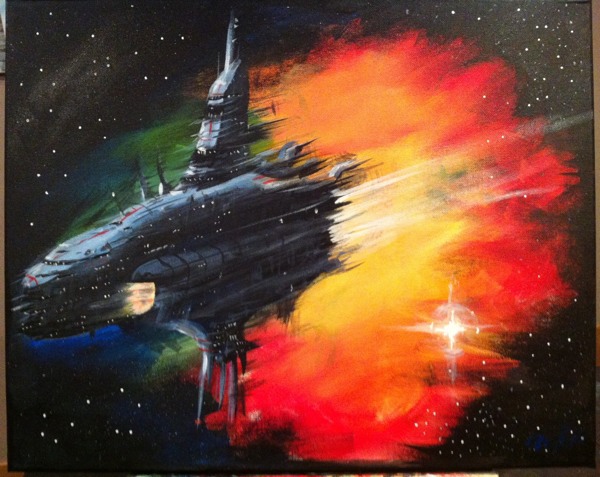
Painting on Canvas
For the first time in many years I painted on canvas, with real brushes and paint – as opposed to the digital painting that’s consumed me for the last year. My wife Stephanie and I visited The Drunken Easel, a local tavern that combines a painting class with fine, local wine and beer. It was just the two if us, and the owners Justin and Janell, which made for a relaxing evening.
After introductions, and a couple of glasses of wine, we set up to paint. Stephanie worked with Janelle on a wonderful tree with blossoms, while I took advantage of the art supplies to paint a space scene. Justin was a good sport and worked along with the space scene on his easel.
I didn’t know if I’d remember my paint skills. Scale model building requires a lot of painting, usually with a airbrush, and it’s not quite the same as painting an picture. But once I had the brushes moving it all came back quickly. Like riding a bicycle, you really never forget.


Stephanie is no slouch either, we met in an art class back in college. I’m thrilled to have spent date night surrounded by paint.
To be honest, I rather surprised myself with what materialized by the end of the evening. It felt natural, comfortable, and exciting to work up the picture. Even without the crutch of an unlimited undo, and other niceties offered by digital painting, I found the whole experience rewarding.
All in all, it was a wonderful evening, and a great chance to meet some new friends. We’re looking forward to coming back again. As for my own artistic journey, my next chapter begins with sorting out which of the paint tubes and supplies are still viable after years of storage, and picking up what I need to proceed with more of these.

-
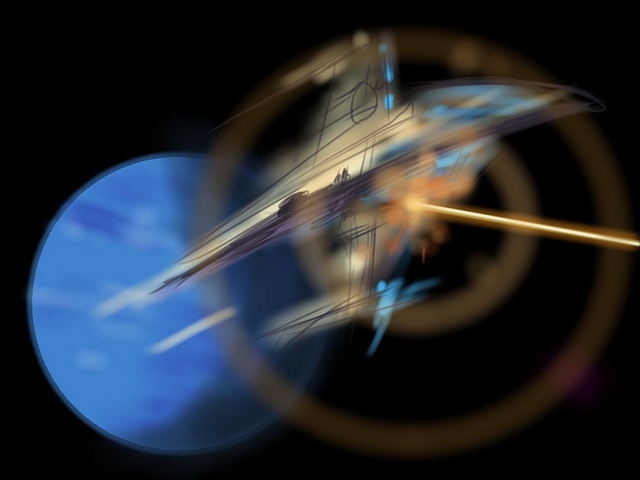
Drawing and Painting on an iPad3
I recently received an iPad3, a thoughtful and quite surprising birthday gift from my lovely wife Stephanie and our daughters Allison and Jessica. That I’ve not yet owned a tablet of any flavor has more to do with shrinking gadgetry budgets, not from a lack of interest.
I’d convinced myself that drawing on an iPad wouldn’t be nearly as rewarding or effective as the wonderful (yet very expensive) Wacom Cintiq line, which I also have not tried out. How wrong was I? Wrong enough to wonder out loud “why didn’t I get one of these sooner?”

I quickly tried out a few of the more popular drawing apps, settling on SketchbookPro and Procreate. Both are powerful enough to let me cut loose with some speed paintings, which allow me to learn the tools quickly while not getting bogged down in fine details that would otherwise derail my efforts.

The trick to drawing with a tablet is to find a good stylus, a pen designed to work with the capacitive touch screen. None of these provide nearly the level of control or performance of a decent Wacom tablet of any flavor, but many give you more than enough control to have a lot of fun. And to have such tools in a small, comfortable form-factor like a tablet makes for a highly convenient art studio at your fingertips.
Luckily for me, I work with a group of User Experience Designers who have already tried out a number of stylii for these tablets. Most feel like you’re drawing with an eraser, although it’s much better (in my opinion) than trying to paint with your fingertips. We’ve had fun trying them all out:

So far, I’ve rather liked the Wacom Bamboo stylus, although the spongy rubber tip means that you really cannot be bothered knowing exactly where your marks will land on the screen. Sure, it will be within the 1/4″ or so area that the tip covers, depending on the angle. I find these are best for loose, impressionist styles.

The Adonit Jot line takes a different approach, giving you a clear disc on the end of the pen. You can see much more of your drawing contact point, making it a far better tool for precise drawing.
In both cases, the more traditional pen-sized stylii work better for drawing than the smaller, more portable ones. Next I will be trying one of the new, pressure-sensitive Pogo Connect Stylii but the price is making me hold off while I spend more time with the Bamboo and Jot.

Drawing and Illustrating on a tablet isn’t perfect, but I’m finding that it’s pushing my learning curve in a good way. I’ve set myself a series of goals, starting with “once good speed painting a day”, meaning something I’m willing to share. I spend between 20 and 90 minutes on any one of these, with some turning out better than others. Already I’ve noticed a tendency to stick with similar color tones and patterns, as well as drawing tools provided by the apps. I don’t mind so much that the theme remains science fiction / astronomy related for now, I’ll be tackling other subjects once I detect that I’m slowing down.

Speed Sketch – some spacecraft

I’m even happy with flat-out copying artwork that I’ve enjoyed – like the image above, which was painted using the cover of the book SPACE ART by Starlog Press (old, old book). I’ve always enjoyed the book’s Saturn painting, and needed a break from blue-tones (didn’t get away from them entirely, but it was a good way to learn some new tricks).

For now I’m sticking with these sketch-level paintings, and having fun with the process. But I’m feeling the need to tackle some of the pieces I’ve listed for the next level – something I’d be happy to print and/or sell.
* UPDATED – I’m finding that I turn to SketchbookPro with the Adonit Jot Pro Stylus for more technical illustrations, and Procreate with the Wacom Bamboo for free-form illustrations. For both the apps, and the pens, each seems suited to a specific role, meaning I’ll be toting both along for a while.
-
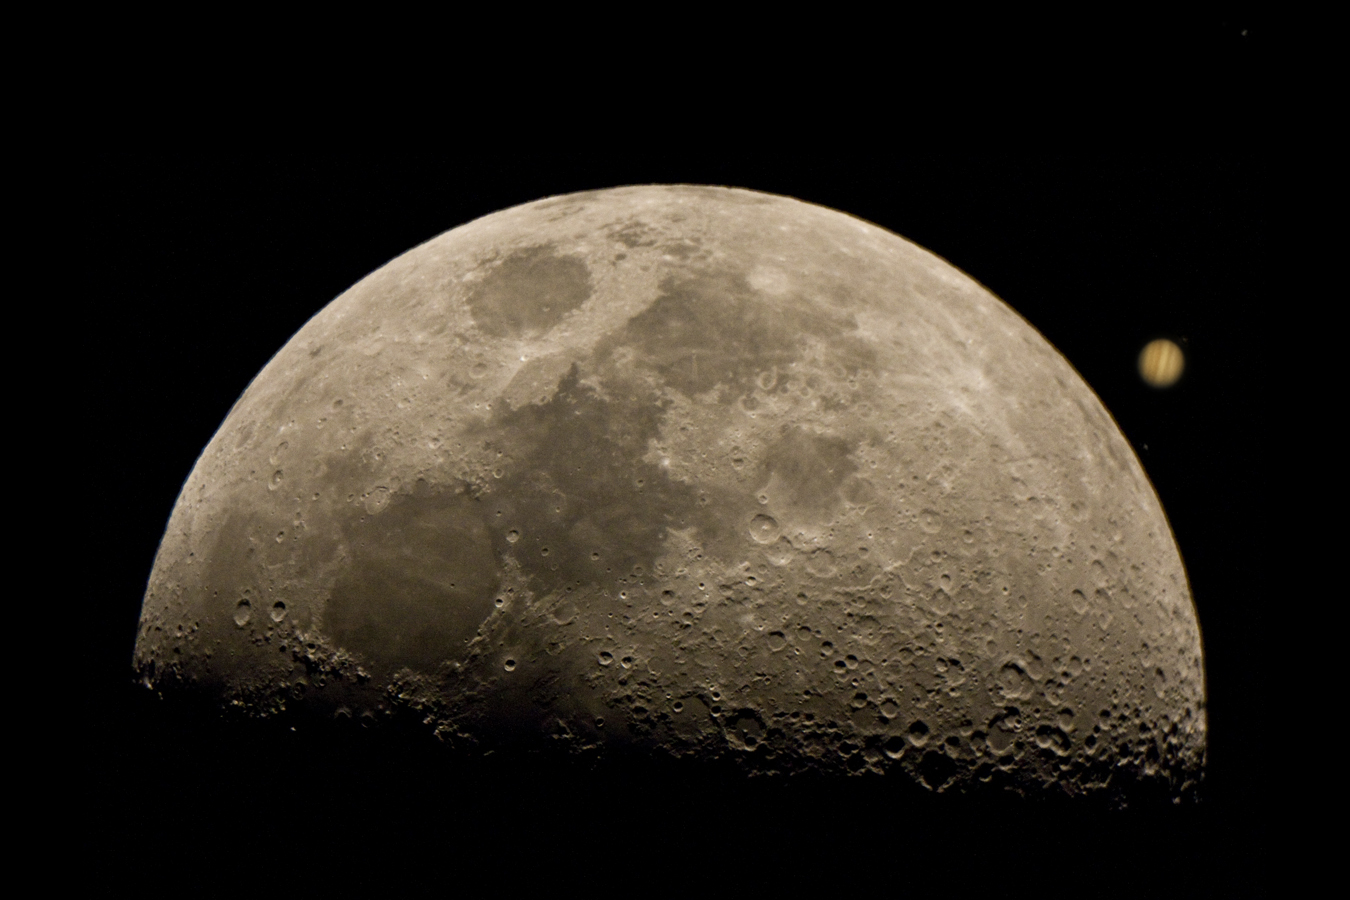
My First Astrophotography with a Telescope
Up until yesterday all of my star photos have been taken with my Canon 40D mounted on a tripod. I�ve read enough to know you can get fantastic images with just your DSLR, without a telescope. And in the process you learn a lot about exposure times, settings, and post-processing.
Last week I stepped up to a Celestron C8, a Schmidt-Cassegrain telescope with an 8-inch mirror. My thanks to the Seattle Astronomical Society for offering equipment check-outs to members. Exciting as it is to try out a great telescope, my family was thrilled to check out the moon the first night we set it up. That�s Jessica, eight years old, who just finished frosting the birthday cake for my wife Stephanie.

The Moon
September 22nd, 2012 was the International Observe the Moon Day, and here we were observing the moon. The moon was nearly a full quarter, with a great view of the crater shadows along the terminator. After taking turns being blown away by the moon at dusk, I took out my camera with the appropriate telescope adaptor. Lining up such a large, bright target wasn�t nearly as challenging as trying to capture stars without a telescope. But I took 60-plus photos anyway, bracketing settings, focus, and playing with the composition.
Of all the photos, this view was my favorite and I present it to you with minimal post-processing in Photoshop. What you see below is almost exactly as it was shot. I did adjust the brightness and contrast only slightly, and framed it for composition:

Jupiter
I spent the rest of the evening fighting with hazy viewing conditions, enjoying the stars that I could see. Around 2:30am, already far later than I�d planned on staying up, this showed up over the trees:

I grabbed my camera, and set about taking photos. By now I�d already moved the telescope to a clearer spot in my backyard which meant I had ruined my polar-alignment (the telescope was no longer aimed at the Earth�s point of rotation, meaning it would be difficult to track any object easily with the built-in motor). Undeterred, I went back to settings I�d learned while shooting stars without a telescope. Short exposure times, lots of them, stack and process the images later.
I took over twice as many individual pictures of Jupiter than I�d taken of the Moon � over 120. I could get ten photos shot before having to re-center Jupiter in the viewfinder � the Earth�s rotation is far more obvious when looking through a telescope. From those, I was able to do a first pass at processing the picture you see above, with ten of the best shots.
I�m quite happy with what I�ve accomplished so far, recognizing this is all part of a long learning curve. Next time it�s polar tracking and hopefully, with clear skies, some deep sky objects -

Seattle Astronomical Society Star Party – September 2012
I’m revisiting my love of Astronomy and Space, an interest I’ve had as far back as I can remember. It’s been years since I’ve owned my own telescope, and now with my interest rising I’ve reached out to the local Seattle Astronomical Society. As a new member, I attended last weekend’s Star Party held at the Snoqualmie Point Park, about 40 minutes East of Seattle. Star Parties are excellent for meeting others who are interested in Astronomy, and to learn more about Star Gazing and Telescopes. While I’m saving my lunch money for a new telescope of my own, this was a great chance to sort out what would be best for me.�

The park was spectacular, with sweeping views of nearby Mount Si and the Cascade Mountain range. Weather reports were calling for clear skies, although there were some clouds remaining, mixed with smoke from wildfires over the pass. Not quite far enough away from Seattle and the outlying suburbs, a slight glow remained to the East for most of the evening.

This was my first SAS event, so I was expecting to meet a lot of new people. David Ingram was on hand to welcome me, and had already set up his gigantic Dobsonian.

Bob Mulford was there �as well,�with a nicely crafted Dobsonian. I was hoping to see a home-built telescope, having just checked out Richard Berry’s book “Build Your Own Telescope”. Also on hand, Jon Bearscove of the Galileo Astronomy Unclub, Mohammed, Denis, Zong (forgive me, I have no last names here).

As the sun went down, more people arrived and telescopes were set up. David told us all that although this was to be a members-only Star Party, a High School class would be visiting for the first part of the evening as part of the Astronomy Outreach program. The class seemed legitimately interested in spending their Saturday evening under the stars, and they certainly had amazing views through these telescopes.
�

The clouds slowly dissipated, and just as everyone was deliberating whether or not we’d have clear skies, the first stars showed up.

While I don’t have my own telescope, I did bring my digital camera, a Canon 40D, with tripod and two lenses – a 50mm f/1.8 prime lens, and an 11-22mm Wide Angle lens. With clear skies that are darker than what I get in my own backyard, I wanted to try to capture more wide field shots of the skies. This would be perhaps my fifth attempt at star photography, and to be honest I’m still not entirely happy with my own results, but I’m learning a lot each time. Most of the time, I get something that looks like this:

If you click on the full-size version you’ll see that I did indeed capture a lot of stars. Still, it wasn’t nearly as amazing a sight as I was about to witness. Before the High School students arrived from their overview talk nearby, Bob called me over to his telescope “Hey Chris, do you want to see M14, a globular cluster?”
Why yes I would, I thought. The optics on these telescopes were far better than any I’ve owned, better perhaps than any I’ve looked through personally. With a quality eyepiece, it’s like looking out a window on a spaceship. Some have such a wide angle, you do almost feel like you could fall right in. The depth you see is staggering, especially in an object like a globular cluster with many points of light within the same field. Pictures truly do not do it justice, I highly recommend that someday you too seek out a local Astronomy gathering like this. Use someone else’s expensive gear, they’ll be thrilled to show you the sights.
I drifted along to several other setups, and even got my first look through a 2-inch eyepiece. These are much larger than what you would be used to, more like a giant picture-window on a starship. I managed to catch myself on the edge before falling into the double, double-star in the Big Dipper.
[devider type=”” height=”” no_border=””]
My Photos, and the rest of the night
With the students now�queuing�up to see different sights on our now clear skies, I returned to my camera and set about getting as many quality shots of the dark skies as I could. My tripod isn’t equipped to track the stars’ apparent motion, like many of these telescopes, so I had to keep the exposure times low. Andromeda had just moved into the clear, and knowing it’s bright enough that even my camera lenses could pick it up, I decided that would be my target. One of the raw shots even had a tracer from a shooting star:

As I proceeded with taking my shots, behind me I could hear a number of SAS folks calling out the objects they were pointing at – and calling them by their proper names: M31, Albireo the double star, the Coathangar. Clearly I needed to brush up on my Astronomical names, memorize the Messier catalog, and otherwise get back up to speed.
Mostly I managed to get a range of images of the area around Andromeda, enough to where you can actually make out the galaxy. Later, after hours of Photoshop sorcery, you can pull out enough information to get a reasonably decent image. Andromeda is a bright object, one that can be easily seen with any binoculars (or the naked eye on a very clear night, free from any city lights), and can be captured somewhat easily without the aid of a telescope. And while I’m not producing images fit for a coffee-table book, I’m pretty impressed with what you can get from a relatively inexpensive lens and a DSLR. Here’s a closer shot of Andromeda, with very little post-processing.

I have no illusions that my astro-imagesbarely qualify for even rank-amateur status, but it’s a start.

I left a bit before the final hours of the Star Party, but I’m thrilled to have met a lot of really great people and see some amazing sights. The Outreach aspect of the SAS is quite appealing to me. It’s great to see the reactions on people’s faces, the first time they see some of these objects. I’m sure I had the same response myself. I look forward to attending more of these Star Parties, and I certainly encourage you to seek them out in your area. You won’t forget it.
-
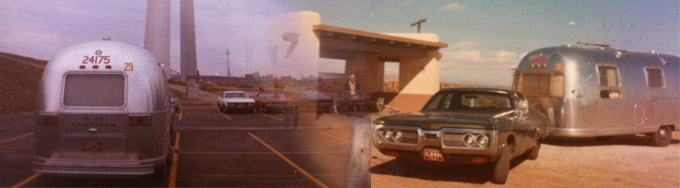
My search for a 1970 Airstream Safari
This is the story of how I found myself on a mission to find a vintage Airstream trailer. In particular, an early 1970’s single-axle Airstream. That I’m on this quest at all is as surprising to my wife as it is to me. She’s long since accepted the fact that I stumble into obsessive spirals over�new-found�interests, hobbies, and other distractions. Often to the point of ignoring more important matters, like life. I take in hobbies the way some people take in every lost stray that passes their door. This time, however, it was a bit different.
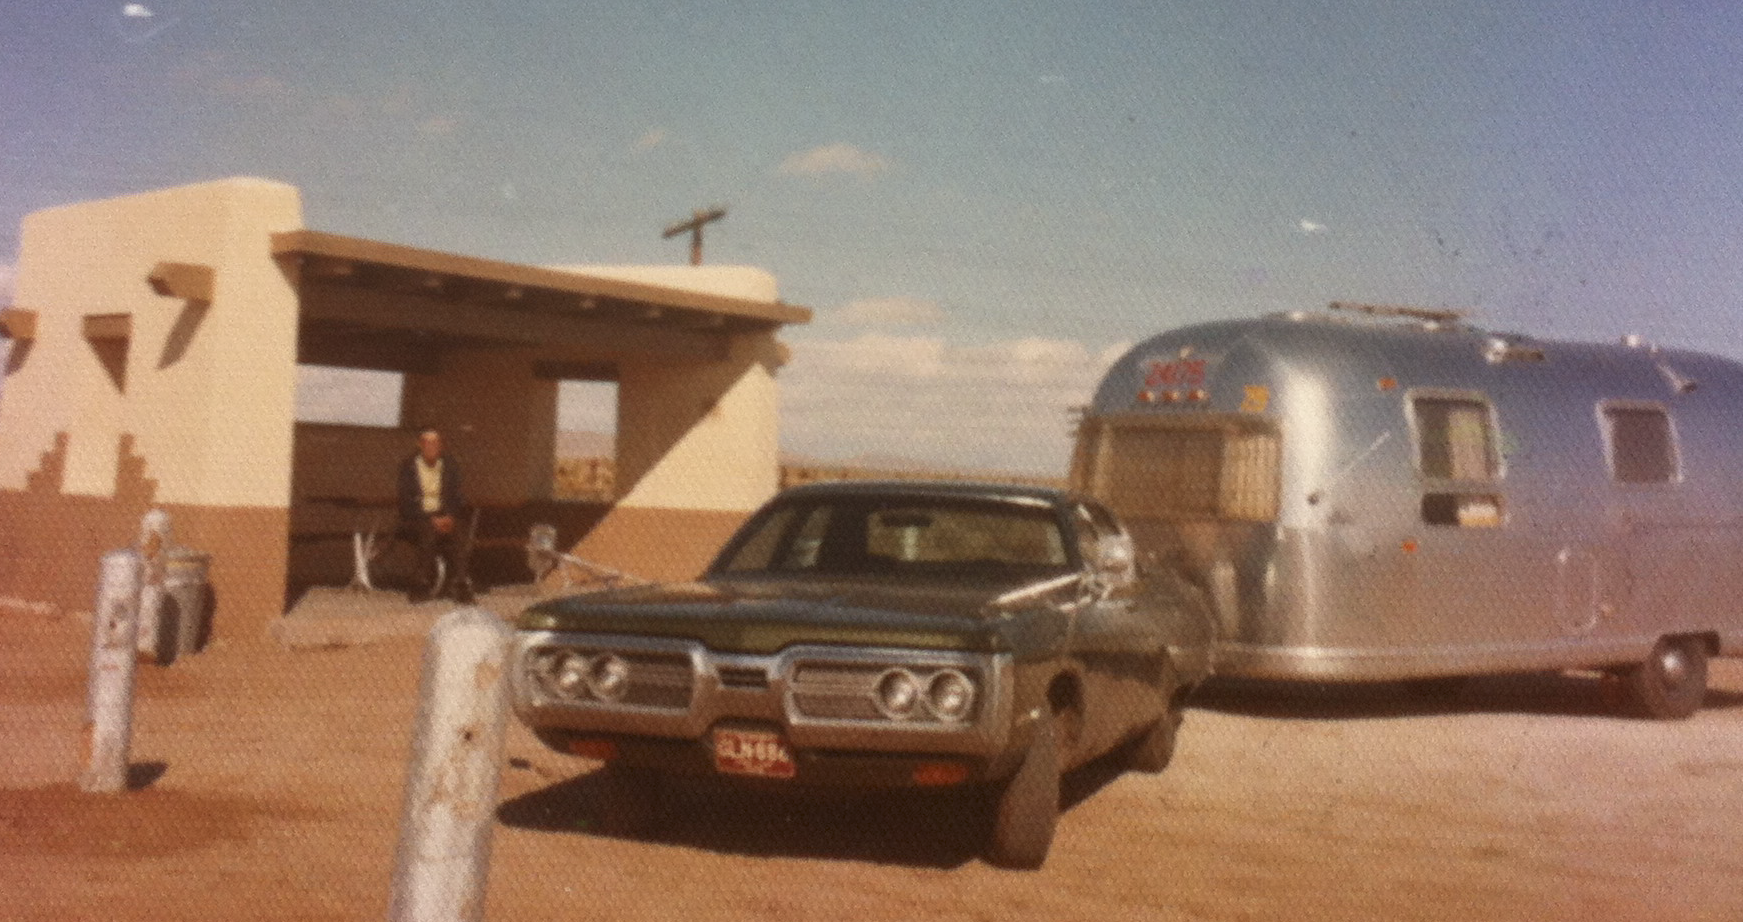
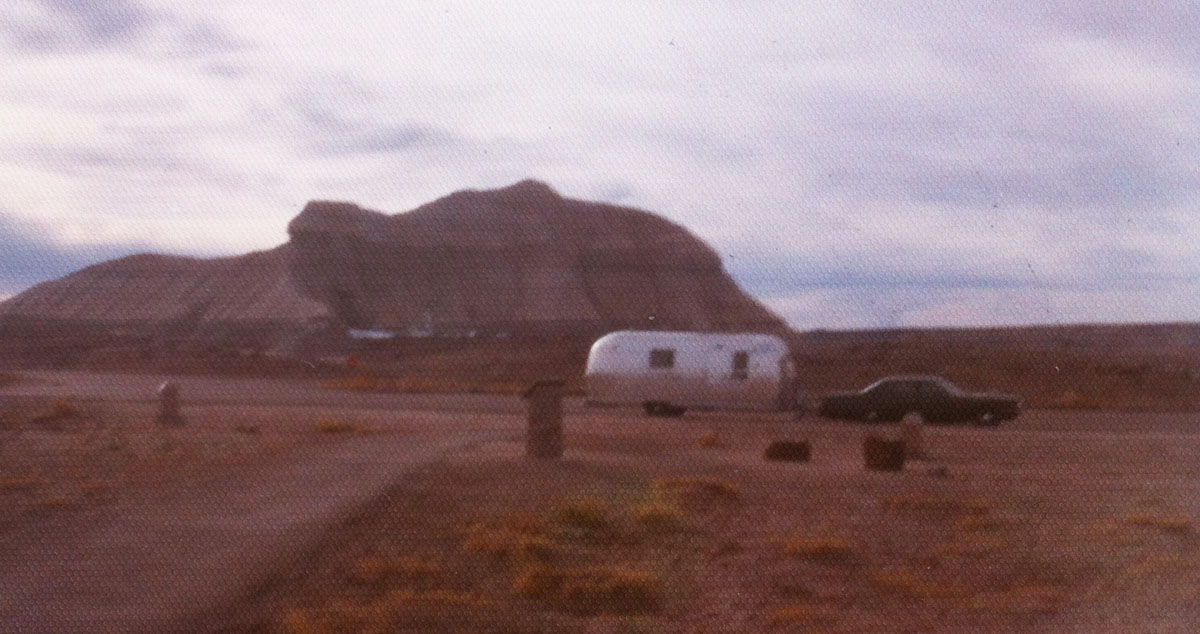
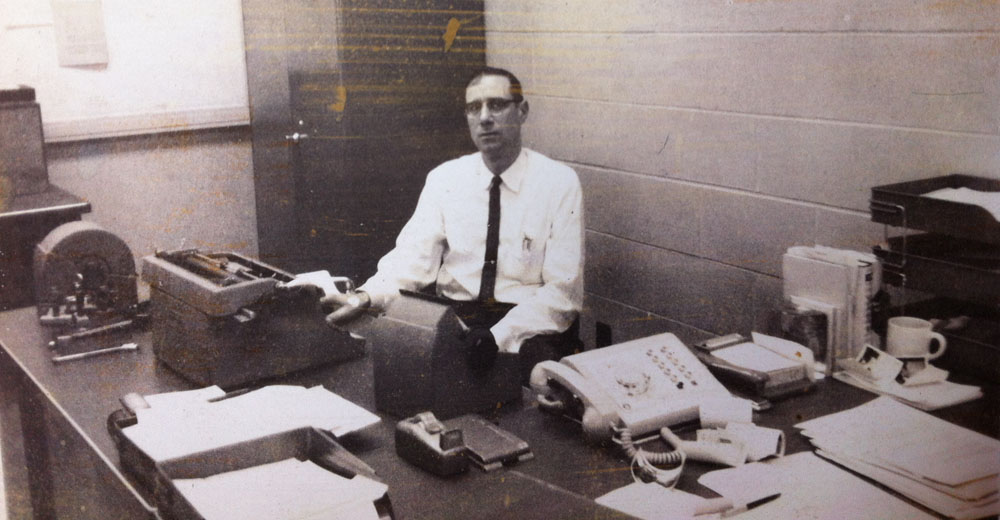
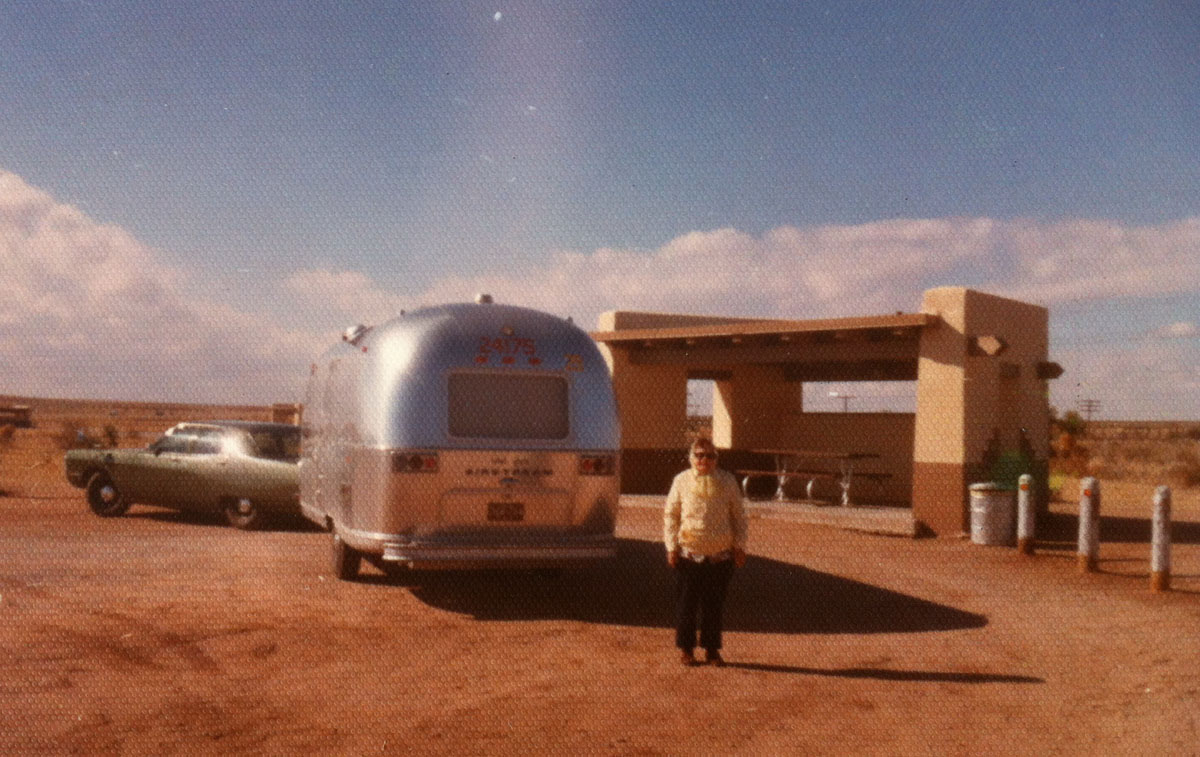
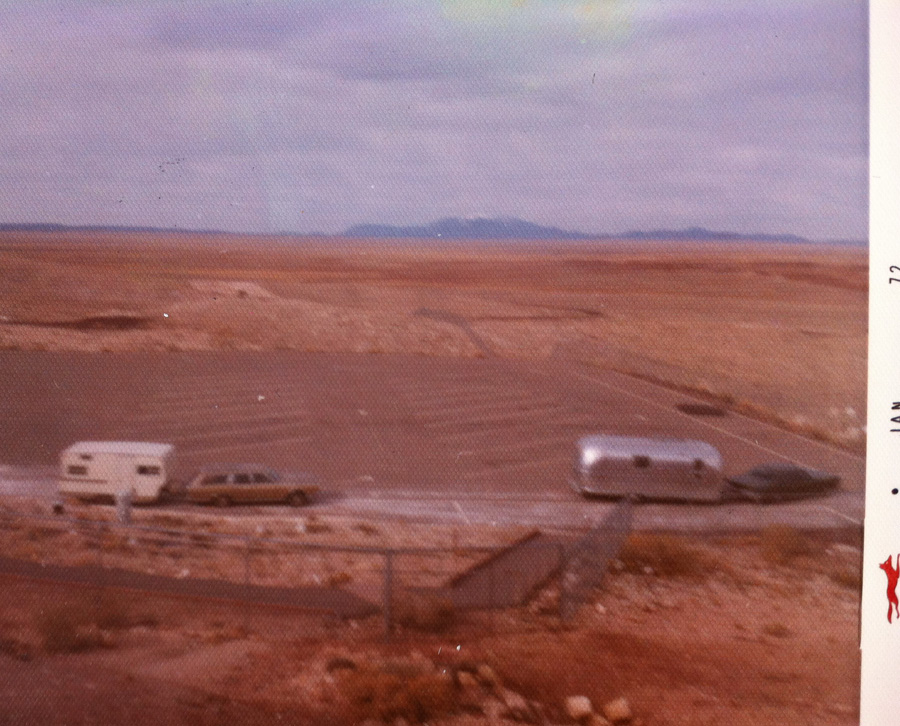
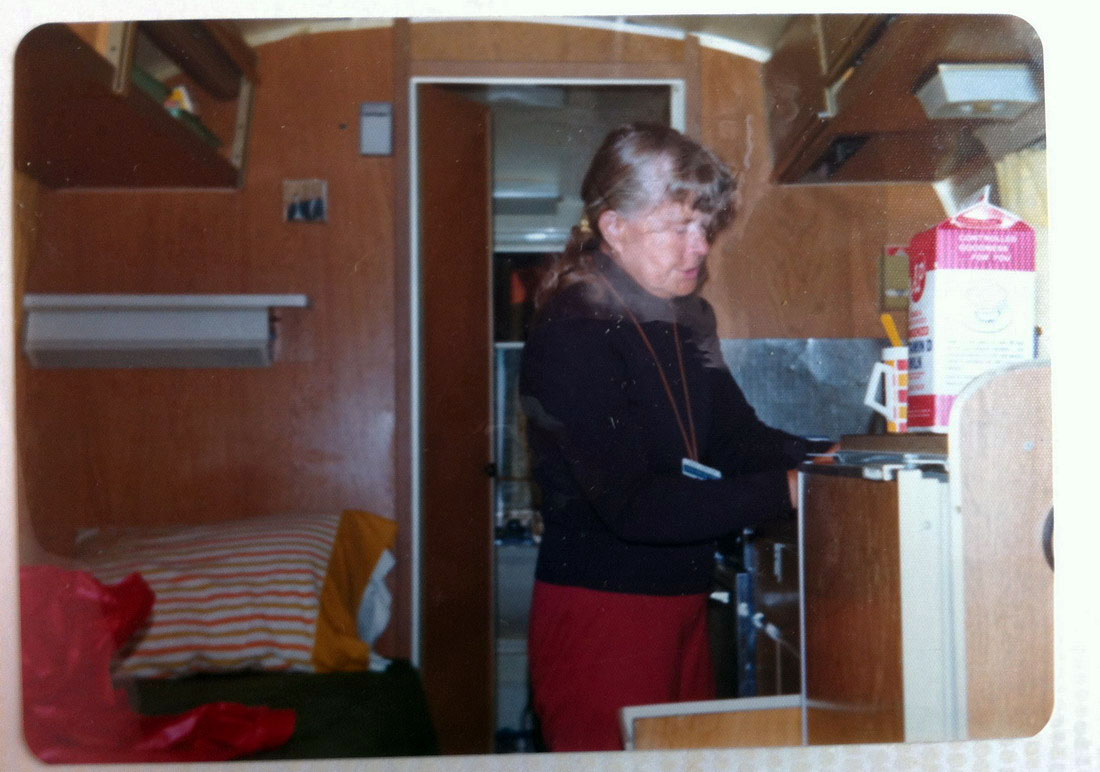
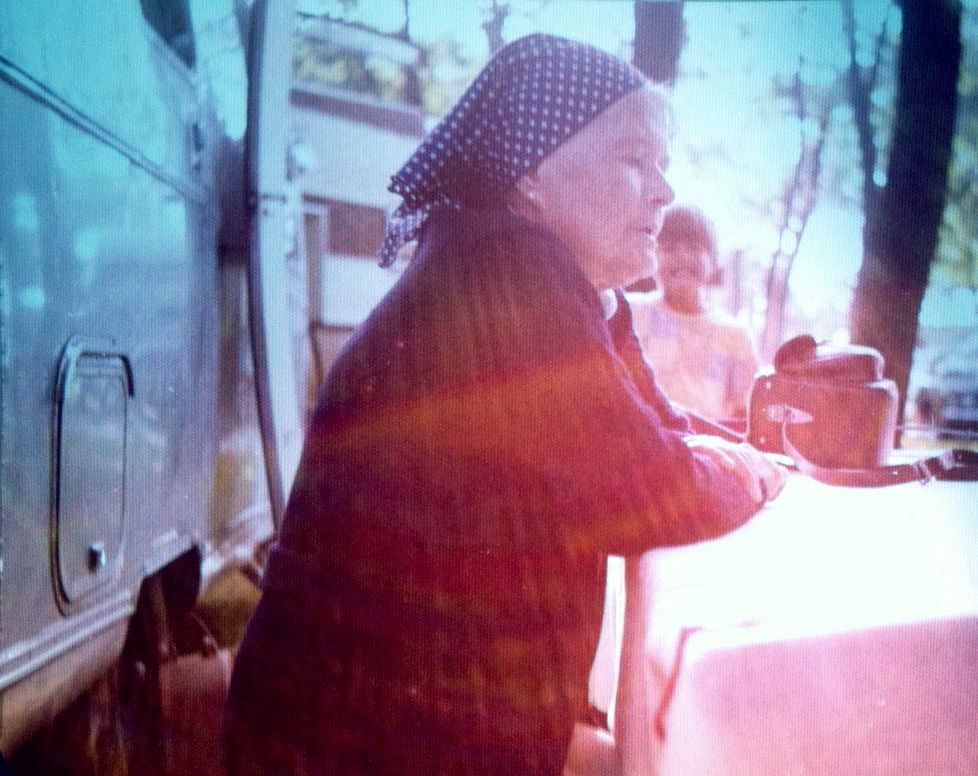
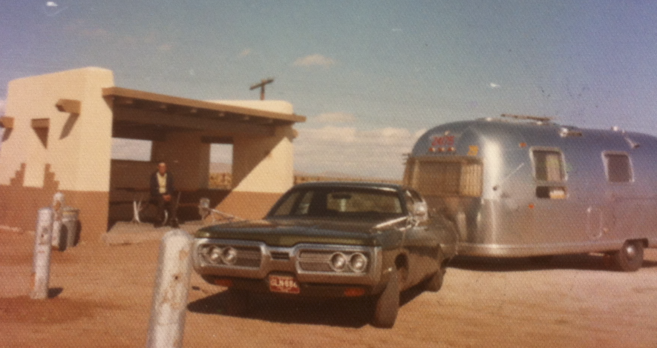
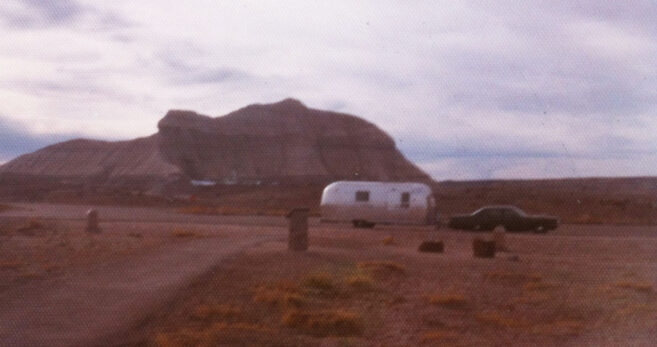
Last summer my family and I visited my father at home in Michigan. During the visit I found old photos that I’ve not seen in decades. Photos from my grandparents, my father’s parents, who lived in the small town of Saline, Michigan near Ann Arbor. Among them were pictures taken during a very special trip they took to Sedona, Arizona in their brand-new Airstream trailer.
 �
�
They loved their Airstream and had long dreamed of owning one when they retired. My Grandfather, Maurice Doll, was the head Accounting Administrator for the City of Saline. He was well-regarded and quite capable of his duties, although he didn’t particularly enjoy dropping in on the Ann Arbor Art Festivals to remind the dealers how important it was to properly fill out their sales tax forms for anything sold that day. My Grandmother, Marjorie Doll, was a nurse at the local hospital and likely more pragmatic than my Grandfather. Both had a wonderful sense of humor, and were great company.
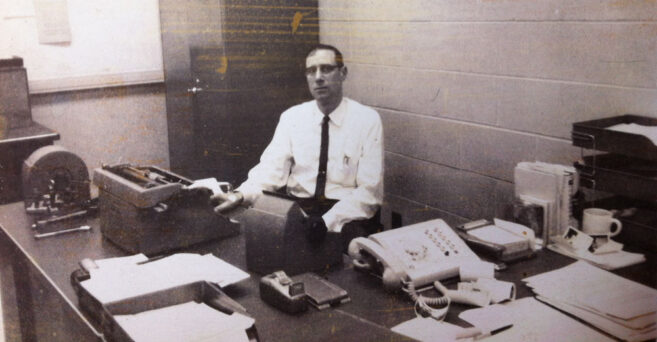 �
�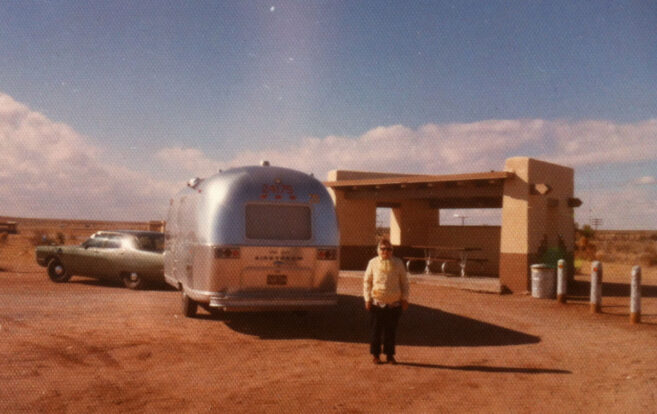
Confirming my genetic pre-disposition to grab hold of an opportunity when it arises, regardless of the risk, they decided to purchase an Airstream several years before either of them had retired. They arrived at our house for a visit after buying it, and I remember it parked next to our home while they stayed. It was a beautiful sight and they were thrilled. The next day they were off to Sedona, Arizona to visit longtime friends and to shake out the new silver bullet.
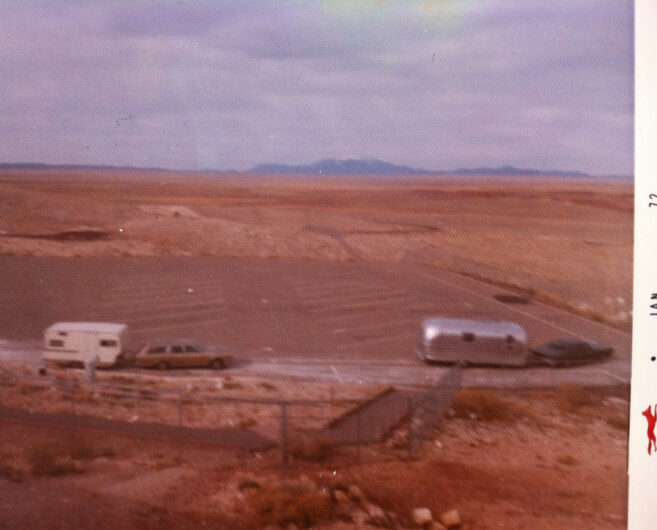
Many of the photos I found were from that Arizona trip, and I don’t recall ever seeing them.
After they returned, I was often invited to join them on local trips to campsites in and around the Ann Arbor area. My younger brother had just arrived, and was too young to join us. I recall many summer trips, staying at RV campgrounds populated with retirees, with posted signs explicitly prohibiting children of any sort on the site. Either I was better company around adults than I remember, or my grandparents held a lot of sway with their community of friends. Their grandchild was coming along for the trip.
During the work week my Grandfather would drive in to his job in Saline, while my Grandmother lined up swims at the beach, bicycle riding, and the usual activities reserved for grandparents and their grandchildren on vacation. She would make sure that we found as many nature talks as we could find, docents and storytellers who ran daytime classes on local animals, monarch butterflies, turtles, insects. I was fascinated, transfixed. We even made several trips to the University of Michigan’s Museum of Natural History to see their collection of dinosaurs, exhibits on human history, and the planetarium.
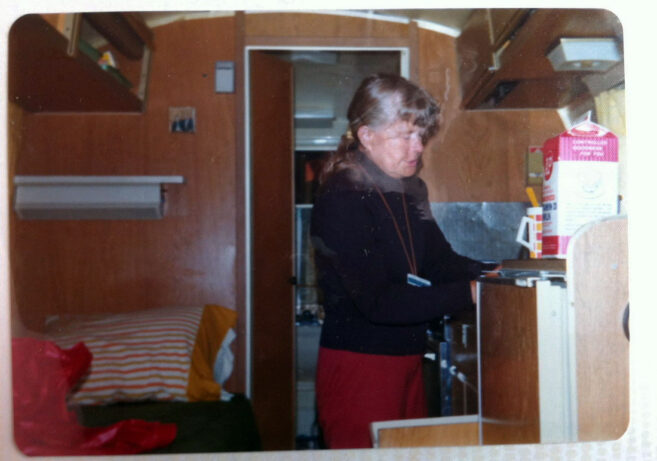
And at the end of each day, we’d return to the campsite and the Airstream.
If you’ve not seen an Airstream up close, they’re pretty impressive. In my mind’s eye it wasn’t a camper, it was a spaceship taking us to fantastic places.
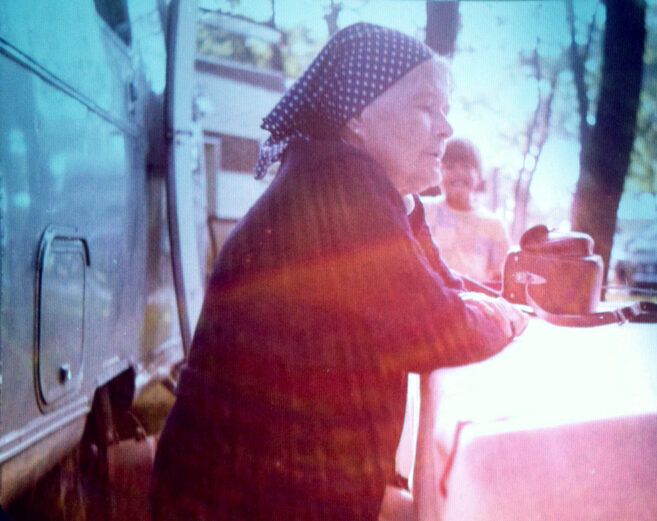
Sadly my grandmother fell ill before they retired. She passed away in 1976. A hard lesson for this young boy, and undoubtedly a difficult time for all. Had they waited for their retirement to buy this Airstream, it would’ve been too late. Instead they had six or seven years of wonderful memories that they shared with their family and friends.
My grandfather kept the Airstream until around 1980, when he remarried and the priorities of a new life shifted.
[devider type=”” height=”” no_border=””]
What did those red numbers mean?
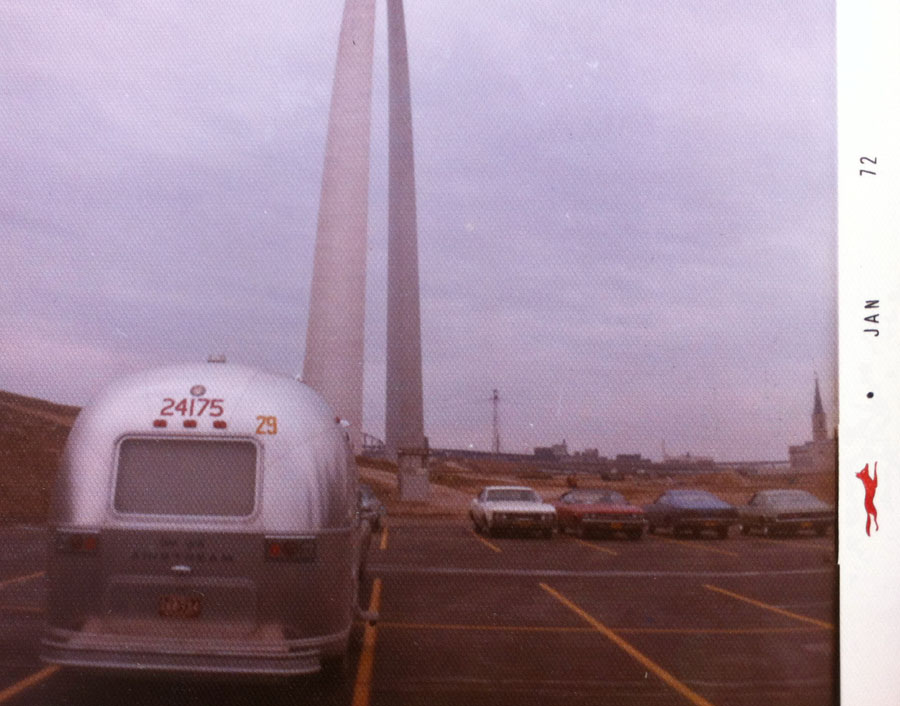
While looking through the stack of old photos, some tattered, some water damaged over time, one picture stood out. It was a nice shot of their Airstream parked in front of the St. Louis Arch. And on the top of the Airstream, clear as day, were big red numbers 24175.
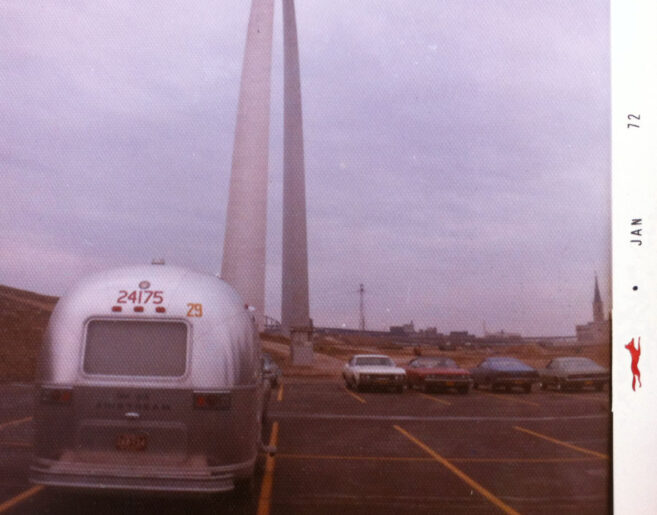
“What do you think those numbers were?” I asked my Dad.
“I’m not sure, but I’ll bet someone can find out”
It occured to me then that many older Airstreams are still on the road. On my drive from Washington State to Michigan I probably saw a hundred Airstreams of various ages. More so than any other type of RV, Airstreams have staying power.�They’re valued by restorers because they’re rugged and even when reduced to a hollowed out shell rotting in the field, the aircraft aluminum holds up.
It dawned on me – My Grandparents’ Airstream is probably still out there. Airstream estimates that 60% to 70% of all the trailers they’ve sold are still operational. Could it be rotting in a field? Maybe it’s been turned into a trendy food truck, or maybe it’s been restored by someone who found and loved it as much as my grandparents did. It’s merely a matter of tracking down this particular trailer. After so many years it wouldn’t be simple, but it wouldn’t be impossible either.
[devider type=”” height=”” no_border=””]
The Search Is On
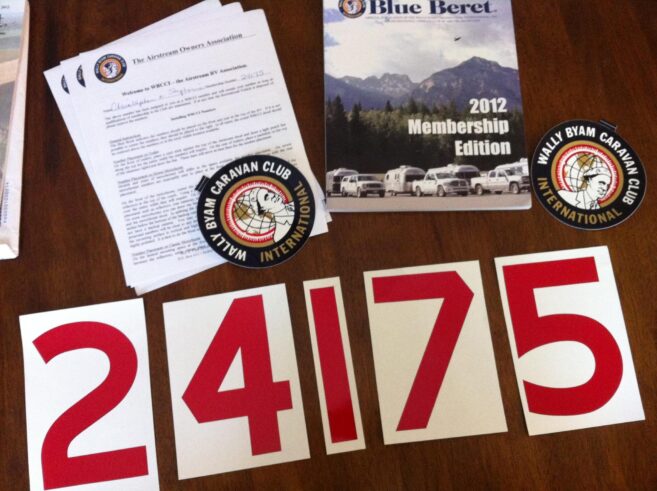
It wasn’t long before I found all of the most visited and populated forums dedicated to Vintage Airstreams, Airstream restorations, and more importantly the Airstream classifieds. I even found out that the red numbers, 24175, were the Wally Bayam Caravan Club membership numbers. Wally Bayam was the Airstream founder and original designer, and club membership was a prized�accompaniment�to Airstream ownership.
The Wally Bayam Caravan Club is, of course, still operating, and my initial email message to them was answered promptly. As was a similar email sent to the Airstream company. They were unable to identify the actual Airstream trailer, as the WBCC numbers were assigned to the person not the trailer. For now, it was a dead-end. I was then put in touch with Joe Peplinski, a member of one of the Vintage Airstream clubs and a historian. He took a look at the photos I sent along, and was kind enough to help me identify the specific model trailer my grandparents owned:
Based upon the provided photo, I agree that the Airstream must be between 1970 and 1972. �It cannot be 1969 or earlier because they used a different rear window shape and it cannot be later than 1972 because of the date on the photo. �Digging further, the compartment door over the rear bumper seems to have been used more on 1969 and 1970 23′ Safari’s than on 1971 and 1972 Safari’s. �This suggests to me that the trailer is most likely a 1970 Safari
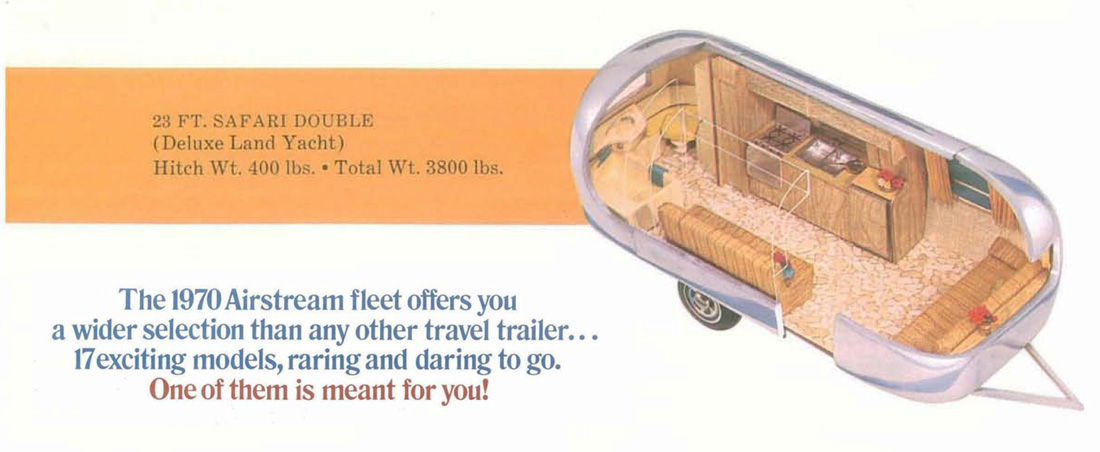
Clearly I’d found the right people to help me on this search. I was thrilled. Of the 1970 Safari models, it appears as though it was a “Safari Double (Deluxe Land Yacht)” from this brochure, taken from the Airstream website archives:
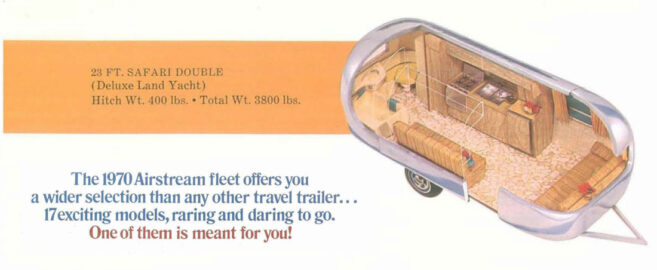
So now the search is on. I’m keeping a sharp eye out for any used 1970 Airstream Safari Doubles being sold in and around the Great Lakes area. And because I cannot possibly know if its later owners kept it within Michigan, I’m even looking cross country. Joe has even sent me several links from his area, although so far none of them have panned out. In particular, their Airstream had the following features:
- 23 feet long, single-axle
- Sofa-bed in front
- Second fold-down sofa opposite the kitchen
- Rear Bathroom
- No air conditioner, no awning. They could’ve been added later
- Curiously this model doesn’t seem to have the little windows that faced the sky, these showed up the next year, 1971.
So what would I do if I find it? At minimum I’d like to know if it’s still out there. If it turns up for sale, I would be very tempted to find a way to secure it. But I wouldn’t want to harass an owner if they had no interest in parting with it. For me it’s mostly to find out where it ended up. And if I find that it has long since been wrecked, or is otherwise unfindable, I may just have to go pick up my own vintage Airstream.
[devider type=”” height=”” no_border=””]
My New Wally Bayam Caravan Club Membership Numbers
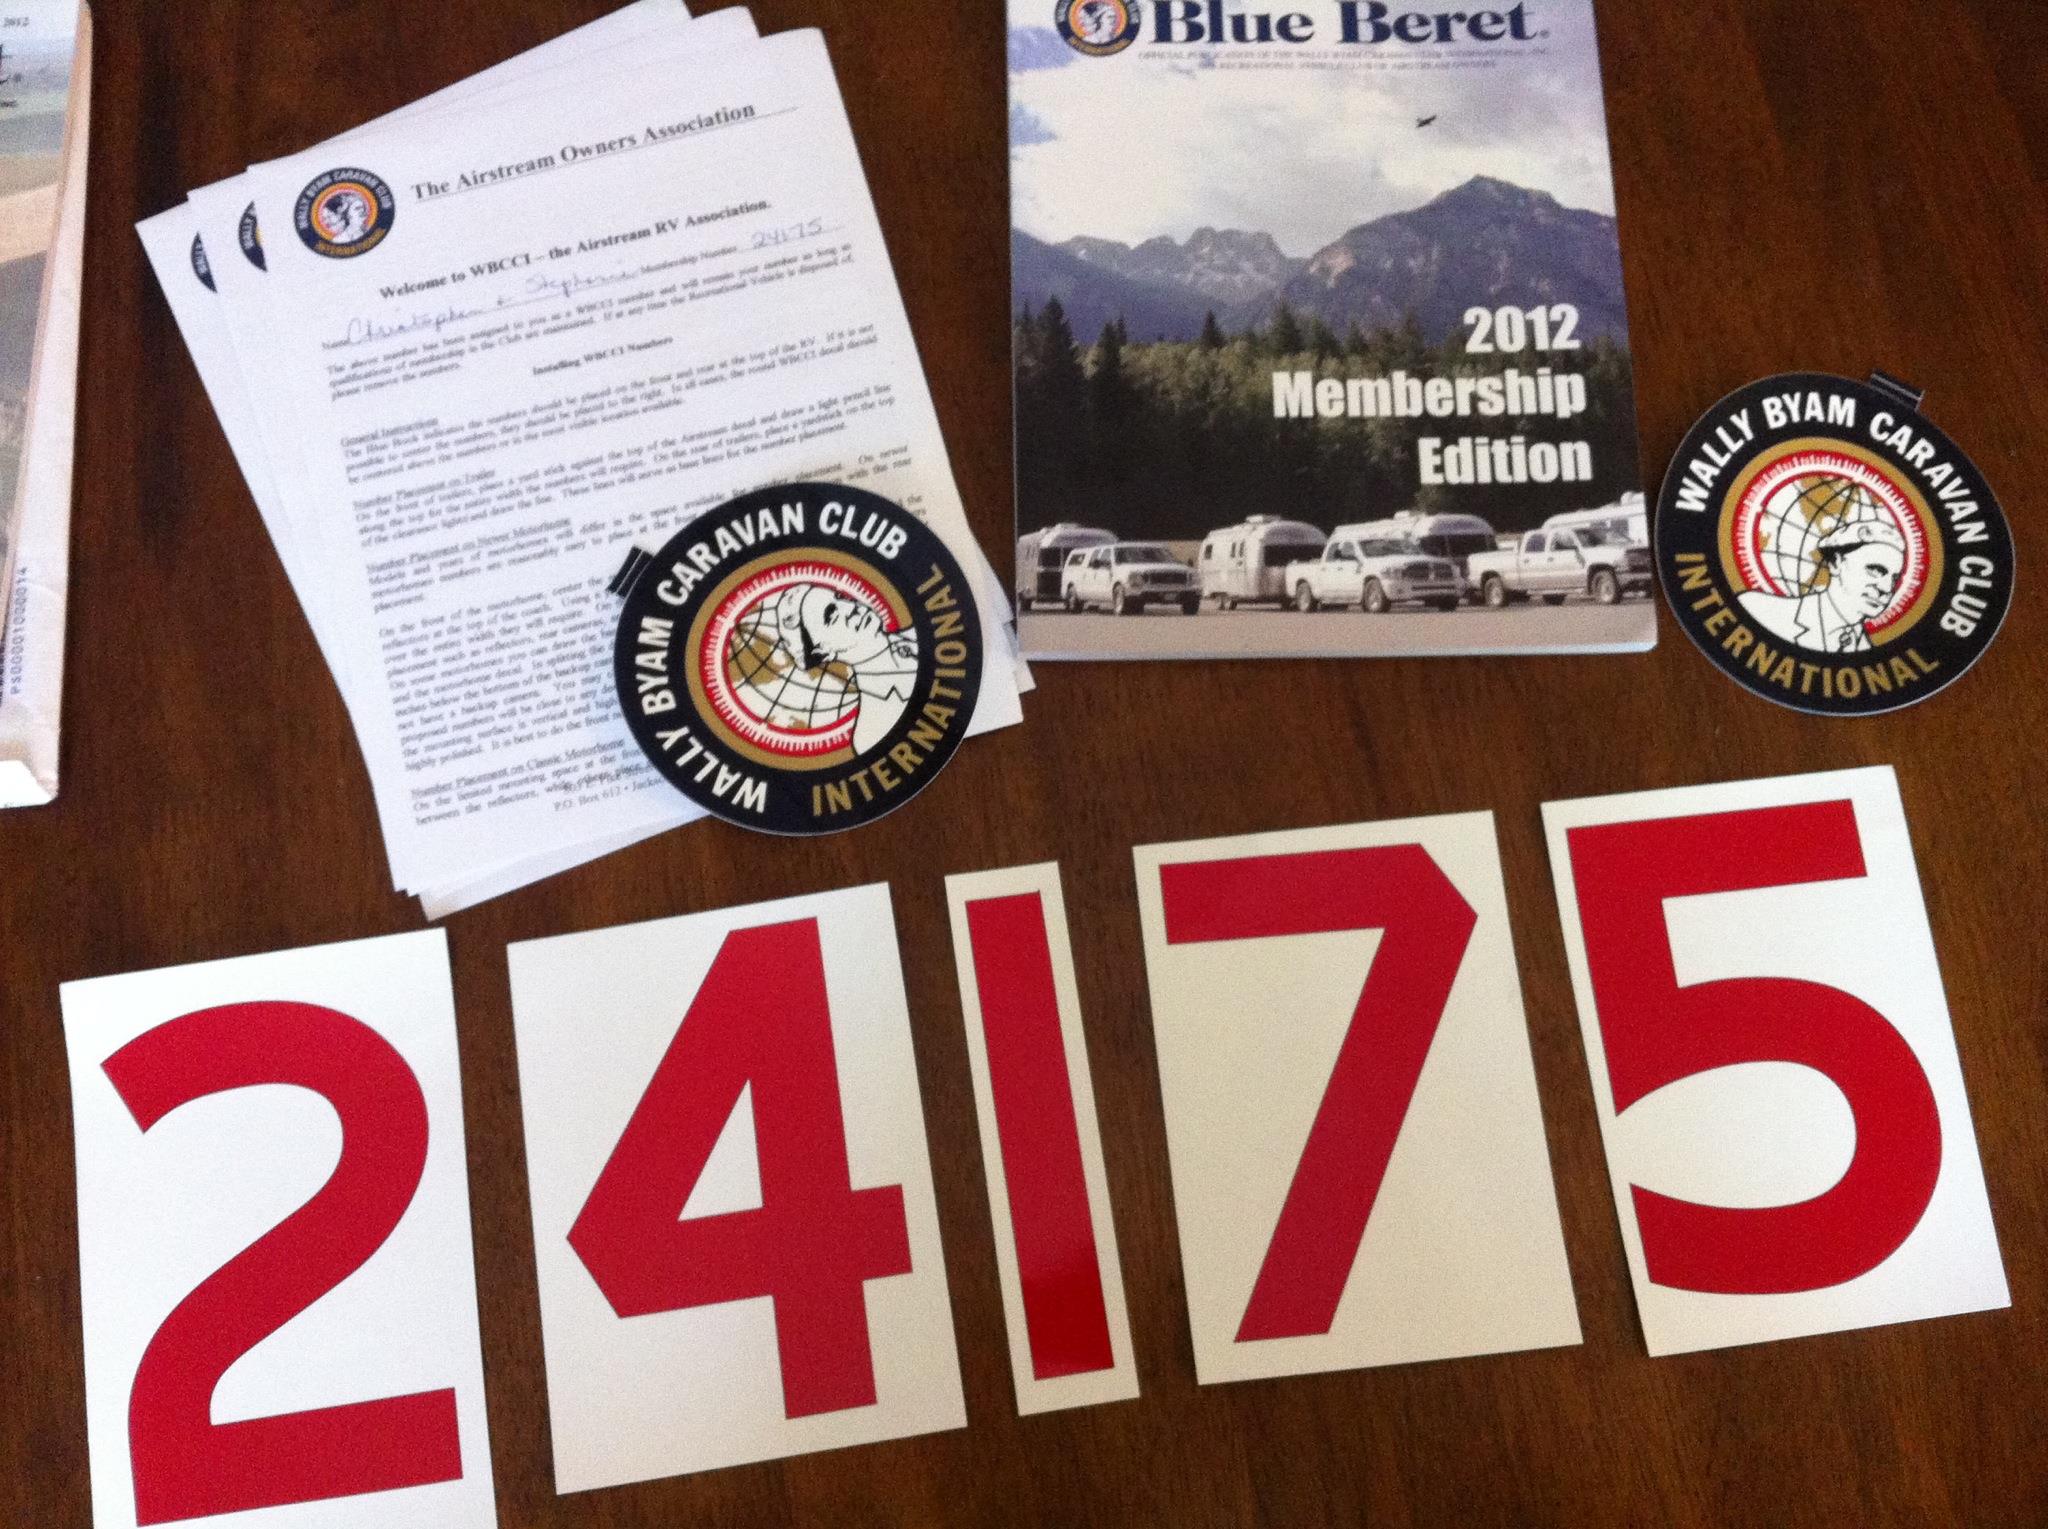
As thanks for the help I�received�from the Wally Bayam Caravan Club, and to secure ongoing help with my search, I sent in my membership form to join the club. I wasn’t sure they’d accept me as a member, I am not (as yet) an Airstream owner. In fact, I actually own a 2003 Fleetwood Bounder motorhome. A far cry from the sleek silver bullets. Membership numbers are assigned as requests come in, with the option of requesting any previously un-assigned number. On a hunch, I requested my grandparents’ number, 24175. A couple of weeks later, a welcome package arrived with my new numbers:
-
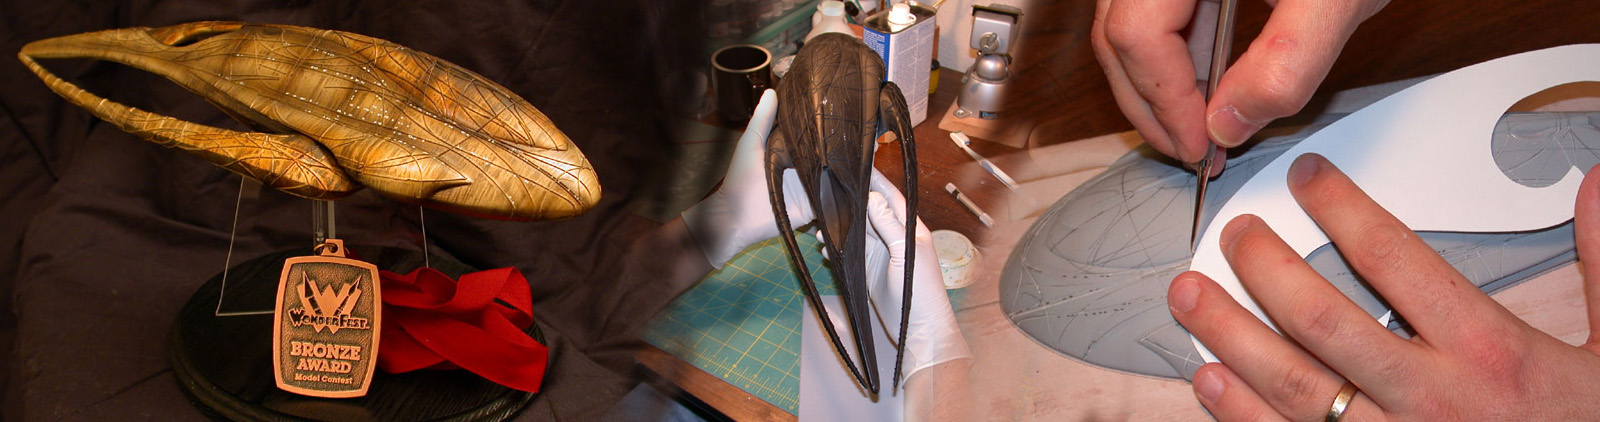
Scratchbuilding a model of Moya from Farscape
This article was based on material I presented at Wonderfest 2003 in the “Advanced Scratchbuilding Course”, and was previously hosted on one of my older websites. The article has been slightly updated, but remains intact.
What is Scratchbuilding?
Scratchbuilding isn’t a specific art or activity, but more of an approach. It is an approach that encompasses skills that can be learned from many other areas. This is my personal approach to creating a model like Moya. I would strongly encourage you to evaluate the approach and skills you read here with others you encounter along the way, as every project is different and may require alternate methods. Consider this a good starting point.
Most modelers build from kits, which have several advantages. The parts are pre-made, engineered to fit, and you have an explicit assembly order carefully illustrated by printed instructions. The shortcomings can include accuracy, as necessary short-cuts taken by manufacturers can sometimes lead to soft detail or sizing issues. The instant you begin complaining about the accuracy or quality of a kit, you’re ready for scratchbuilding! In my case, no commercial model kit was available for Farscape’s Moya, and there haven’t been any made since (yet). I was fond of the show, and enjoyed the design of this living spaceship. I had no choice but to consider sculpting one myself.
Kit bashing is often a first step for scratch-builders. Taking parts from existing kits to make new ones is rewarding, but you’re still relegated to using someone else’s parts � also your scale is pre-determined by the parts. Clearly there would be no easy option for me to kit-bash Moya.
A common myth is that you have to be a master modeler to scratch-build. That is not true at all � everyone has the base skills needed to scratch-build. All that is required is a desire and a plan. If you keep the complexity within reach of your skills, maybe push them just a bit here and there, and you can do it too.
- You have no instructions!
- There are no parts to work with, you make them all yourself
- Accuracy and quality are up to you, your skill level, and your comfort level
- You aren’t forced to use found parts that are out of scale. Kit bashing forces you to use parts designed by someone else
How do I get started?
So how does one get started? First you need to select a subject – seriously. Making basic decisions is the core to any scratchbuilding project and this is the first. More importantly you need to ask, and answer, as many questions as you can about your model. Will it be hollow, what scale is it, how big will it be, are there any moving parts, how many parts etc.
If you’re re-creating an existing design then you need to secure as many source images as you can. Look for clear shots that define the form and, if possible, find them in orthogonal views (top, front, left, right, etc.), because you will be drafting them later. The best views are straight-on shots – use dynamic views more for color and surface references.
Now you need to break out your pens and draft model scale views of your model. By model scale, I mean drawings that are sized to your final model. Many questions will be answered by these drawings. They are your instructions and will become reference markers later on.
- Choose a subject
- Ask, and answer questions
- What scale is it?
- How big will it be?
- Will it be hollow?
- What will it are made from?
- How many parts? You need to decide based on your project
- Collect source images, if possible
- Draft plans � draw your own instructions
- Orthogonal views – top, side, front, bottom
- Make Templates from your drafting
My Project – Farscape’s Moya
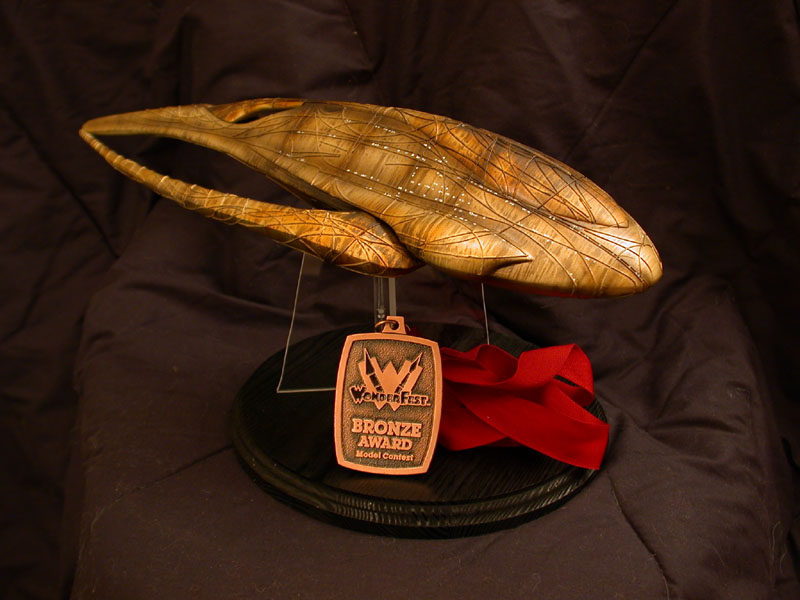
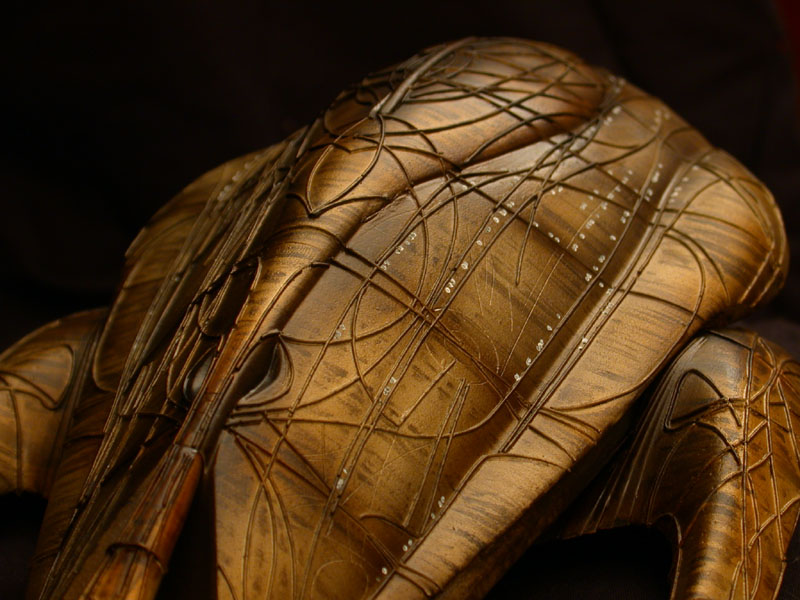
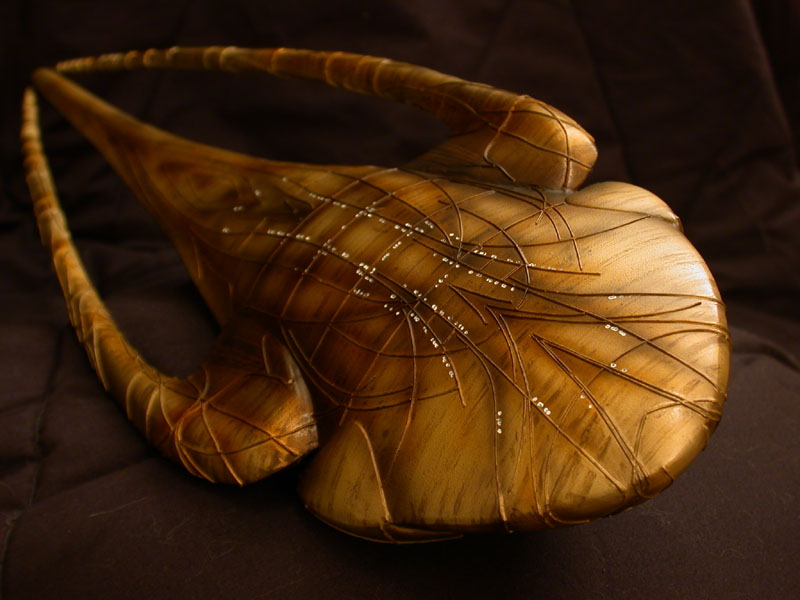
Today’s example will be my scratchbuilding project � Moya, the living spacecraft from the TV show Farscape. She is referred to as a Leviathan in the show, a living bio-mechanical spaceship. As you can see there isn’t a straight line on her. Worse, she’s covered in contour lines that would be a bear to emulate.
I knew there was never going to be a model kit of this ship, and nobody in the garage market appeared to want to sculpt one. It was after my first trip to Wonderfest that I decided I would take a stab at making my own Moya.
For the better part of a year I answered my own series of questions. I knew that this was going to be a difficult project, full of new techniques, so I wanted a larger size in the end � 16 inches. It needed to be hollow so that I could light it from the inside. This meant I would have to cast the parts.
We will see, in the following slides, how the master was created. The master or pattern, in modeling terms, is the primary form used for casting later on.
Gather References
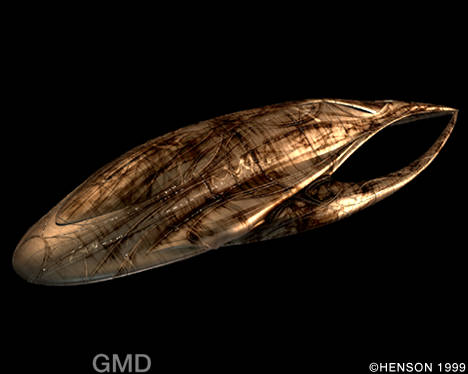
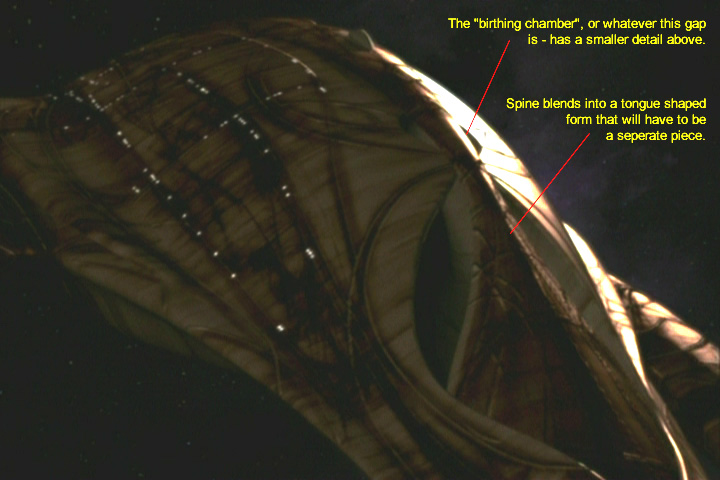
Reference material was virtually non-existent. I found much of it online, took screen-captures with my home PC, and found some great shots in books and magazines. The special effects company wasn’t keen on sharing their images with me, unfortunately, although I did try.
Once you get a lot of material, print it out so you can reference it on your workbench later. The bigger the better, but often I would combine detail shots onto one page. I ended up having enough pictures to fill a small book.
Drafting
Once I felt I had enough decisions made, and enough reference material, I began drafting the ship in AutoCAD. This helped me generate the section lines needed for the buildup. If you don’t have access to CAD software, or do not know how to use such tools, grab some drafting supplies and draw it out the old fashioned way. It’s important to have reference drawings at the exact scale of your final model.
Once you have your plans, and your reference material, you’re pretty much ready to go.
You will be using all of your modeling skills, usually. In my case I had to learn skills along the way, but that’s okay. Plan extra time in your schedule (if you have one) so you can compensate for any time slippage.
Start with whatever tools you have, and add more as you need them. I’m not going to call out special tools, as they are typically tied to specific techniques. Learning new techniques is a part of the modeling hobby, so don’t be afraid to research and try as you go.
Lofting
I built Moya’s main body using a technique known as lofting. Lofting is a nautical term used to describe the construction of a boat hull using consecutive ribs laid along a keel. This is a fairly common practice for complex, organic shapes. I will walk through this process.
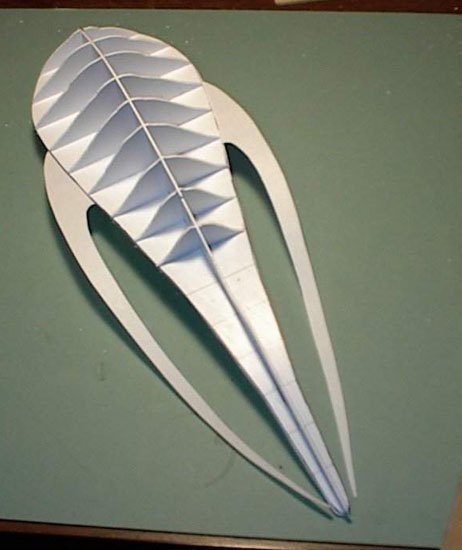
Since I had the side and top profiles, and a series of sections, transferred to styrene, I could begin assembling the body.
There was no flat surface I could work from so the first thing I needed to build was. . .
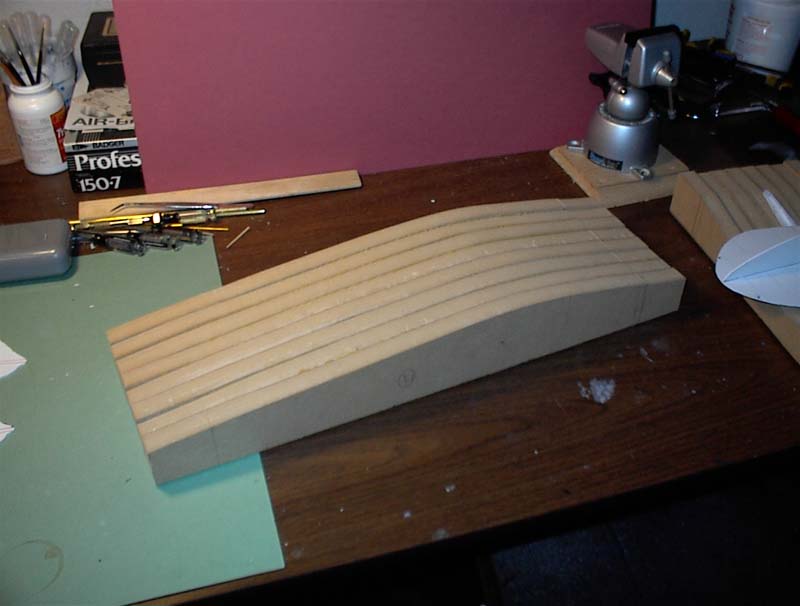
The base or keel. Technically this is referred to as the �datum� – a geometric form or line that is used as a reference for construction or definition. The top shape of this keel was derived from the part line along the side of Moya. I built one base for the top, and one for the bottom. When put together, the splines fit perfectly. It was on these bases that I mounted the profiles and sections.
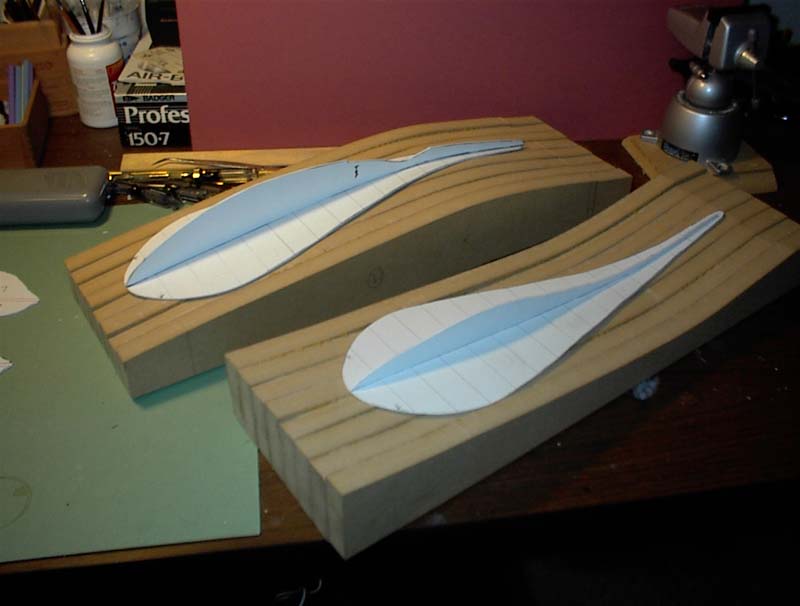
It was critical that the spline on the base was dead-on accurate. Not only would it be a base to work from, but it would also define the part line of my final pieces!
Once I was happy with the base splines, I mounted the profile assembly to the surface. The side profiles were then glued to the base profiles using TENEX, a powerful liquid styrene cemet. Today, since TENEX isn’t readily available, I’d recommend Ambroid Pro-Weld or something similar.
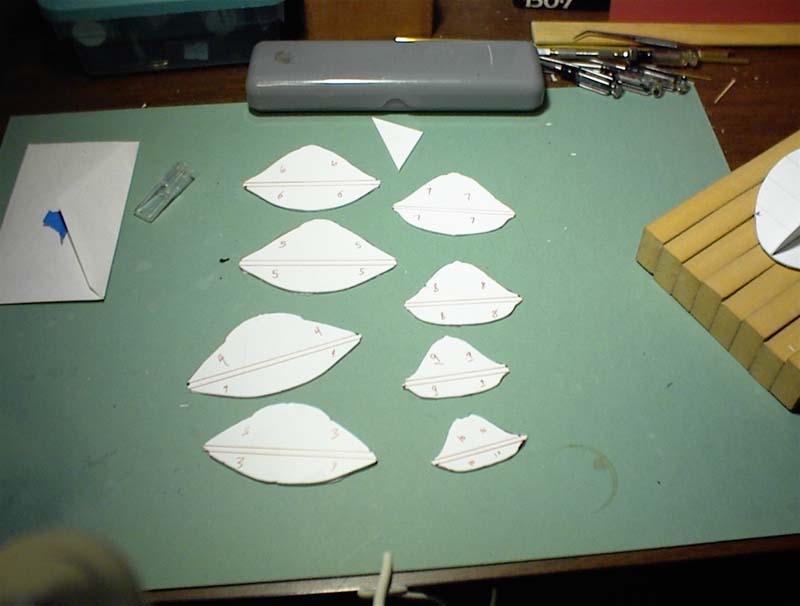
Sections were cut from my drawings and glued onto the profile assemblies. Each section had a 1� gap between them, and was set at 90� to the flat base.
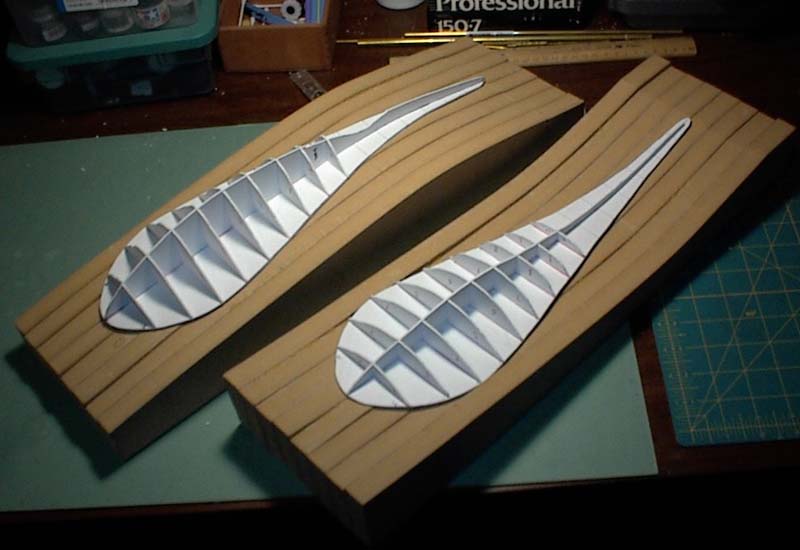
Once these were placed, the forms were checked for symmetry. If the left and right sides do not match, now is the time to make adjustments. Every error at this point will be compounded later, so it’s good to make sure things match up the way you’d like them to.
After all the sections were laid in, I began cutting section fillers of foam to go on the inside gaps. I could’ve simply loaded this with expanding foam, or even magic-sculpt, but I had the foam and it was very quick.
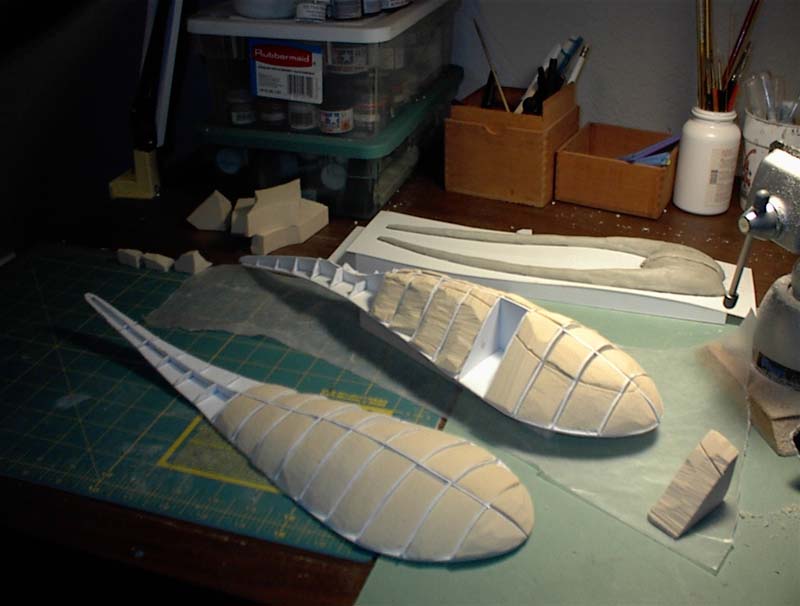
As you can see, once you begin filling the gaps, the shape really begins to be noticeable. I even began delineating detail lines.
Magic Sculpt was mixed up and used to cover the surface in thin sheets. I worked slowly, doing a few inches at a time. The Magic Sculpt was rolled thin using a wooden dowel.
I knew that later on I would have to scribe channels on the surface for the detail lines. Just gluing wire on the surface wouldn’t be sufficient � wire is round and a channel would help set the wire into the surface. This would help in molding and casting copies as well. Magic Sculpt has an excellent surface property that allows for easy scribing and manipulation.
Arm construction
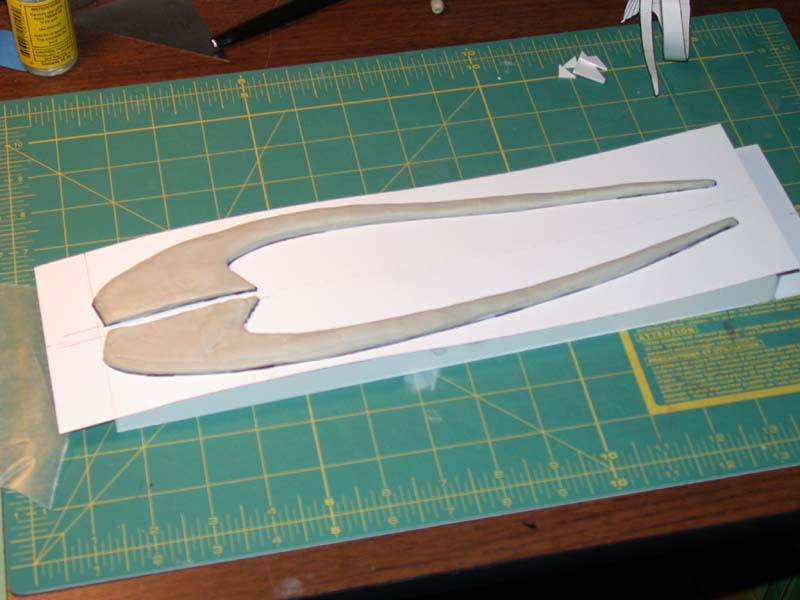
The arms were a different problem. While I still had a common part line through the middle, they were small enough to be built as a single piece. However they were actually more complex forms than the main body. They were inherently asymmetrical, but needed to be symmetrical with each other!
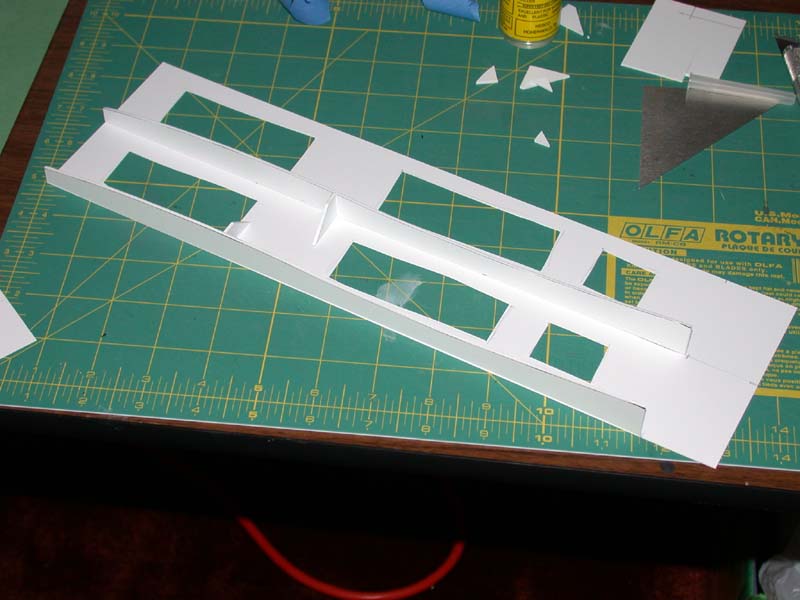
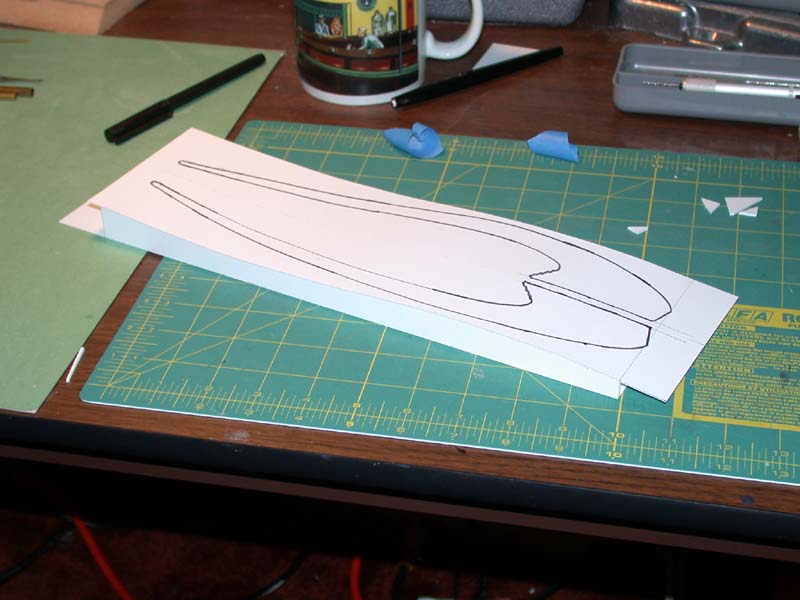
I decided to break the problem down by identifying the side view part line as a baseline to work from. I had the top views plotted, symmetrically, in my drafting, so I transferred those to a flat sheet of styrene. Once glued to the base, I now had a properly contoured surface to work with.
Magic sculpt was added along the lines. I didn’t care much about thickness, as I knew I would be sanding these down later. The arms are really thin.
Once I had the arms completed, and the main body, I began working the forms by sanding. You can see that I got back down to the foam on the main bodies. Those areas were simply filled in with spot putty.
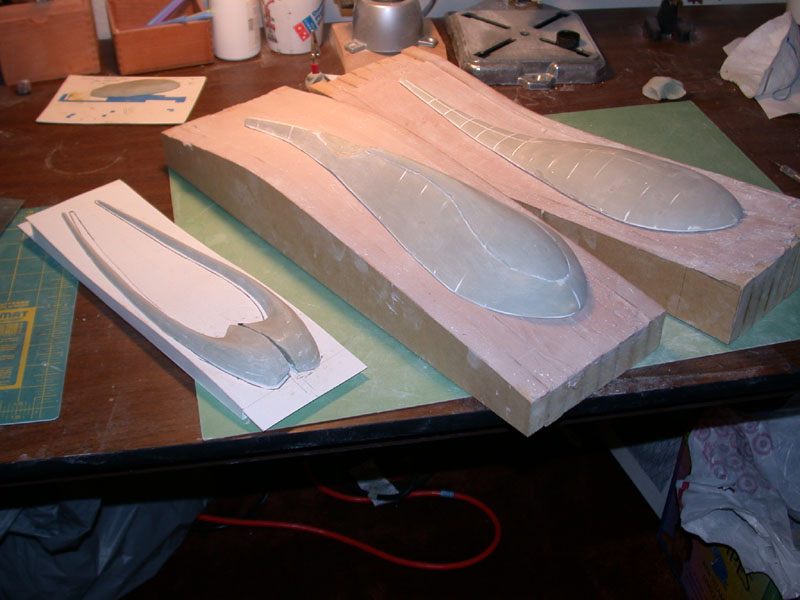
At each step I checked the forms using my templates. Symmetry was critical and I battled accuracy issues the best I could with the images and drafted plans.
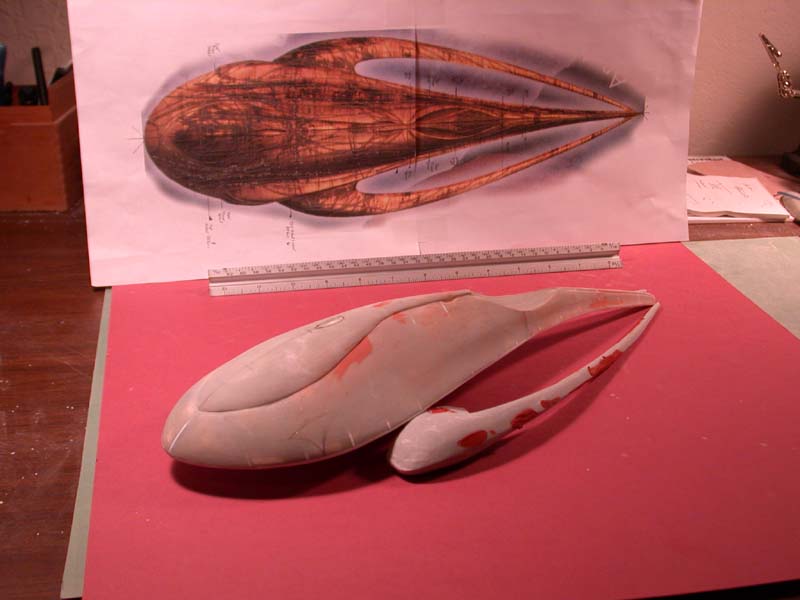
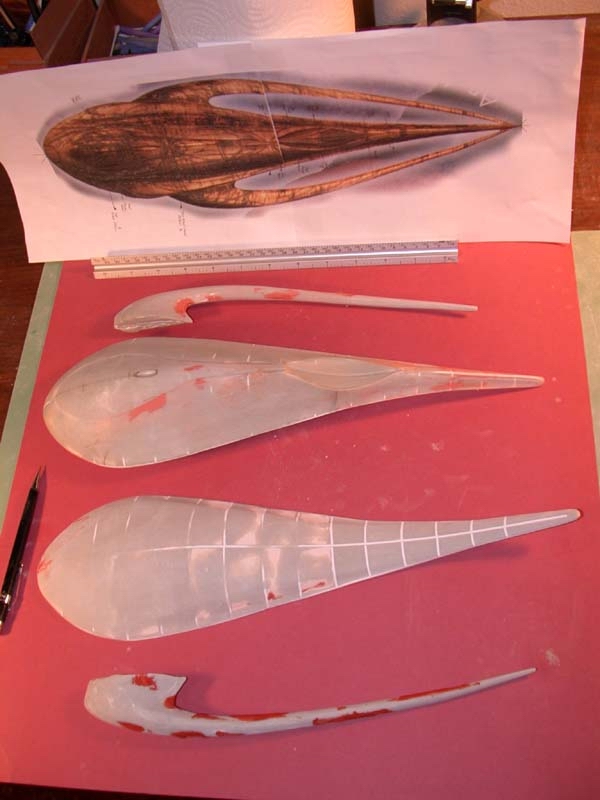
As you can see on the right, I managed to secure a top view of Moya. I printed it out at my model scale and was able to check my work along the way, with a high degree of accuracy.
The detail piece in the rear was quickly carved out of foam, and covered in Magic Sculpt.
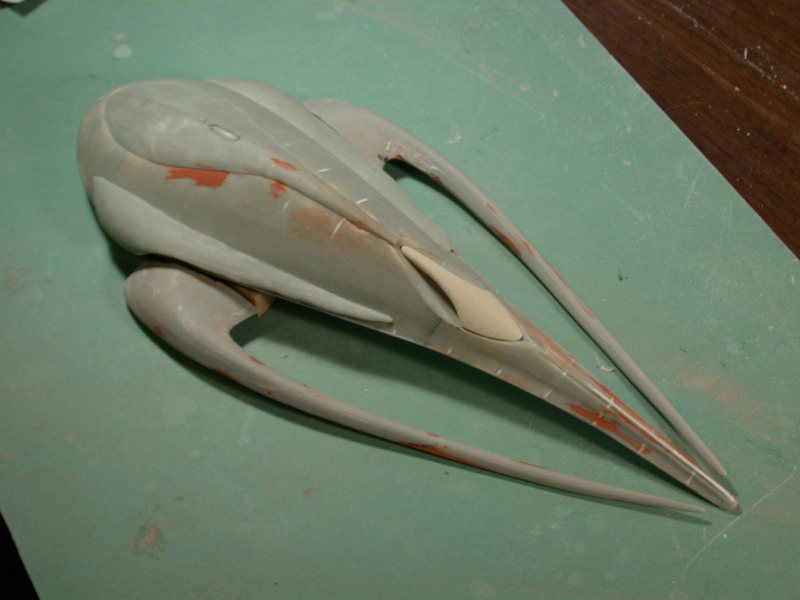
After all of the gaps and surface defects were filled, it was time to prepare the surface for detailing. Moya had a lot of raised lines (a lot!) that needed to be meticulously plotted. I shot primer over the surface and gave it a quick, light sanding with 400-600 grit sandpaper. I was now ready to proceed.
Detailing
After about three weeks of work, I finally had the forms to where I wanted them � exactly. Now began the task of marking the surface lines. I felt like I was creating an Aboriginal tattoo. But with my references, printed to scale, and a curve template that I cut from styrene, I was able to plot the lines with a pencil.

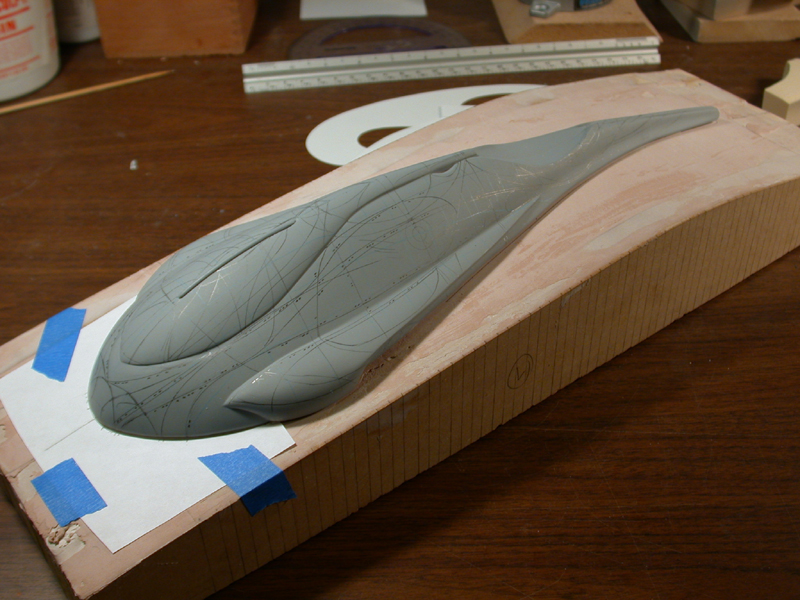
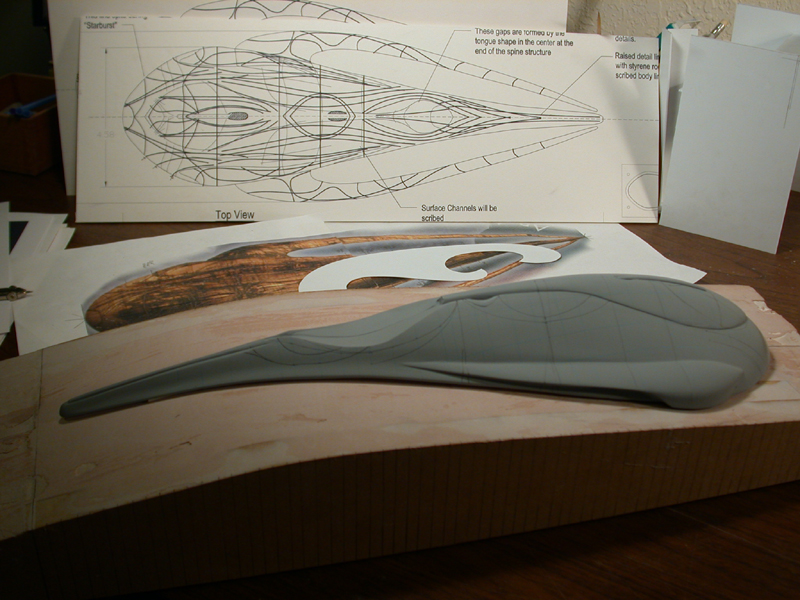
Amazingly, side-by-side symmetry was very, very close.
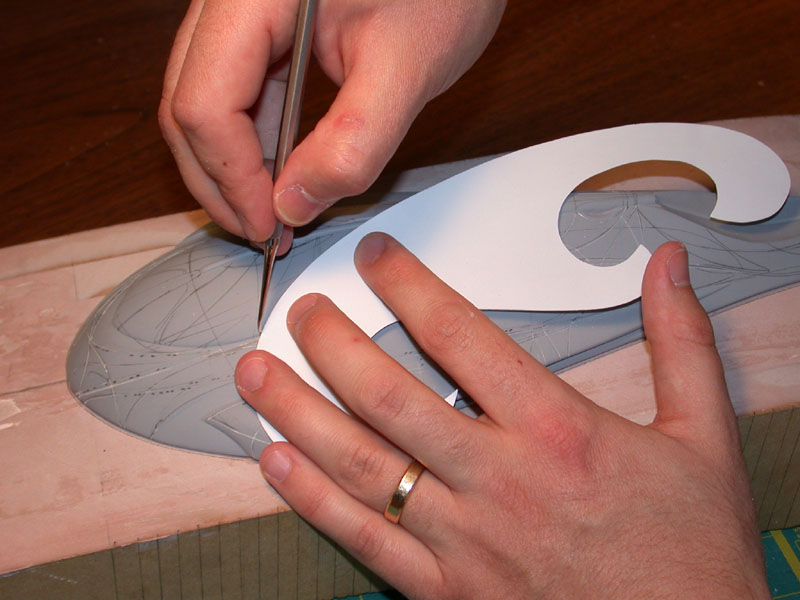
Once the lines were completed, I took a scribing tool and created channels all along the surface for the wire. These channels allowed the wire to settle into the form and gave the CA (liquid super glue) more surface area to bond with. Ends were cut appropriately.
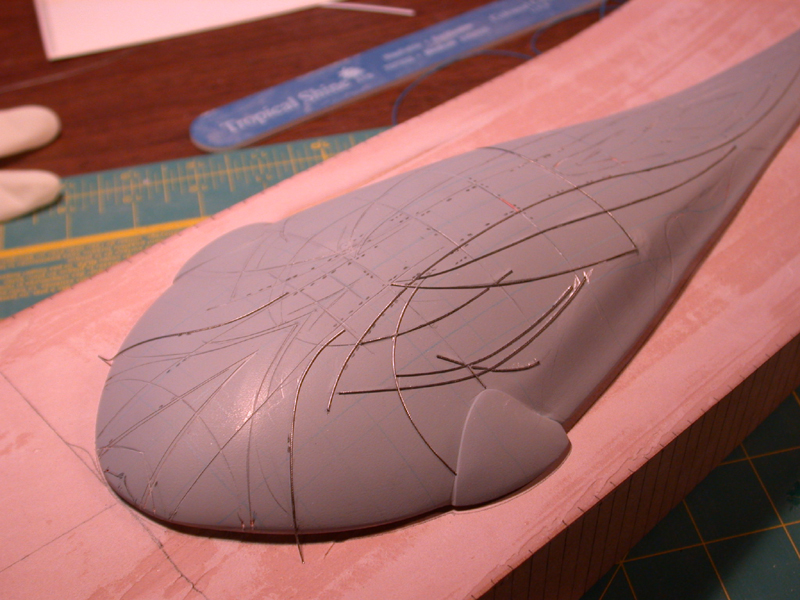
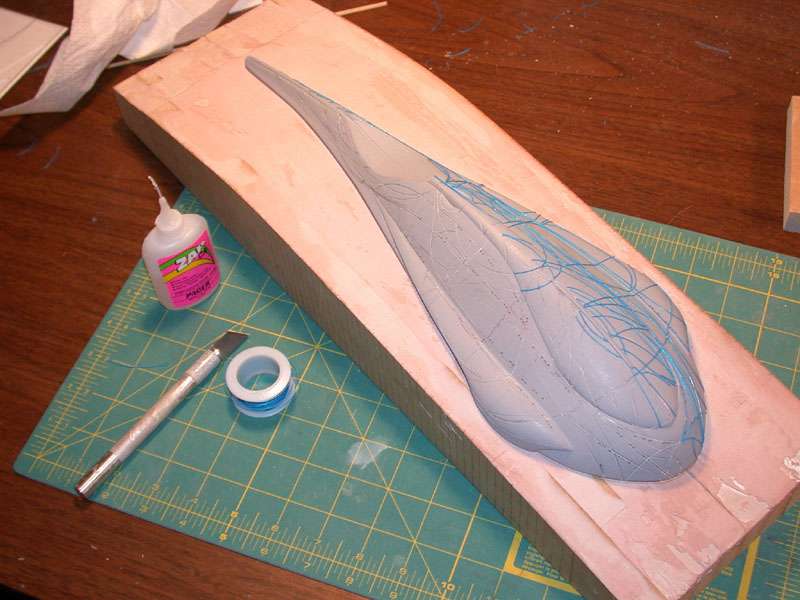
The first wire I used was far too stiff, and was miserable to cut so I switched to the blue Radio Shack wrapping wire you see above.
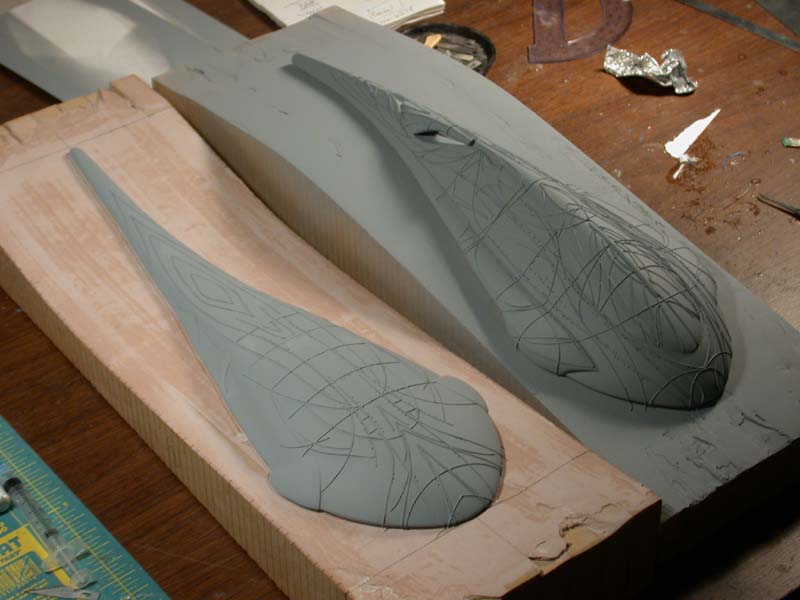
Shooting your masters with primer really brings the forms together and allows you to see any flaws that may have built up along the way. For Moya, I used primer after I first got the forms built, and then after I got all the wire laid down. My favorite primer is Duplicolor Sandable primer, which can be found in most auto parts stores. I used gray primer for this project, but I typically use black primer for final models.
I was able to make final corrections to the lines and add a few other surface details. At this stage you could add all sorts of greeblies, but care should be taken to ensure that they’re in scale with your subject � don’t just slap items on!
Molding and Casting
I won’t go into molding and casting too heavily � there are other resources you should reference for more information. But it was a critical issue with this project.
This was a new area for me and I relied heavily on a good friend of mine who worked with the processes and materials regularly, and had created a kit of his own. Added to that the classes I attended at Wonderfest and people I knew online, I was able to tackle this technique with only a few setbacks.
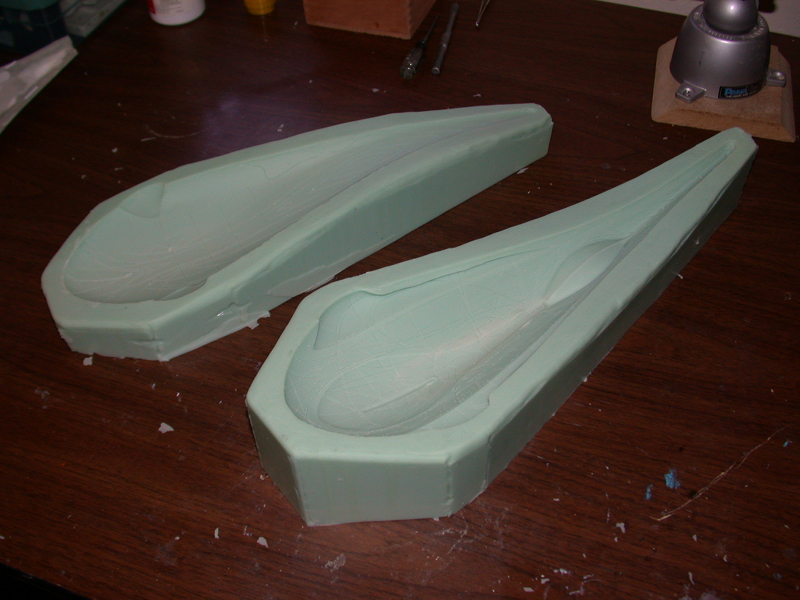
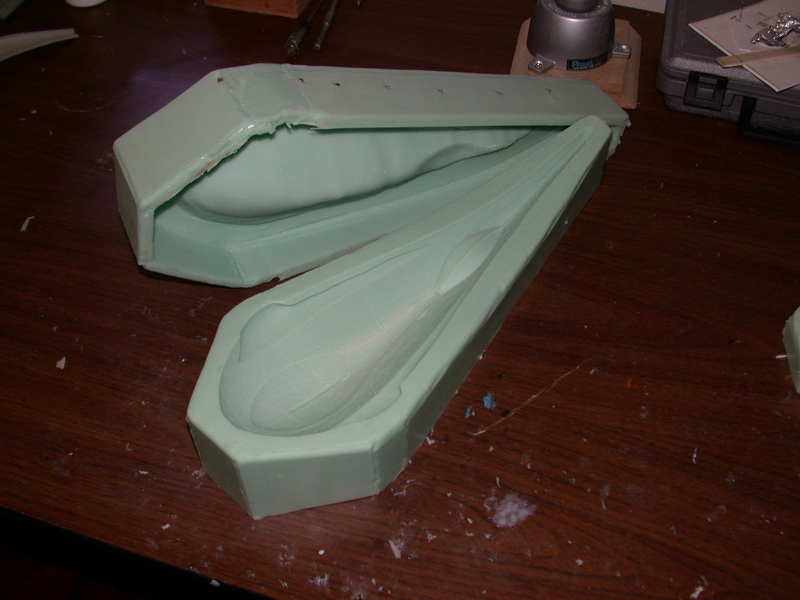
Above you can see the positive molds of my masters. The part lines were now a part of the mold.For part thickness, But I still had one more step to do. These molds only captured the surface detail of my original forms. Had I proceeded to pour the other side of the mold, my parts would have no thickness! The best way I found to define the part thickness was to cover the open mold, with all its detail, in a thin layer of some material, and THEN pour the back half of the mold. Basically, you’re making a sandwich of silicone RTV mold (with detail) on the bottom, a 1/8″ to 1/4″ thick layer of some material, then the top cap of the mold (also in silicone RTV).
I filled the cavities with a thin layer of magic sculpt. I tried to keep them as thin as possible, and cut to the surface of the mold.
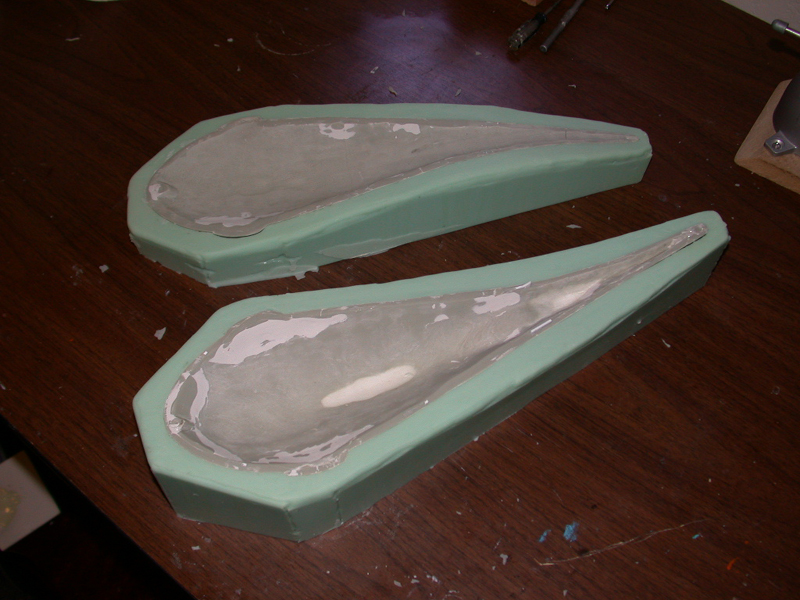
I then poured the top of the mold � with pour spouts and vents place appropriately. Brass rods were used inside the top to give it some support. With all the weight of the cap there was a chance it would sag.
This, by the way, is an unconventional mold process that used a lot of mold rubber. But the pouring the castings was extremely easy. Because the molds were so heavy, they held themselves together by gravity. I never had to clamp the molds to prevent the casting resin from running out. Once the parts were cast it became a simple matter of assembly and painting.
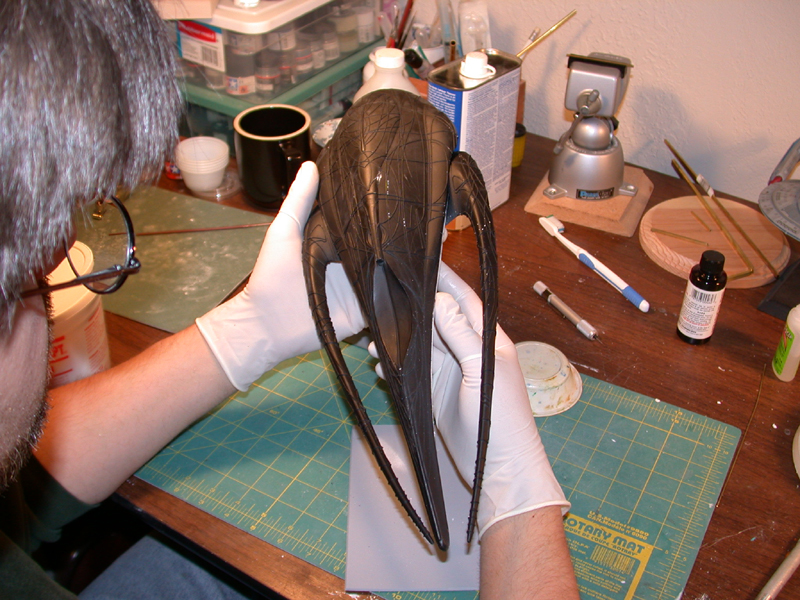
And here’s a shot of a casting that I’d cleaned up, assembled, and covered in my favorite black primer. Building the kit that I created was one of the most surreal experiences I can remember. Have fun!
Moya Today
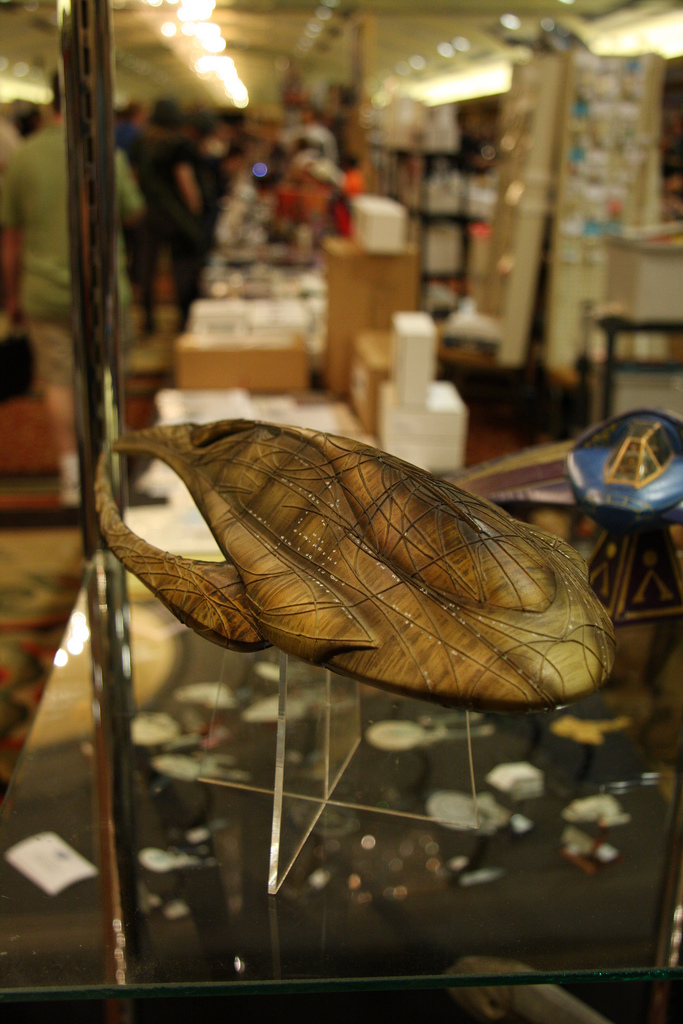
My finished Moya model won a Bronze award at Wonderfest 2002, which was more recognition than I’d anticipated. I ended up selling that one to a good friend of mine, and each year it’s brought back to Wonderfest as part of his display models. A second build-up was also sold, and today I do not have a build-up of my own. Although I’ve retained several good copies for future buildups.
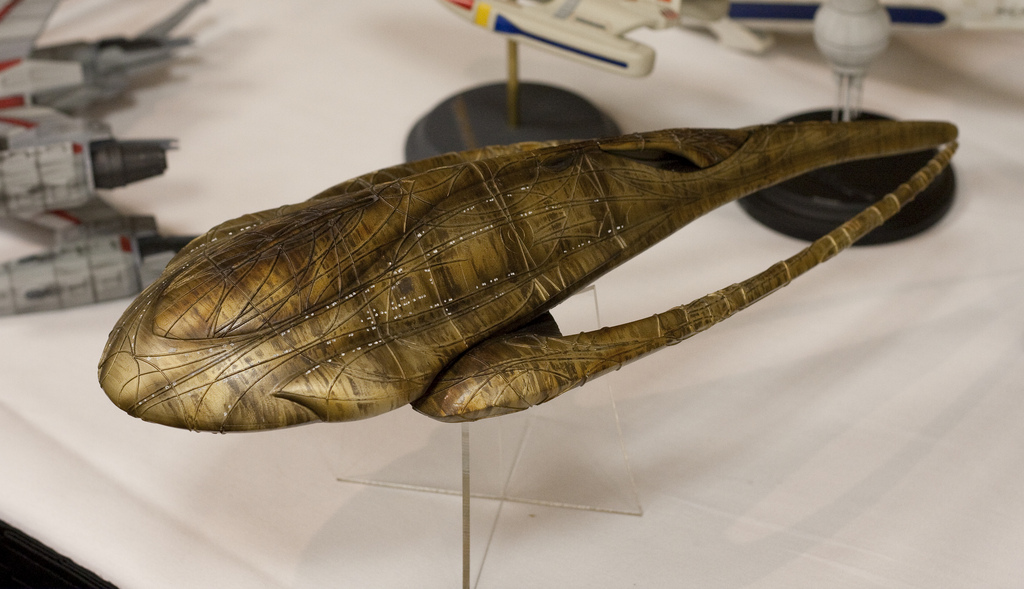
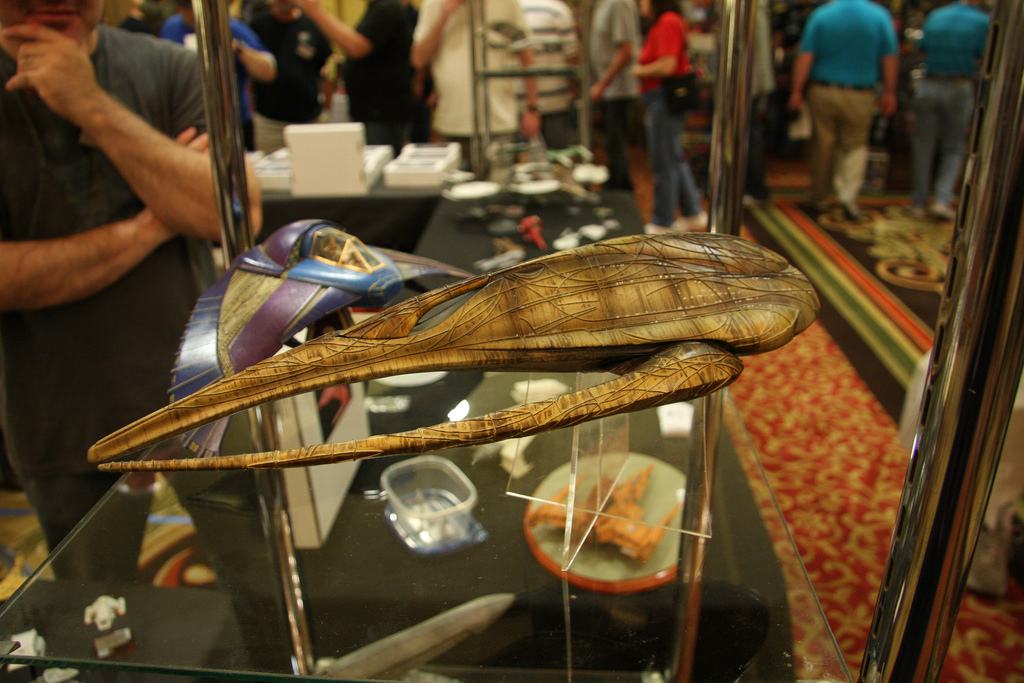
For a brief time I sold copies of Moya as an aftermarket resin kit. There are still a few out there, so if you’re interested in getting one for yourself I’d recommend hitting up Federation Models.